My Garage
Cart

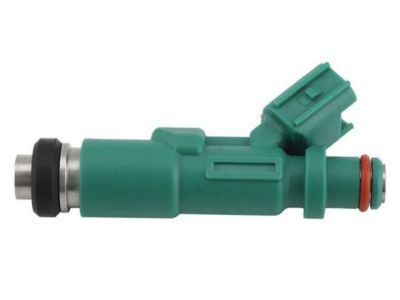
OEM 2006 Scion xB Fuel Injector

Gas Injector
  • Select Vehicle by Model
  • Select Vehicle by VIN
Select Vehicle by Model
Make
Model
Year
or
Select Vehicle by VIN
For the most accurate results, select vehicle by your VIN (Vehicle Identification Number).

1 Fuel Injector found

  • 2006 Scion xB Fuel Injector Diagram - 23209-21020
    View related parts

    2006 Scion xB Injector

    Part Number: 23209-21020
    $158.61 MSRP: $224.54
    You Save: $65.93 (30%)
    Ships in 1-3 Business Days
    ADD TO CART
    Product Specifications
    • Other Name: Injector Set, Fuel; Fuel Injector; Injector Assembly, Fuel
    • Part Name Code: 23250
    • Item Weight: 0.60 Pounds
    • Item Dimensions: 3.7 x 2.6 x 1.4 inches
    • Condition: New
    • Fitment Type: Direct Replacement
    • Require Quantity: 4
    • SKU: 23209-21020
    • Warranty: This genuine part is guaranteed by Toyota's factory warranty.
    More Info
    Fits the following 2006 Scion xB Submodels:
    • Base | 4 Cyl 1.5 L GAS

2006 Scion xB Fuel Injector

Looking for affordable OEM 2006 Scion xB Fuel Injector? Explore our comprehensive catalogue of genuine 2006 Scion xB Fuel Injector. All our parts are covered by the manufacturer's warranty. Plus, our straightforward return policy and speedy delivery service ensure an unparalleled shopping experience. We look forward to your visit!

2006 Scion xB Fuel Injector Parts Q&A

  • Q: How to service and repair the fuel injector on 2006 Scion xB?
    A: The procedure for servicing and fixing fuel injectors begins by removing the circuit opening relay (Marked C/OPN) from the instrument panel junction block to discharge fuel pressure. The engineer starts then stops the engine which leads to switching off the ignition and verifying engine non-start-up. The vehicle requires emptying fuel tank air through the cap removal and negative battery disconnection for a minimum 90-second period to stop Air Bag and seat belt pretensioners from activating. After removing the 4 nuts and No. 2 cylinder head cover, proceed to take out both the ignition coil and cylinder head cover sub-assembly. Disconnect the fuel tube sub-assembly through a combination of Special Service Tool: 09268-21010 along with removing the fuel pipe clamp while cleaning the connector beforehand and wrapping the separated pipe and connector with a plastic bag for protection. The process requires separating the fuel delivery pipe from its sub-assembly through disconnecting 4 fuel injector connectors and removing 3 bolts then carefully extracting the fuel pipe with the 4 fuel injectors while removing the 2 spacers from the cylinder head. You must detach the fuel injectors from their delivery position before removing the 4 O-rings and 4 insulators together with 4 fuel injectors. The installation method requires new insulators for each fuel injector and then you must apply a thin layer of grease or gasoline to the O-rings before positioning them correctly without rotating the parts. The fuel delivery pipe installation requires torquing bolt A to 19 N.m (194 kgf.cm, 14 ft.lbf) while torquing bolt B to 9.0 N.m (92 kgf.cm, 80 in.lbf). During this process, check for smooth rotation of the injectors. Attach the 4 fuel injector connectors before connecting the fuel tube while inspecting for damage and foreign objects and properly aligning the connector to the pipe. Secure the connection well. Place the fuel pipe clamp then attach the cylinder head cover sub-assembly together with the ignition coil. Reconnect the negative battery terminal after you check for fuel leaks and proceed to install the No. 2 cylinder head cover by first tightening nuts marked A to 7.0 N.m (71 kgf.cm, 62 in.lbf) then move to tighten nuts marked B to the same torque.