My Garage
Cart

OEM 2006 Scion xB Fuel Tank

Gas Tank
  • Select Vehicle by Model
  • Select Vehicle by VIN
Select Vehicle by Model
Make
Model
Year
or
Select Vehicle by VIN
For the most accurate results, select vehicle by your VIN (Vehicle Identification Number).

2 Fuel Tanks found

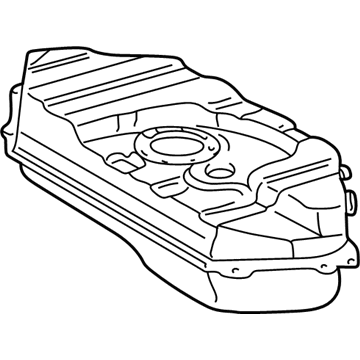
  • 2006 Scion xB Fuel Tank - 77001-52180
    2006 Scion xB Fuel Tank Diagram - 77001-52180
    View related parts

    2006 Scion xB Fuel Tank

    Part Number: 77001-52180
    $590.53 MSRP: $865.42
    You Save: $274.89 (32%)
    Ships in 1-3 Business Days
    ADD TO CART
    Product Specifications
    • Other Name: Tank Sub-Assembly, Fuel; Tank Assembly, Fuel
    • Part Name Code: 77100
    • Item Weight: 25.70 Pounds
    • Item Dimensions: 41.2 x 10.0 x 17.7 inches
    • Condition: New
    • Fitment Type: Direct Replacement
    • SKU: 77001-52180
    • Warranty: This genuine part is guaranteed by Toyota's factory warranty.
    More Info
    Fits the following 2006 Scion xB Submodels:
    • Base | 4 Cyl 1.5 L GAS
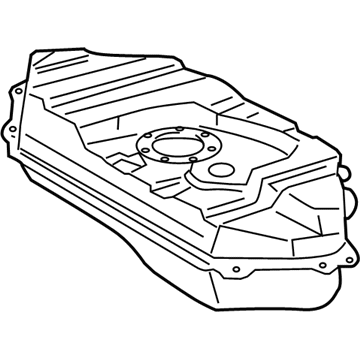
  • 2006 Scion xB Fuel Tank - 77001-52170
    2006 Scion xB Fuel Tank Diagram - 77001-52170
    View related parts

    2006 Scion xB Fuel Tank

    Part Number: 77001-52170
    $466.97 MSRP: $684.35
    You Save: $217.38 (32%)
    Ships in 1-3 Business Days
    ADD TO CART
    Product Specifications
    • Other Name: Tank Sub-Assembly, Fuel; Tank Assembly, Fuel
    • Part Name Code: 77100
    • Item Weight: 28.40 Pounds
    • Item Dimensions: 36.7 x 31.3 x 12.1 inches
    • Condition: New
    • Fitment Type: Direct Replacement
    • SKU: 77001-52170
    • Warranty: This genuine part is guaranteed by Toyota's factory warranty.
    More Info
    Fits the following 2006 Scion xB Submodels:
    • Base | 4 Cyl 1.5 L GAS

2006 Scion xB Fuel Tank

Looking for affordable OEM 2006 Scion xB Fuel Tank? Explore our comprehensive catalogue of genuine 2006 Scion xB Fuel Tank. All our parts are covered by the manufacturer's warranty. Plus, our straightforward return policy and speedy delivery service ensure an unparalleled shopping experience. We look forward to your visit!

2006 Scion xB Fuel Tank Parts Q&A

  • Q: How to remove and install the fuel tank on 2006 Scion xB?
    A: Removal of the fuel tank requires disconnecting the negative cable from the battery and draining the system pressure then waiting at least 90 seconds to avoid Air Bag and seat belt pretensioner activation. Begin by taking out the rear seat cushion assembly then the support bracket alongside the floor service hole cover and fuel pump tube assembly and No. 2 fuel evaporation assembly. After you drain the fuel you should disconnect the No. 2 and No. 3 parking brake cable assemblies by taking out their bolts and unclipping the cable clamps. The repair process starts with removal of the No. 1 fuel tank protector through clips and bracket disassembly then continues with fuel tank assembly separation from the fuel tank to filler pipe hose along with the removal of fuel vapor hose and fuel tank vent hose. Disconnect the fuel pump tube following connector cleaning from around the connector region before placing both components into a protective plastic bag. The first step requires the removal of four bolts securing the fuel tank followed by the removal sequence of the fuel pump tube sub-assembly alongside the No. 2 fuel evaporation tube sub-assembly and the No. 3 fuel tube clamp and check valve protector and check valve support. First disconnect the fuel tank inlet valve assembly, No. 1 fuel tube clamp and the fuel tank side plates before unfastening the clamp and extracting the fuel tank to filler pipe hose. Start by placing the fuel tank side plates followed by the No. 1 fuel tube clamp before installing the new gasket fuel tank inlet valve assembly while being cautious of resin valve damage. Follow bolts installation of the check valve support then torque it to the recommended level before welding the fuel tank vent hose and No. 2 fuel evaporation tube sub-assembly together followed by checking valve protector installation with bolts. The installation process requires attaching the No. 3 fuel tube clamp followed by placing the fuel pump assembly along with the fuel sender gauge assembly while connecting the No. 2 fuel evaporation tube sub-assembly then finishing off with the fuel tank vent tube set plate bolt. Fasten the fuel tank assembly using four bolts and verify the torque while connecting the fuel pump tube with fuel tank vent hose and fuel vapor hose and new fuel tank to filler pipe hose through clamps. To finalize the procedure you must install the No. 1 fuel tank protector then join the No. 3 and No. 2 parking brake cable assemblies after which you should put on the exhaust pipe assembly and re-establish the cable connection to the negative battery terminal lastly add fuel before testing for leaks and replacing all components starting with the rear floor service hole cover and continuing with the rear seat cushion support bracket and rear seat cushion assembly while finalizing with exhaust gas leak checks.