×
ToyotaParts- Hello
- Login or Register
- Quick Links
- Live Chat
- Track Order
- Parts Availability
- RMA
- Help Center
- Contact Us
- Shop for
- Toyota Parts
- Scion Parts
My Garage
My Account
Cart
OEM 2006 Scion tC A/C Switch
Air Conditioning Switch- Select Vehicle by Model
- Select Vehicle by VIN
Select Vehicle by Model
orMake
Model
Year
Select Vehicle by VIN
For the most accurate results, select vehicle by your VIN (Vehicle Identification Number).
1 A/C Switch found


2006 Scion tC Knob, Center
Part Number: 55937-21010$76.89 MSRP: $107.94You Save: $31.05 (29%)Ships in 1-3 Business DaysProduct Specifications- Other Name: Knob, Center Cluster Mo; HVAC Heater Control Knob; Knob, Center Cluster Module
- Manufacturer Note: BASE PACKAGE
- Position: Center
- Part Name Code: 55937C
- Item Weight: 1.40 Pounds
- Condition: New
- Fitment Type: Direct Replacement
- SKU: 55937-21010
- Warranty: This genuine part is guaranteed by Toyota's factory warranty.
2006 Scion tC A/C Switch
Looking for affordable OEM 2006 Scion tC A/C Switch? Explore our comprehensive catalogue of genuine 2006 Scion tC A/C Switch. All our parts are covered by the manufacturer's warranty. Plus, our straightforward return policy and speedy delivery service ensure an unparalleled shopping experience. We look forward to your visit!
2006 Scion tC A/C Switch Parts Q&A
- Q: How to replace the A/C Switch in the control assembly on 2006 Scion tC?A: The first step to handle the control assembly replacement is disconnecting the cable from the negative terminal of the battery followed by a minimum 90-second waiting period to stop Air Bag and seat belt pretensioners from activating. The first step involves uninstalling the shift lever knob sub-assembly that serves the manual transaxle while also removing the console panel upper front and instrument cluster finish panel assembly by unplugging 9 claws and keeping the heater control cover properly closed. Remove the heater control while disconnecting its connector. Follow these steps for instrument cluster finish panel assembly installation: firstconnect the connector then reattach the 9 claws and put back the instrument cluster finish panel assembly before setting the console panel upper front and the shift lever knob sub-assembly for the manual transaxle. Upon reconnection of the cable to the negative battery terminal follow initialization procedures since specific systems need this step when disconnecting and reconnecting the cable.
Related 2006 Scion tC Parts
 2006 Scion tC Blower Motor
 2006 Scion tC Blower Motor Resistor
 2006 Scion tC A/C Accumulator
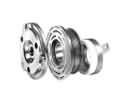 2006 Scion tC A/C Clutch
 2006 Scion tC A/C Compressor
 2006 Scion tC A/C Condenser
 2006 Scion tC A/C Expansion Valve
 2006 Scion tC A/C Hose
 2006 Scion tC Ambient Temperature Sensor
 2006 Scion tC Blower Control Switches
 2006 Scion tC Evaporator
 2006 Scion tC Heater Core