×
ToyotaParts- Hello
- Login or Register
- Quick Links
- Live Chat
- Track Order
- Parts Availability
- RMA
- Help Center
- Contact Us
- Shop for
- Toyota Parts
- Scion Parts
My Garage
My Account
Cart
OEM 2005 Toyota MR2 Spyder Brake Caliper
Caliper- Select Vehicle by Model
- Select Vehicle by VIN
Select Vehicle by Model
orMake
Model
Year
Select Vehicle by VIN
For the most accurate results, select vehicle by your VIN (Vehicle Identification Number).
4 Brake Calipers found
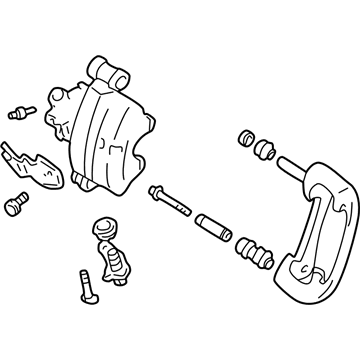
2005 Toyota MR2 Spyder Caliper Assembly, Rear Driver Side
Part Number: 47750-17160$205.26 MSRP: $293.07You Save: $87.81 (30%)Ships in 1-3 Business DaysProduct Specifications- Other Name: Cylinder Assembly, Disc; Disc Brake Caliper, Rear Left; Caliper; Cylinder Assembly, Disc Brake, Rear Driver Side; Brake Caliper
- Position: Rear Driver Side
- Part Name Code: 47750A
- Item Weight: 8.20 Pounds
- Condition: New
- Fitment Type: Direct Replacement
- SKU: 47750-17160
- Warranty: This genuine part is guaranteed by Toyota's factory warranty.
2005 Toyota MR2 Spyder Caliper Assembly, Passenger Side
Part Number: 47730-17160$205.26 MSRP: $293.07You Save: $87.81 (30%)Ships in 1-3 Business DaysProduct Specifications- Other Name: Cylinder Assembly, Disc; Disc Brake Caliper, Rear Right; Caliper; Cylinder Assembly, Rear Disc Brake, Passenger Side; Brake Caliper
- Position: Passenger Side
- Part Name Code: 47730B
- Item Weight: 8.40 Pounds
- Condition: New
- Fitment Type: Direct Replacement
- SKU: 47730-17160
- Warranty: This genuine part is guaranteed by Toyota's factory warranty.
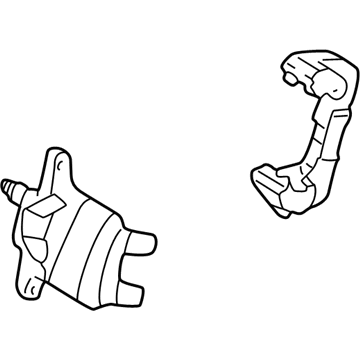
2005 Toyota MR2 Spyder Caliper Assembly, Driver Side
Part Number: 47750-17150$189.53 MSRP: $270.61You Save: $81.08 (30%)Ships in 1-3 Business DaysProduct Specifications- Other Name: Cylinder Assembly, Disc; Disc Brake Caliper, Front Left; Caliper; Cylinder Assembly, Disc Brake, Driver Side; Brake Caliper
- Position: Driver Side
- Part Name Code: 47750
- Item Weight: 12.10 Pounds
- Item Dimensions: 10.1 x 7.8 x 5.4 inches
- Condition: New
- Fitment Type: Direct Replacement
- SKU: 47750-17150
- Warranty: This genuine part is guaranteed by Toyota's factory warranty.
2005 Toyota MR2 Spyder Caliper Assembly, Passenger Side
Part Number: 47730-17150$189.53 MSRP: $270.61You Save: $81.08 (30%)Ships in 1-3 Business DaysProduct Specifications- Other Name: Cylinder Assembly, Disc; Disc Brake Caliper, Front Right; Caliper; Cylinder Assembly, Front Disc Brake, Passenger Side; Brake Caliper
- Position: Passenger Side
- Part Name Code: 47730
- Item Weight: 12.00 Pounds
- Item Dimensions: 10.2 x 7.5 x 5.5 inches
- Condition: New
- Fitment Type: Direct Replacement
- SKU: 47730-17150
- Warranty: This genuine part is guaranteed by Toyota's factory warranty.
2005 Toyota MR2 Spyder Brake Caliper
Looking for affordable OEM 2005 Toyota MR2 Spyder Brake Caliper? Explore our comprehensive catalogue of genuine 2005 Toyota MR2 Spyder Brake Caliper. All our parts are covered by the manufacturer's warranty. Plus, our straightforward return policy and speedy delivery service ensure an unparalleled shopping experience. We look forward to your visit!
2005 Toyota MR2 Spyder Brake Caliper Parts Q&A
- Q: How to Service and Repair a Brake Caliper on 2005 Toyota MR2 Spyder?A: To service and repair the brake caliper take it apart by removing the dust boot and slide bushing. Take tools to take off the piston and seals, and then take the adjusting bolt assembly to pieces. Test the disc thickness and pad lining. Assemble by fitting components and providing adequate torque and clearance.


