My Garage
Cart

OEM 2005 Scion xB Windshield

Glass Windshield
  • Select Vehicle by Model
  • Select Vehicle by VIN
Select Vehicle by Model
Make
Model
Year
or
Select Vehicle by VIN
For the most accurate results, select vehicle by your VIN (Vehicle Identification Number).

1 Windshield found

  • 2005 Scion xB Windshield - 56111-52150-8N
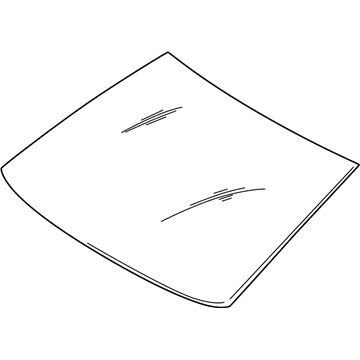
    2005 Scion xB Windshield Diagram - 56111-52150-8N
    View related parts

    2005 Scion xB Windshield, Front

    Part Number: 56111-52150-8N
    $417.44 MSRP: $611.76
    You Save: $194.32 (32%)
    Ships in 1-3 Business Days
    ADD TO CART
    Product Specifications
    • Other Name: Glass Sub-Assembly, Windshield; Windshield, Front
    • Position: Front
    • Replaces: 56111-52150
    • Item Weight: 4.20 Pounds
    • Condition: New
    • SKU: 56111-52150-8N
    • Warranty: This genuine part is guaranteed by Toyota's factory warranty.
    More Info
    Fits the following 2005 Scion xB Submodels:
    • Base | 4 Cyl 1.5 L GAS

2005 Scion xB Windshield

Looking for affordable OEM 2005 Scion xB Windshield? Explore our comprehensive catalogue of genuine 2005 Scion xB Windshield. All our parts are covered by the manufacturer's warranty. Plus, our straightforward return policy and speedy delivery service ensure an unparalleled shopping experience. We look forward to your visit!

2005 Scion xB Parts Questions & Experts Answers

  • Q: How to replace the windshield glass on 2005 Scion xB?
    A: Begin the windshield glass replacement process by completely disassembling the roof headlining structure that needs removal of front door opening trim and front pillar garnish along with visors and many additional components that will provide access to the windshield glass. Begin by undoing the wiper arm covers which are located on both the right-hand and left-hand sides then proceed to remove the front wiper arms from these sides alongside the hood to cowl top seal and the cowl top ventilator louver itself. The windshield moulding located outside needs precise knife cutting to detach it without harming the body after which all remaining moulding material will be discarded. The procedure for windshield glass removal starts with using piano wire positioned between vehicle chassis and glass and ends with applying tape to prevent damage during this stage. Pull the piano wires around the glass to cut it then remove the stoppers before using a suction cup to lift off the glass while preserving as much adhesive on the body. Scrape all damaged stoppers, dam and adhesive from the windshield glass surface before cleaning the glass perimeter with white gasoline while taking care to avoid contact with the glass itself. Apply Primer G to the installation part of Windshield Glass Stopper No. 2 before allowing it to dry for three minutes at least then discard any remaining primer. Fit two new windshield glass stoppers to both the glass and install two new stoppers to the vehicle body. Apply Primer G onto the installation area of the window glass adhesive dam before installation. Place new tape around the glass surface with an exception at the dam position after it has dried. Begin by applying Primer G on the windshield glass edge and contact surface before allowing it to dry. Finally install the moulding. Open the contact surface of the vehicle body for cleaning by cutting off any surplus adhesive then wiping down the exposed area with a shop rag. After positioning the glass with a suction cup while pressing the surface level you should add reference points before the glass removal begins. The vehicle body contact area requires Primer M application before allowing dry time and then requires Primer G coating on glass edges and surface contacts with accidental removal of excess before dry time. A sealer gun requires the Part No. 08850-00801 or equivalent adhesive to coat the glass after the cartridge nozzle receives its adhesive through quantity reduction and nozzle insertion. The glass installation process requires users to align the glass at reference points and apply gentle pressure to the rim while making sure stoppers sit correctly in place and verifying the vehicle body glass gap. Apply appropriate pressure to the glass front surface while ensuring a proper fit before trimming away leftover adhesive with a scraper until you can drive the vehicle. Never drive the vehicle before adhesive fully cures. Perform a leak test on the hardened adhesive before you apply auto glass sealer to fix any detected leaks.

Related 2005 Scion xB Parts