×
ToyotaParts- Hello
- Login or Register
- Quick Links
- Live Chat
- Track Order
- Parts Availability
- RMA
- Help Center
- Contact Us
- Shop for
- Toyota Parts
- Scion Parts
My Garage
My Account
Cart
OEM Scion xB Windshield
Glass Windshield- Select Vehicle by Model
- Select Vehicle by VIN
Select Vehicle by Model
orMake
Model
Year
Select Vehicle by VIN
For the most accurate results, select vehicle by your VIN (Vehicle Identification Number).
2 Windshields found

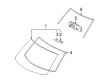
Scion xB Windshield, Front Part Number: 56101-12490
$377.49 MSRP: $553.21You Save: $175.72 (32%)Ships in 1-3 Business Days
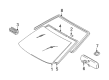
Scion xB Windshield, Front Part Number: 56111-52150-8N
$428.56 MSRP: $628.07You Save: $199.51 (32%)Ships in 1-3 Business Days
Scion xB Windshield
Choose genuine Windshield that pass strict quality control tests. You can trust the top quality and lasting durability. Shopping for OEM Windshield for your Scion xB? Our website is your one-stop destination. We stock an extensive selection of genuine Scion xB parts. The price is affordable so you can save more. It only takes minutes to browse and find the exact fit. Easily add to cart and check out fast. Our hassle-free return policy will keep you stress-free. We process orders quickly for swift delivery. Your parts will arrive faster, so you can get back on the road sooner.
The Scion xB Windshield operates as a vital safety component that protects passengers through its exceptional visibility and resistance from outdoor elements thus enhancing reliability and performance of the Scion xB. The Scion xB Windshield enables exceptional driving experiences under all weather conditions while helping the vehicle achieve better aerodynamics that promotes higher speed and fuel efficiency. The windshield of the vehicle consists of safety glass laminations that integrate two curved glass layers with a plastic core which provides strength and structural reliability. The Scion xB Windshield demonstrates versatility because it supports multiple xB models thereby becoming indispensable for maintaining vehicle efficiency alongside safety standards. Vehicle owners must perform regular maintenance because small scratches on the Scion car Windshield will reduce visibility while driving. The automotive market values the car Windshield through replacing costs that fall between $110 to $140. Safety tests awarded the car Windshield with a Good rating thus confirming its strong reputation in vehicular safety. As a windscreen the car part delivers exceptional features alongside an exclusive design while providing complete reliability to the automaker model drivers who want high performance and safety.
Scion xB Windshield Parts and Q&A
- Q: How to replace the windshield glass on Scion xB?A:Begin the windshield glass replacement process by completely disassembling the roof headlining structure that needs removal of front door opening trim and front pillar garnish along with visors and many additional components that will provide access to the windshield glass. Begin by undoing the wiper arm covers which are located on both the right-hand and left-hand sides then proceed to remove the front wiper arms from these sides alongside the hood to cowl top seal and the cowl top ventilator louver itself. The windshield moulding located outside needs precise knife cutting to detach it without harming the body after which all remaining moulding material will be discarded. The procedure for windshield glass removal starts with using piano wire positioned between vehicle chassis and glass and ends with applying tape to prevent damage during this stage. Pull the piano wires around the glass to cut it then remove the stoppers before using a suction cup to lift off the glass while preserving as much adhesive on the body. Scrape all damaged stoppers, dam and adhesive from the windshield glass surface before cleaning the glass perimeter with white gasoline while taking care to avoid contact with the glass itself. Apply Primer G to the installation part of Windshield Glass Stopper No. 2 before allowing it to dry for three minutes at least then discard any remaining primer. Fit two new windshield glass stoppers to both the glass and install two new stoppers to the vehicle body. Apply Primer G onto the installation area of the window glass adhesive dam before installation. Place new tape around the glass surface with an exception at the dam position after it has dried. Begin by applying Primer G on the windshield glass edge and contact surface before allowing it to dry. Finally install the moulding. Open the contact surface of the vehicle body for cleaning by cutting off any surplus adhesive then wiping down the exposed area with a shop rag. After positioning the glass with a suction cup while pressing the surface level you should add reference points before the glass removal begins. The vehicle body contact area requires Primer M application before allowing dry time and then requires Primer G coating on glass edges and surface contacts with accidental removal of excess before dry time. A sealer gun requires the Part No. 08850-00801 or equivalent adhesive to coat the glass after the cartridge nozzle receives its adhesive through quantity reduction and nozzle insertion. The glass installation process requires users to align the glass at reference points and apply gentle pressure to the rim while making sure stoppers sit correctly in place and verifying the vehicle body glass gap. Apply appropriate pressure to the glass front surface while ensuring a proper fit before trimming away leftover adhesive with a scraper until you can drive the vehicle. Never drive the vehicle before adhesive fully cures. Perform a leak test on the hardened adhesive before you apply auto glass sealer to fix any detected leaks.
- Q: How to install windshield glass on Scion xB?A:Start the windshield glass installation process by cleaning the windshield glass with a scraper to eliminate damaged stoppers and dam along with adhesive while being cautious to protect the glass. Use a non-residue solvent to clean the outer edge then abstain from coming into contact with the processed area. Follow this step by thoroughly cleaning the vehicle body through knife operation which eliminates adhesive roughness while avoiding body damage followed by wiping it with either a shop rag or cloth. Put in two new No.2 stoppers to the windshield glass after you apply Primer G to the installation area then wait for a minimum of 3 minutes for drying time. Install 2 new No. 1 stoppers on the vehicle body parallel to installation of 2 new No. 2 stoppers on the windshield glass. Primer G should be applied to the windshield outside moulding application area and adhesive dam before they get installed. Use suction cups to position the windshield glass while maintaining an even contact surface and matching the marks with the necessary application of Primer M to the vehicle body installation surface and Primer G to adhesive areas. Purchaser should apply Toyota Genuine Windshield Glass Adhesive or its equivalent to the glass surface within the designated usage time window prior to windshield installation which requires inspection for correct stopper operation for vehicle clearance. Secure protective tape over the glass surface to hold it into position until the adhesive becomes hard. During the minimum waiting period avoid operating the vehicle. Last step involves external water testing for leaks followed by adhesive addition for any deformity and protective tape removal. Proceed to install the inner rear view mirror assembly, roof headlining, front pillar garnishes, room light assembly, personal light assembly, visor holder, visor assemblies, assist grip, front door opening trim Weather Strips, cowl side trim boards, front door scuff plates, cowl top ventilator louvers, hood to cowl top seal, front wiper arm and blade assemblies, windshield wiper arm cover, reconnect the negative battery terminal with a torque of 5.4 Nm (55 kgf-cm, 48 in-lbf), and inspect the SRS warning light.