×
ToyotaParts- Hello
- Login or Register
- Quick Links
- Live Chat
- Track Order
- Parts Availability
- RMA
- Help Center
- Contact Us
- Shop for
- Toyota Parts
- Scion Parts
My Garage
My Account
Cart
OEM 2004 Toyota Prius A/C Compressor
Air Conditioning Compressor- Select Vehicle by Model
- Select Vehicle by VIN
Select Vehicle by Model
orMake
Model
Year
Select Vehicle by VIN
For the most accurate results, select vehicle by your VIN (Vehicle Identification Number).
1 A/C Compressor found


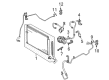
2004 Toyota Prius Compressor
Part Number: 88370-47010$551.01 MSRP: $808.72You Save: $257.71 (32%)Ships in 1-2 Business DaysProduct Specifications- Other Name: Compressor Assembly, With Pulley; A/C Compressor; Compressor Assembly, W/Motor
- Part Name Code: 88370
- Item Weight: 11.10 Pounds
- Item Dimensions: 13.5 x 9.5 x 9.5 inches
- Condition: New
- Fitment Type: Direct Replacement
- SKU: 88370-47010
- Warranty: This genuine part is guaranteed by Toyota's factory warranty.
2004 Toyota Prius A/C Compressor
Looking for affordable OEM 2004 Toyota Prius A/C Compressor? Explore our comprehensive catalogue of genuine 2004 Toyota Prius A/C Compressor. All our parts are covered by the manufacturer's warranty. Plus, our straightforward return policy and speedy delivery service ensure an unparalleled shopping experience. We look forward to your visit!
2004 Toyota Prius A/C Compressor Parts Q&A
- Q: How to replace the A/C Compressor Assy on 2004 Toyota Prius?A: The repair of Electric Inverter Compressor Assy requires first removing Rear Floor Board No.2 together with Deck Floor Box Rear and Rear Floor Board No.3. Remove the service plug grip after disconnecting the battery negative terminal. The process of removing refrigerant from the refrigeration system requires Special Service Tool: 07110-58060 (07117-58080, 07117-58090, 07117-78050, 07117-88060, 07117-88070, and 07117-88080). Disconnect the discharge hose sub-assy by removing its bolt along with O-ring and then secure openings with vinyl tape to block moisture and foreign matter. Seal the openings of the suction hose sub-assy before removing the Electric Inverter Compressor Assy by releasing the green-lock and disconnecting the connector. You must also remove the three clamps and bolts. Check the compressor oil while properly draining the necessary quantity from the new compressor unit before assembly under safe oil level and types conditions. Use two bolts to temporarily secure the Electric Inverter Compressor Assy while fully tightening both bolts to 25 Nm (255 kgf.cm, 18 ft.lbf) according to the specified order. The wire harness requires connection after proper adherence to the green lock location. Mount the suction hose sub-assy after installing its new O-ring and adding ND-OIL 11 or equivalent compressor oil while tightening the bolt to 9.8 Nm (100 kgf.cm, 87 in.lbf). Complete this procedure twice on the discharge hose sub-assy. Reinstall the service plug grip before you reconnect the battery negative terminal and place the rear floor components in their correct positions. Charging of refrigerant through Special Service Tool (07110-58060 and others) must reach 450 plus or minus 30 g (15.87 plus or minus 1.05 oz.) before warming up the compressor to check for any refrigerant leakage.
Related 2004 Toyota Prius Parts
 2004 Toyota Prius Cabin Air Filter
 2004 Toyota Prius Blower Motor
 2004 Toyota Prius Heater Core
 2004 Toyota Prius A/C Accumulator
 2004 Toyota Prius A/C Condenser
 2004 Toyota Prius A/C Expansion Valve
 2004 Toyota Prius A/C Hose
 2004 Toyota Prius Ambient Temperature Sensor
 2004 Toyota Prius Blend Door Actuator
 2004 Toyota Prius Blower Motor Resistor
 2004 Toyota Prius Evaporator