×
ToyotaParts- Hello
- Login or Register
- Quick Links
- Live Chat
- Track Order
- Parts Availability
- RMA
- Help Center
- Contact Us
- Shop for
- Toyota Parts
- Scion Parts
My Garage
My Account
Cart
OEM 2004 Toyota Land Cruiser Air Bag Sensor
Air Bag Impact Sensor- Select Vehicle by Model
- Select Vehicle by VIN
Select Vehicle by Model
orMake
Model
Year
Select Vehicle by VIN
For the most accurate results, select vehicle by your VIN (Vehicle Identification Number).
7 Air Bag Sensors found
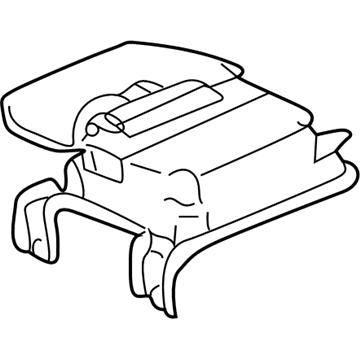
2004 Toyota Land Cruiser Diagnostic Unit
Part Number: 89170-60261$1076.99 MSRP: $1355.72You Save: $278.73 (21%)Ships in 1-3 Business DaysProduct Specifications- Other Name: Sensor Assembly, Air Bag; Air Bag Control Module; Air Bag Sensor; Center Sensor
- Replaces: 89170-60260
- Item Weight: 1.60 Pounds
- Item Dimensions: 8.0 x 6.7 x 4.1 inches
- Condition: New
- SKU: 89170-60261
- Warranty: This genuine part is guaranteed by Toyota's factory warranty.
2004 Toyota Land Cruiser Sensor Assembly, Air Bag
Part Number: 89170-60151$739.78 MSRP: $931.24You Save: $191.46 (21%)Ships in 1-3 Business DaysProduct Specifications- Other Name: SENSOR ASSY, AIR BAG; Air Bag Sensor
- Item Weight: 1.60 Pounds
- Item Dimensions: 7.8 x 6.6 x 3.9 inches
- Condition: New
- SKU: 89170-60151
- Warranty: This genuine part is guaranteed by Toyota's factory warranty.
2004 Toyota Land Cruiser Sensor, Air Bag, Front Driver Side
Part Number: 89174-69105$97.25 MSRP: $117.25You Save: $20.00 (18%)Ships in 1-3 Business DaysProduct Specifications- Other Name: Sensor, Air Bag, Front; Air Bag Sensor
- Position: Front Driver Side
- Part Name Code: 89174A
- Item Weight: 0.70 Pounds
- Item Dimensions: 4.9 x 3.0 x 2.3 inches
- Condition: New
- Fitment Type: Direct Replacement
- SKU: 89174-69105
- Warranty: This genuine part is guaranteed by Toyota's factory warranty.
2004 Toyota Land Cruiser Front Sensor, Passenger Side
Part Number: 89173-69105$107.82 MSRP: $130.00You Save: $22.18 (18%)Ships in 1-3 Business DaysProduct Specifications- Other Name: Sensor, Air Bag, Front; Air Bag Impact Sensor, Front Right; Air Bag Sensor; Sensor, Air Bag, Front Passenger Side
- Position: Front Passenger Side
- Part Name Code: 89173A
- Item Weight: 0.70 Pounds
- Item Dimensions: 4.8 x 3.0 x 2.4 inches
- Condition: New
- Fitment Type: Direct Replacement
- SKU: 89173-69105
- Warranty: This genuine part is guaranteed by Toyota's factory warranty.
2004 Toyota Land Cruiser Rear Sensor, Driver Side
Part Number: 89834-60010$131.82 MSRP: $186.61You Save: $54.79 (30%)Ships in 1-3 Business DaysProduct Specifications- Other Name: Sensor, Air Bag, Rear; Air Bag Impact Sensor, Rear Left; Air Bag Sensor; Impact Sensor; Side Sensor; Sensor, Air Bag, Rear Driver Side
- Position: Rear Driver Side
- Part Name Code: 89834
- Item Weight: 0.60 Pounds
- Item Dimensions: 4.3 x 2.7 x 2.1 inches
- Condition: New
- Fitment Type: Direct Replacement
- SKU: 89834-60010
- Warranty: This genuine part is guaranteed by Toyota's factory warranty.
2004 Toyota Land Cruiser Sensor, Air Bag, Rear Passenger Side
Part Number: 89833-60030$131.82 MSRP: $186.61You Save: $54.79 (30%)Ships in 1-3 Business DaysProduct Specifications- Other Name: Sensor, Air Bag, Rear; Air Bag Sensor
- Position: Rear Passenger Side
- Part Name Code: 89833
- Item Weight: 0.60 Pounds
- Item Dimensions: 4.6 x 2.6 x 2.1 inches
- Condition: New
- Fitment Type: Direct Replacement
- SKU: 89833-60030
- Warranty: This genuine part is guaranteed by Toyota's factory warranty.
2004 Toyota Land Cruiser Position Sensor, Driver Side
Part Number: 89178-0W010$79.26 MSRP: $111.27You Save: $32.01 (29%)Ships in 1-3 Business DaysProduct Specifications- Other Name: Sensor, Seat Position; Seat Track Position Sensor, Left; Air Bag Sensor; Seat; Sensor, Seat Position Air Bag
- Position: Driver Side
- Part Name Code: 89178A
- Item Weight: 0.50 Pounds
- Item Dimensions: 2.1 x 1.6 x 1.4 inches
- Condition: New
- Fitment Type: Direct Replacement
- SKU: 89178-0W010
- Warranty: This genuine part is guaranteed by Toyota's factory warranty.
2004 Toyota Land Cruiser Air Bag Sensor
Looking for affordable OEM 2004 Toyota Land Cruiser Air Bag Sensor? Explore our comprehensive catalogue of genuine 2004 Toyota Land Cruiser Air Bag Sensor. All our parts are covered by the manufacturer's warranty. Plus, our straightforward return policy and speedy delivery service ensure an unparalleled shopping experience. We look forward to your visit!
2004 Toyota Land Cruiser Air Bag Sensor Parts Q&A
- Q: When should the front Air Bag sensor be replaced and what is the correct procedure for its removal and installation on 2004 Toyota Land Cruiser?A: Replacement of the front Air Bag sensor becomes necessary after a car Air Bag deploys in an accident but repair also involves changing both left and right sensors. A sensor needs replacement during troubleshooting or item checking or after a sensor drop. Before working on or installing the front Air Bag sensor unit users need to use proper procedures.
