×
ToyotaParts- Hello
- Login or Register
- Quick Links
- Live Chat
- Track Order
- Parts Availability
- RMA
- Help Center
- Contact Us
- Shop for
- Toyota Parts
- Scion Parts
My Garage
My Account
Cart
OEM 2003 Toyota Avalon Timing Belt
Engine Timing Belt- Select Vehicle by Model
- Select Vehicle by VIN
Select Vehicle by Model
orMake
Model
Year
Select Vehicle by VIN
For the most accurate results, select vehicle by your VIN (Vehicle Identification Number).
1 Timing Belt found

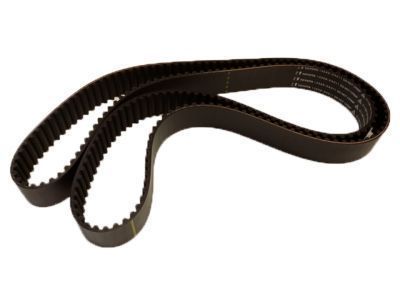
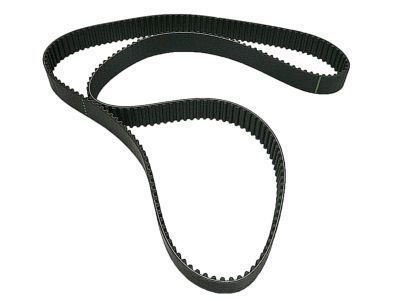
2003 Toyota Avalon Timing Belt
Part Number: 13568-09080$60.54 MSRP: $84.98You Save: $24.44 (29%)Ships in 1-2 Business DaysProduct Specifications- Other Name: Belt, Timing; Engine Timing Belt; Timing Belt Kit
- Replaces: 13568-09050
- Part Name Code: 13568
- Item Weight: 1.00 Pounds
- Item Dimensions: 14.0 x 12.1 x 2.1 inches
- Condition: New
- Fitment Type: Direct Replacement
- SKU: 13568-09080
- Warranty: This genuine part is guaranteed by Toyota's factory warranty.
2003 Toyota Avalon Timing Belt
Looking for affordable OEM 2003 Toyota Avalon Timing Belt? Explore our comprehensive catalogue of genuine 2003 Toyota Avalon Timing Belt. All our parts are covered by the manufacturer's warranty. Plus, our straightforward return policy and speedy delivery service ensure an unparalleled shopping experience. We look forward to your visit!
2003 Toyota Avalon Timing Belt Parts Q&A
- Q: How to service and repair the timing belt on 2003 Toyota Avalon?A: Service and repair of the timing belt starts when you disconnect RH front wheel, RH fender apron seal, generator drive belt, and PS pump drive belt by unfastening their 2 bolts. The service starts with unfastening the engine coolant reservoir hose from the water outlet then disconnecting the ground strap connectors and engine moving control rod and No.2 RH engine mounting bracket. After that, the No.2 generator bracket can be removed by loosening its pivot bolt and removing the nut and bracket. Apply Special Service Tools: 09213-54015 or 91651-60855 with 09330-00021 and 09950-50013 including 09951-05010 09952-05010 09953-05010 09953-05020 and 09954-05021 to take out the crankshaft pulley first. Start by taking away four bolts from the No.1 timing belt cover and afterward remove the timing belt guide and finish by disconnecting the engine wire protector clamps to free five bolts that enable removal of the No.2 timing belt cover. Install the crankshaft pulley bolt temporarily while setting No.1 cylinder to TDC/compression by following the timing mark alignment (turn the crankshaft clockwise). After removing 2 bolts along with a nut from the RH engine mounting bracket. Before belt removal customers should inspect for three installation marks and one front mark; new marks must be placed when these markings are absent. The removal process of the timing belt tensioner begins by alternating 2 bolt loosening procedures until the tensioner can be removed from both camshaft timing pulleys with Special Service Tools: 09249-63010 and 09960-10010 (09962-01000 and 09963-01000) for the RH timing pulley and Special Service Tool 09960-10010 (09962-01000, 09963-01000) for the LH timing pulley. Start by loosening the two 10 mm hexagon bolted idler pulleys in succession followed by the crankshaft timing pulley with Special Service Tool: 09950-50012 (09951-05010, 09952-05010, 09953-05010, 09953-05020, 09954-05011). Detect all defects on the timing belt before checking if it keeps straight while remaining isolated from oil water and steam. Also test the idler pulleys and timing belt tensioner for oil leaks as well as operational smoothness. Begin installation with the crankshaft timing pulley where the set key matches the key groove while you apply adhesive (Part No.08833-00080 or Three Bond 1344 or Loctite 242 or equivalent). Continue by adding the No.1 idler pulley. Lay the RH camshaft timing pulley facing outward before installing the LH camshaft timing pulley which should have its flange side facing inward. Next install the timing belt while keeping it spotless and aligning its marks with reference to TDC/compression of the No.1 cylinder. Set the timing belt tensioner after pressing the push rod and securing it with a hexagon wrench before installing the tensioner component and performing valve timing checks through crankshaft rotation and timing mark alignment. As the next step install the RH engine mounting bracket together with No.2 timing belt cover, timing belt guide, No.1 timing belt cover, crankshaft pulley and No.2 generator bracket then move to engine moving control rod, ground strap connectors, engine coolant reservoir hose, PS pump drive belt, generator drive belt, RH fender apron seal and RH front wheel. Finish with a vehicle road test that evaluates abnormal noise, shock, slippage and checks correct shift points and smooth operation.


