×
ToyotaParts- Hello
- Login or Register
- Quick Links
- Live Chat
- Track Order
- Parts Availability
- RMA
- Help Center
- Contact Us
- Shop for
- Toyota Parts
- Scion Parts
My Garage
My Account
Cart
OEM 2002 Toyota Avalon Air Bag
Air Bag Module- Select Vehicle by Model
- Select Vehicle by VIN
Select Vehicle by Model
orMake
Model
Year
Select Vehicle by VIN
For the most accurate results, select vehicle by your VIN (Vehicle Identification Number).
1 Air Bag found

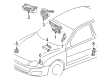 Product Specifications
- Other Name: Air Bag Assembly, Instrument Panel; Instrument Panel Air Bag, Upper; Passenger Inflator Module; Air Bag Assembly, Instrument Panel Passenger W/O Door
- Part Name Code: 73960A
- Item Weight: 7.90 Pounds
- Item Dimensions: 14.9 x 11.3 x 7.8 inches
- Condition: New
- Fitment Type: Direct Replacement
- SKU: 73960-07030
- Warranty: This genuine part is guaranteed by Toyota's factory warranty.
2002 Toyota Avalon Air Bag
Looking for affordable OEM 2002 Toyota Avalon Air Bag? Explore our comprehensive catalogue of genuine 2002 Toyota Avalon Air Bag. All our parts are covered by the manufacturer's warranty. Plus, our straightforward return policy and speedy delivery service ensure an unparalleled shopping experience. We look forward to your visit!
2002 Toyota Avalon Air Bag Parts Q&A
- Q: How to Service and Repair the Side Air Bag in a Power Seat on 2002 Toyota Avalon?A: The first step to repair or service the side Air Bag assembly on the power seat requires complete removal of the front seat by unfastening 4 seat track covers and 4 bolts and disconnecting power seat and side Air Bag connector specifically while protecting the Air Bag wire harness from damage. The service involves removing the headrest followed by eliminating the seat armrest assembly with its cover and bolt removal and power seat switch knob removal. Start the side Air Bag assembly service by unfastening 5 seat cushion shield screws then taking out the front seat inner belt together with 2 front seat cushion inner shield screws. The seat cushion assembly requires slackening the wire harness followed by using 5 bolts to disconnect the driver seat bench type or 4 bolts to remove other types. Remove the seatback board and the seatback assembly by unfastening the hog rings and 4 bolts yet avoid applying abnormal force to the Air Bag harness. Position the seatback temporarily after which you should connect the wire harness to the reclining adjuster inside cover and fasten it with 2 screws while also tightening 4 bolts to 43 N.m (440 kgf.cm, 32 ft.lbf). When the seatback assembly shows evidence of damage the technician must substitute it with a new component while installing fresh hog rings. The installation process requires first mounting the seatback board and then adding the seat cushion assembly through usage of five bolts on bench-type driver seats and four bolts on other seats while also wiring the harness. The front seat cushion inner shield should be installed with two screws and then follow with five screws for the front seat inner belt and front seat cushion shield. Install the headrest before affixing the power seat switch knobs and attaching the seat armrest assembly with a bolt for driver seats with bench type alongside their cover. The process of front seat mounting involves connecting side Air Bag and power seat connectors before sliding the seat to the front position and letting the seat adjuster lock into place while omitting use of the seat track handle. The front side bolts receive temporary tightening until inner side bolts reach their specification of 37 N.m (375 kgf.cm, 27 ft.lbf). Slide the seat to the front post to fasten the rear side bolts at 37 N.m (375 kgf.cm, 27 ft.lbf).
Related 2002 Toyota Avalon Parts
 2002 Toyota Avalon Camshaft Position Sensor
 2002 Toyota Avalon Fuse Box
 2002 Toyota Avalon Knock Sensor
 2002 Toyota Avalon Air Bag Control Module
 2002 Toyota Avalon Air Bag Sensor
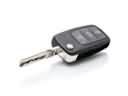 2002 Toyota Avalon Car Key
 2002 Toyota Avalon Clock Spring
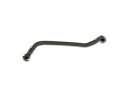 2002 Toyota Avalon Crankcase Breather Hose
 2002 Toyota Avalon Door Jamb Switch
 2002 Toyota Avalon Engine Control Module
 2002 Toyota Avalon Headlight Relay
 2002 Toyota Avalon Relay