×
ToyotaParts- Hello
- Login or Register
- Quick Links
- Live Chat
- Track Order
- Parts Availability
- RMA
- Help Center
- Contact Us
- Shop for
- Toyota Parts
- Scion Parts
My Garage
My Account
Cart
OEM 2001 Toyota Echo Shock Absorber
Suspension Shock Absorber- Select Vehicle by Model
- Select Vehicle by VIN
Select Vehicle by Model
orMake
Model
Year
Select Vehicle by VIN
For the most accurate results, select vehicle by your VIN (Vehicle Identification Number).
2 Shock Absorbers found
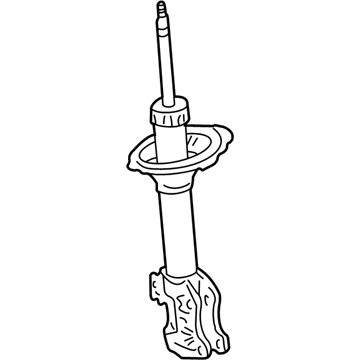
2001 Toyota Echo Strut
Part Number: 48510-59396$112.92 MSRP: $158.50You Save: $45.58 (29%)Ships in 1-3 Business DaysProduct Specifications- Other Name: Absorber Assembly, Shock; Suspension Strut, Front; Shock Absorber; Absorber Assembly, Shock, Front Passenger Side; Absorber Assembly, Shock, Front Driver Side
- Manufacturer Note: MARK 48510-52054
- Replaces: 48510-59166, 48510-59165, 48510-59167, 48510-59395
- Item Weight: 9.40 Pounds
- Item Dimensions: 26.1 x 8.4 x 7.6 inches
- Condition: New
- Fitment Type: Direct Replacement
- SKU: 48510-59396
- Warranty: This genuine part is guaranteed by Toyota's factory warranty.
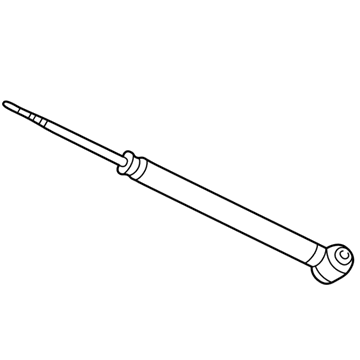
2001 Toyota Echo Shock Absorber
Part Number: 48530-59446$59.83 MSRP: $83.98You Save: $24.15 (29%)Ships in 1-3 Business DaysProduct Specifications- Other Name: Absorber Assembly, Shock; Shock Absorber, Rear; Suspension Strut Assembly Kit; Strut Shock Kit; Complete Strut; Shock; Absorber Assembly, Shock, Rear Passenger Side; Absorber Assembly, Shock, Rear Driver Side
- Manufacturer Note: MARK 48530-52072
- Replaces: 48530-59205, 48530-59445, 48530-59206
- Item Weight: 3.80 Pounds
- Item Dimensions: 26.9 x 6.8 x 5.8 inches
- Condition: New
- Fitment Type: Direct Replacement
- SKU: 48530-59446
- Warranty: This genuine part is guaranteed by Toyota's factory warranty.
2001 Toyota Echo Shock Absorber
Looking for affordable OEM 2001 Toyota Echo Shock Absorber? Explore our comprehensive catalogue of genuine 2001 Toyota Echo Shock Absorber. All our parts are covered by the manufacturer's warranty. Plus, our straightforward return policy and speedy delivery service ensure an unparalleled shopping experience. We look forward to your visit!
2001 Toyota Echo Shock Absorber Parts Q&A
- Q: How to service and repair the Shock Absorber on 2001 Toyota Echo?A: The first step when servicing or repairing the suspension strut requires you to align the front wheel directly forward to protect the steering gear. The service begins by removing both the front wheel followed by the disconnection and unclamping of the flexible hose as well as the ABS speed sensor wire harness by removing the bolt. Before installing the shock absorber with coil spring, begin by first disconnecting it from the steering knuckle using two nuts and bolts then remove three nuts attached to the shock absorber. Begin by applying engine oil to the shock absorber's 3 nuts then install it with the coil spring using torque of 39 Nm (400 kgf-cm, 29 ft. lbs.). Insert the shock absorber to the steering knuckle and apply engine oil on the 2 nuts before tightening the 2 bolts and nuts to 132 Nm (1,350 kgf-cm, 97 ft. lbs.). The installation requires connecting the ABS speed sensor wire harness clamp and flexible hose to the shock absorber but torquing them to 29 Nm (300 kgf-cm, 22 ft. lbs.). Wind up the installation of the front wheel by tightening it to 103 Nm (1,050 kgf-cm, 76 ft. lbs.) and verify the front wheel alignment.


