My Garage
Cart
Make sure this part fits

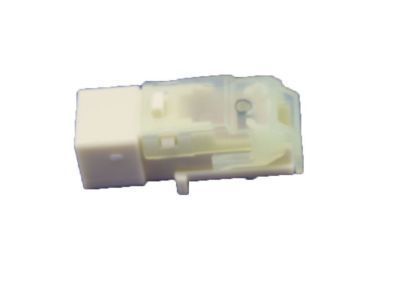
Toyota 84052-71010
Position Sensor

2005-2024 Toyota 8405271010

Customer Questions & Expert Answers (38)
Toyota 84052-71010 Position Sensor
  • Part Description
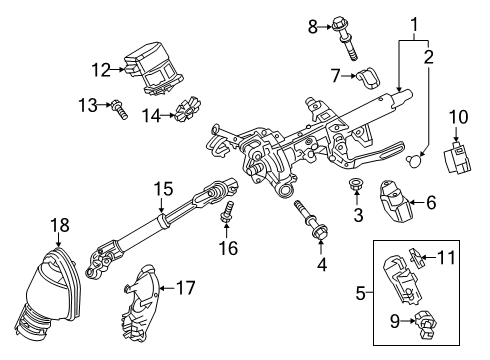
    Switch Assembly, Un-Lock Warning; Hazard Switch; Steering Lock; Angle Sensor; Multi Purpose Switch
  • Part Name Code
    84052
  • Manufacturer
    Toyota
Make sure this part fits
$61.21 MSRP: $85.91
You Save: $24.70 (29%)
Ships in 1-2 Business Days
1
ADD TO CART
  • Related Parts
  • Product Specifications
  • Vehicle Fitment
  • Customer Questions & Expert Answers
  • Product Specifications

    BrandGenuine Toyota
    Part Name Code84052
    Manufacturer Part Number84052-71010
    Part DescriptionSwitch Assembly, Un-Lock Warning; Hazard Switch; Steering Lock; Angle Sensor; Multi Purpose Switch
    Other NamesLock Switch; Switch Assembly; Warning Switch; Switch
    Item Dimensions13.6 x 11.6 x 2.1 inches
    Item Weight0.50 Pounds
    ConditionNew
    Fitment TypeDirect Replacement
    ManufacturerToyota
    SKU84052-71010
    WarrantyThis genuine Toyota part is guaranteed by Toyota's factory warranty.
    Shipping & ReturnShipping Policy Return Policy
    Warning: California's Proposition 65
  • Vehicle Fitment

    Year Make Model Trim Engine
    2016 Scion iMBase4 Cyl 1.8 L GAS
    2011-2016 Scion tCBase4 Cyl 2.5 L GAS
    2008-2015 Scion xBBase4 Cyl 2.4 L GAS
    2008-2014 Scion xDBase4 Cyl 1.8 L GAS
    2010-2022 Toyota 4RunnerLimited, Nightshade, SR5, SR5 Premium, Trail, TRD Off-Road, TRD Off-Road Premium, TRD Pro, TRD Sport, Venture4 Cyl 2.7 L GAS, 6 Cyl 4.0 L GAS
    2018-2022 Toyota C-HRLE, Limited, Nightshade, XLE, XLE Premium4 Cyl 2.0 L GAS
    2007-2024 Toyota CamryBase, CE, L, LE, SE, SE Nightshade, SE Sport, Special Edition, TRD, XLE, XSE4 Cyl 2.4 L GAS, 4 Cyl 2.5 L GAS, 6 Cyl 3.5 L GAS
    2009-2023 Toyota Corolla50th Anniversary Special Edition, Base, Hybrid LE, Hybrid SE, Hybrid XLE, L, LE, LE Eco, Le Eco Plus, S, SE, SE Apex, SE Nightshade, Special Edition, XLE, XRS, XSE, XSE Apex4 Cyl 1.8 L FULL HYBRID EV-GAS (FHEV), 4 Cyl 1.8 L GAS, 4 Cyl 2.0 L GAS, 4 Cyl 2.4 L GAS
    2022-2023 Toyota Corolla CrossHybrid S, Hybrid SE, Hybrid XSE, L, LE, XLE4 Cyl 2.0 L FULL HYBRID EV-GAS (FHEV), 4 Cyl 2.0 L GAS
    2017-2018 Toyota Corolla iMBase4 Cyl 1.8 L GAS
    View More
  • Customer Questions & Expert Answers

    Q:
    Can you provide the right 84052-71010 for my car? Posted by ToyotaPartsNow Specialist
    A:
    Find out if part number 84052-71010 is the right fit for your car by Selecting Your Vehicle model.
    Posted by ToyotaPartsNow Specialist
    Q:
    How to install the Ignition Switch for the starting system on Toyota Camry? Posted by Customer
    A:
    Two claws need attachment before fixing the 2AZ-FXE starting system power switch. First mount the lower instrument panel finish panel for TMC Made vehicles before proceeding with the mounting procedure for TMMK Made vehicles.
    Posted by ToyotaPartsNow Specialist
    Q:
    How to remove the ignition switch assembly on Scion xB? Posted by Customer
    A:
    The first step to remove the ignition switch assembly for the 2AZ-FE engine starts with facing the front wheels straight ahead followed by disconnecting the cable from the negative battery terminal then waiting for at least 90 seconds before proceeding. The first task involves taking off the steering pad followed by the removal of the steering wheel assembly. Begin removing the lower steering column cover by gently pushing both right and left sides of the cover until the four claws separate. Afterwards, access the tilt lever opening to release the next claw before turning the cover to let loose the remaining two claws. The ignition switch assembly removal process begins when users disconnect the two connectors and remove the wire harness clamp while taking out the two screws.
    Posted by ToyotaPartsNow Specialist
    Q:
    How to service and repair the ignition switch for TMC Made and TMMK Made on Toyota Camry? Posted by Customer
    A:
    The service work for the ignition switch begins by taking off the lower instrument panel finish panel from vehicles created by both TMC and TMMK. The process of power switch extraction from the finish panel starts with unclipping both claws.
    Posted by ToyotaPartsNow Specialist
    Q:
    How to remove the ignition switch assembly on Scion xD? Posted by Customer
    A:
    Private ownership of premises will benefit from initiating a process to uninstall the ignition switch assembly of the 2ZR-FE starting system. Initially remove the steering column cover by rotating the steering wheel to the right to reach and remove the specified screw followed by turning it left to release another specified screw before final removal of the indicated screw which allows you to remove the steering column cover. The ignition switch assembly removal requires disconnection of the connector and removal of 2 claws before extraction.
    Posted by ToyotaPartsNow Specialist
    Q:
    How to remove the ignition switch assembly on Scion xB? Posted by Customer
    A:
    The process to remove the ignition switch assembly for 2AZ-FE starting system starts with a front-wheel alignment then a negative battery terminal cable removal which requires a 90-second waiting period for safety. The first step requires removal of the steering pad before proceeding to take out the steering wheel assembly. Start by detaching the steering column cover through the following procedure: push each side to release the 4 claws and use fingers in the tilt lever opening to unfasten one more claw then turn the cover to separate the remaining 2 claws. To complete the removal process disconnect the 2 connectors then remove the wire harness clamp before taking out the ignition switch assembly by removing its 2 screws.
    Posted by ToyotaPartsNow Specialist
    Q:
    How to remove the ignition switch on Toyota Highlander? Posted by Customer
    A:
    The first step to remove the ignition switch involves disconnecting the negative battery terminal cable then waiting 90 seconds to deactivate the SRS system before moving forward with removal. Initialization processes might be required after reconnecting the cable. You can access and remove lower steering column elements by releasing the steering lock with a key in the ignition key cylinder. Afterward turn the wheel in both directions to see screws and release the tilt lever before unclipping the two claws for cover removal. First remove the front door scuff plate on the left side along with the cowl side trim sub-assembly on the left side and the lower instrument panel finish panel sub-assembly. Proceed with the removal by disconnecting the ignition switch connector and disengage the 2 claws before taking out the ignition switch assembly.
    Posted by ToyotaPartsNow Specialist
    Q:
    How to remove the ignition switch on Toyota Sequoia? Posted by Customer
    A:
    The first step for removing the 2UZ-FE starting system ignition switch requires customization of Power Tilt and Power Telescopic Steering Column information along with steering column assembly removal. The third step requires the removal of the steering column cover at its lower end. The ignition or starter switch assembly requires users to disconnect its connector before breaking the 2 claws and finally removing the assembly.
    Posted by ToyotaPartsNow Specialist
    Q:
    How to service the ignition switch on Toyota RAV4? Posted by Customer
    A:
    The first step to servicing the ignition switch starts with disconnecting the negative battery cable followed by waiting for at least 90 seconds to avoid Air Bag and seat belt pretensioner activation. The service begins by disconnecting the lower steering column cover through four claw separation followed by the tilt lever release and cover removal. Start by disconnecting both connectors from the ignition switch assembly including the connector for the ignition switch and the ignition key cylinder light connector. Afterward remove the assembly retaining 2 screws. Begin the installation procedure by locking down the ignition switch assembly through two attaching screws followed by establishing the connector signals for the ignition key cylinder light and ignition switch. Reattach the 4 lower steering column claws to install the cover and complete the process by reattaching the cable to the negative battery terminal.
    Posted by ToyotaPartsNow Specialist
    Q:
    How to service and repair the ignition switch on Toyota Tundra? Posted by Customer
    A:
    Begin ignition switch service by separating the negative battery terminal cable while observing the need to initialize particular systems upon reconnecting. The navigation system requires 90 seconds of wait time with the ignition OFF to save memory then the cable disconnecting begins. Secondly you must detach the steering column assembly and after that separate the upper steering column with switch bracket assembly for manual tilt systems as well as manual tilt and telescopic configurations. Proceed to take out the ignition switch assembly from the vehicle. The installation process requires installation of the ignition switch assembly before moving to the upper steering column with switch bracket assembly installation for both manual tilt and manual tilt and telescopic setups. After reinstallation of the steering column assembly proceed with cable connection to the negative battery terminal while systems that need initializing after reconnection must be taken into account.
    Posted by ToyotaPartsNow Specialist
    Q:
    How to service and repair the ignition switch on Toyota Tacoma? Posted by Customer
    A:
    The first step to service the ignition switch requires cable disconnection from the negative battery terminal. Before proceeding remove the steering column cover LWR by unscrewing its 2 attachments and unclipping its 2 claws. The next step requires disconnecting the connector while unclamping two attachments before extracting the ignition or starter switch. The procedure for installation starts with inputting the ignition switch followed by reinstalling the steering column cover LWR and ending with connecting the cable to the negative battery terminal while tightening up to 3.9 N.m (40 kgf. cm, 35 in.lbf).
    Posted by ToyotaPartsNow Specialist
    Q:
    How to install the ignition switch on Toyota Venza? Posted by Customer
    A:
    The installation of the ignition switch requires connecting the connector afterward securing the connector clamp to the ignition switch then using two screws for its final fixation. You need to use the 2 screws for securing the ignition switch in its place. Follow this step by placing on the upper steering column cover followed by the lower steering column cover installation.
    Posted by ToyotaPartsNow Specialist
    Q:
    How to service and repair the ignition switch on Toyota Yaris? Posted by Customer
    A:
    The ignition switch service process begins by taking out the cable from the negative terminal of the battery. First access and remove the indicated screws by turning the steering column right and then left due to installation needs of the indicated screws. When the steering column cover is ready for removal simply remove the last indicated screw. Remove the ignition or starter switch assembly from your vehicle using a connector disconnection and then unlocking the 2 claws to extract the assembly. You can install the ignition or starter switch assembly through 2 claws before reattaching the connector. You should reinstall the steering column cover by putting in the first indicated screw after which you must turn the steering wheel to the left to operate the second indicated screw and right to install the third indicated screw. The negative battery terminal cable installation requires a torque of 5.4 N.m (55 kgf.cm, 48 in.lbf) when reconnecting the cable.
    Posted by ToyotaPartsNow Specialist
    Q:
    What should be removed after disconnecting the battery for the 2008 Scion xB? Posted by Customer
    A:
    Remove the steering pad and then the steering wheel assembly.
    Posted by ToyotaPartsNow Specialist
    See expert answers on similar Ignition Switch
    Q:
    What components are installed after the spiral cable adjustment for the 2009 Scion xB? Posted by Customer
    A:
    The steering wheel assembly and the steering pad.
    Posted by ToyotaPartsNow Specialist
    See expert answers on similar Ignition Switch
    Q:
    What components should be installed after adjusting the spiral cable for the 2010 Scion xB? Posted by Customer
    A:
    Install the steering wheel assembly and the steering pad.
    Posted by ToyotaPartsNow Specialist
    See expert answers on similar Ignition Switch
    Q:
    What is the final step in installing the steering column cover for the 2010 Scion xD? Posted by Customer
    A:
    Turn the steering wheel to the right to install the last screw in the designated position.
    Posted by ToyotaPartsNow Specialist
    See expert answers on similar Ignition Switch
    Q:
    How do you install the steering column cover for the 2009 Scion xD? Posted by Customer
    A:
    Install the steering column cover by placing the screw in the indicated position.
    Posted by ToyotaPartsNow Specialist
    See expert answers on similar Ignition Switch
    Q:
    What is the first step to remove the ignition switch for the 2009 Toyota Corolla? Posted by Customer
    A:
    Align the front wheels straight ahead and disconnect the cable from the negative battery terminal, waiting at least 90 seconds to disable the SRS system.
    Posted by ToyotaPartsNow Specialist
    See expert answers on similar Ignition Switch
    Q:
    What is the final step in removing the ignition switch for the 2009 Toyota Matrix? Posted by Customer
    A:
    Disconnect the connector from the ignition switch assembly, remove the 2 screws, and take out the ignition switch.
    Posted by ToyotaPartsNow Specialist
    See expert answers on similar Ignition Switch
    Q:
    What is the first step in the installation process for the 2006 Toyota RAV4? Posted by Customer
    A:
    Install the ignition switch with the 2 screws.
    Posted by ToyotaPartsNow Specialist
    See expert answers on similar Ignition Switch
    Q:
    What should be removed after the lower instrument panel finish panel for the 2008 Toyota Highlander? Posted by Customer
    A:
    Remove the upper console panel sub-assembly, the No. 2 console box duct (without Rear Air Conditioning System), the lower rear console box, and the console box assembly (for both with and without Rear Air Conditioning System).
    Posted by ToyotaPartsNow Specialist
    See expert answers on similar Ignition Switch
    Q:
    What is the next component to install after the cowl side trim sub-assembly LH for the 2009 Toyota Highlander? Posted by Customer
    A:
    Install the front door scuff plate LH.
    Posted by ToyotaPartsNow Specialist
    See expert answers on similar Ignition Switch
    Q:
    What is the first step to remove the ignition switch for the 2UZ-FE starting system for the 2008 Toyota Sequoia? Posted by Customer
    A:
    Customize information for the Power Tilt and Power Telescopic Steering Column.
    Posted by ToyotaPartsNow Specialist
    See expert answers on similar Ignition Switch
    Q:
    What should be done after removing the air conditioning control assembly for the 2009 Toyota RAV4? Posted by Customer
    A:
    Disconnect the switch connector and detach the 2 claws to remove the engine switch.
    Posted by ToyotaPartsNow Specialist
    See expert answers on similar Ignition Switch
    Q:
    What connectors need to be disconnected during the process for the 2008 Toyota RAV4? Posted by Customer
    A:
    Disconnect the ignition switch connector and the ignition key cylinder light connector.
    Posted by ToyotaPartsNow Specialist
    See expert answers on similar Ignition Switch
    Q:
    What should be done after disconnecting the negative battery terminal for the 2009 Toyota Tacoma? Posted by Customer
    A:
    Remove the lower steering column cover by taking out the 2 screws and disengaging the 2 claws.
    Posted by ToyotaPartsNow Specialist
    See expert answers on similar Ignition Switch
    Q:
    What is the first step to service the ignition switch for the 2007 Toyota Tacoma? Posted by Customer
    A:
    Disconnect the cable from the negative battery terminal.
    Posted by ToyotaPartsNow Specialist
    See expert answers on similar Ignition Switch
    Q:
    What torque should be applied when connecting the cable to the negative battery terminal for the 2009 Toyota Tacoma? Posted by Customer
    A:
    Ensure a torque of 3.9 Nm (40 kgf-cm, 35 in-lbf) is applied.
    Posted by ToyotaPartsNow Specialist
    See expert answers on similar Ignition Switch
    Q:
    What should be done after installing the new ignition or starter switch assembly for the 2005 Toyota Tacoma? Posted by Customer
    A:
    Reinstall the steering column cover LWR.
    Posted by ToyotaPartsNow Specialist
    See expert answers on similar Ignition Switch
    Q:
    What is the first step to service and repair the ignition switch for the 2TR-FE starting system for the 2008 Toyota Tacoma? Posted by Customer
    A:
    Disconnect the cable from the negative battery terminal.
    Posted by ToyotaPartsNow Specialist
    See expert answers on similar Ignition Switch
    Q:
    What is the first step to install the ignition or starter switch assembly for the 2009 Toyota Sequoia? Posted by Customer
    A:
    First, attach the 2 claws to secure it in place.
    Posted by ToyotaPartsNow Specialist
    See expert answers on similar Ignition Switch
    Q:
    What is the next step after removing the steering column assembly for the 2008 Toyota Tundra? Posted by Customer
    A:
    Remove the upper steering column with the switch bracket assembly for both manual tilt and manual tilt with telescopic configurations.
    Posted by ToyotaPartsNow Specialist
    See expert answers on similar Ignition Switch
    Q:
    What is the next step after removing the screws from the steering column cover for the 2008 Toyota Yaris? Posted by Customer
    A:
    Remove the final indicated screw to take off the steering column cover.
    Posted by ToyotaPartsNow Specialist
    See expert answers on similar Ignition Switch
    Q:
    What is the next step after installing the upper steering column for manual tilt for the 2009 Toyota Tundra? Posted by Customer
    A:
    Install the upper steering column with the switch bracket assembly for both manual tilt and manual telescopic steering column.
    Posted by ToyotaPartsNow Specialist
    See expert answers on similar Ignition Switch
    Q:
    What is the final step to remove the ignition or starter switch assembly for the 2010 Toyota Yaris? Posted by Customer
    A:
    Disconnect the connector and disengage the 2 claws to complete the removal.
    Posted by ToyotaPartsNow Specialist
    See expert answers on similar Ignition Switch
    Q:
    What should be removed after the right side components for the 2009 Toyota Venza? Posted by Customer
    A:
    After that, remove the No. 2 instrument panel under cover sub-assembly and the lower instrument panel sub-assembly.
    Posted by ToyotaPartsNow Specialist
    See expert answers on similar Ignition Switch
    Q:
    What is the next step after removing the screws for the 2009 Toyota Yaris? Posted by Customer
    A:
    Remove the final indicated screw to take off the steering column cover.
    Posted by ToyotaPartsNow Specialist
    See expert answers on similar Ignition Switch
    If you have any questions about this product, please don't hesitate to ask us. We will be happy to help you!

OEM Toyota 84052-71010, Excellent Performance and Perfect Fitment

To ensure reliability, purchase Toyota part # 84052-71010 Position Sensor. It is sometimes referred to as Toyota Ignition Switch. OEM parts are unrivaled in terms of quality. They go through extensive quality control inspections and are produced in accordance with Toyota's official factory specifications. All of these remove defects and imperfections. So you can relax knowing they promise exceptional lifespan and flawless fitment.

ToyotaPartsNow.com is a leading supplier of genuine Toyota parts such as Toyota 8405271010 Position Sensor. At ToyotaPartsNow.com, we have a wide variety of OEM Toyota parts available at competitive prices. Our comprehensive range of genuine Toyota parts come with a manufacturer's warranty for peace of mind. We also prioritize customer satisfaction, providing a hassle-free return policy and expedited delivery for all our parts. For detailed Toyota parts information, click here.
Choose ToyotaPartsNow for discounted prices, exceptional service and fast delivery