My Garage
Cart
Make sure this part fits

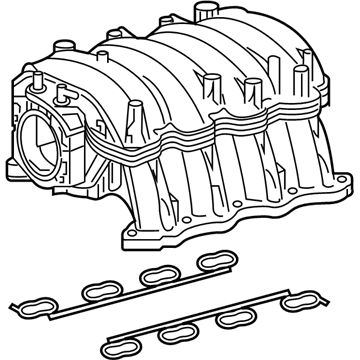
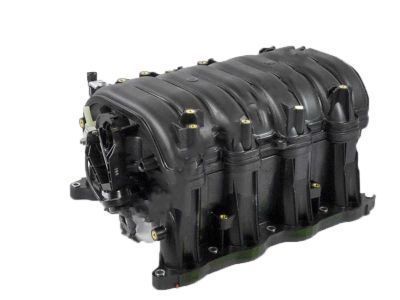
Toyota 17120-50020
Intake Manifold

2005-2009 Toyota 1712050020

Customer Questions & Expert Answers (9)
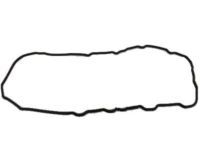
Toyota 17120-50020 Intake Manifold
  • Part Description
    Manifold Assembly, Intake; Engine Intake Manifold
  • Part Name Code
    17111
  • Replaces
    17120-50010, 17120-50011
  • Manufacturer
    Toyota
Make sure this part fits
$1158.71 MSRP: $1698.10
You Save: $539.39 (32%)
Ships in 1-3 Business Days
1
ADD TO CART
  • Related Parts
  • Product Specifications
  • Vehicle Fitment
  • Customer Questions & Expert Answers
  • Product Specifications

    BrandGenuine Toyota
    Part Name Code17111
    Manufacturer Part Number17120-50020
    Part DescriptionManifold Assembly, Intake; Engine Intake Manifold
    Other NamesManifold, Intake
    Item Dimensions17.8 x 14.2 x 8.1 inches
    Item Weight24.50 Pounds
    ConditionNew
    Fitment TypeDirect Replacement
    Replaces17120-50010, 17120-50011
    ManufacturerToyota
    SKU17120-50020
    WarrantyThis genuine Toyota part is guaranteed by Toyota's factory warranty.
    Shipping & ReturnShipping Policy Return Policy
    Warning: California's Proposition 65
  • Vehicle Fitment

    Year Make Model Trim Engine
    2005-2009 Toyota 4RunnerLimited, SR5, Sport8 Cyl 4.7 L GAS
    2006-2007 Toyota Land CruiserBase8 Cyl 4.7 L GAS
    2005-2009 Toyota SequoiaLimited, SR58 Cyl 4.7 L GAS
    2005-2009 Toyota TundraBase, Limited, SR58 Cyl 4.7 L GAS
  • Customer Questions & Expert Answers

    Q:
    Is 17120-50020 a good match for my car? Posted by ToyotaPartsNow Specialist
    A:
    Find out if part number 17120-50020 is the right fit for your car by Selecting Your Vehicle model.
    Posted by ToyotaPartsNow Specialist
    Q:
    How to remove the intake manifold assembly on Toyota Sequoia? Posted by Customer
    A:
    Before beginning the 2UZ-FE engine intake manifold assembly removal process, it is essential to discharge fuel system pressure. Both right and left front wiper arm assemblies with their blades need to be removed before proceeding with the front fender to cowl side seal removal on each side. Afterward remove the cowl top ventilator louver sub-assembly as well as the front wiper motor and link assembly. You can start by removing the front cowl top outer panel sub-assembly after breaking the washer hose connection and removing the washer hose grommet and wire harness clamp and unscrewing the 7 bolts. You will now drain the engine coolant before you take out the No. 1 engine under cover. Matter assumes initiative by unfastening the 2 nuts and 2 bolts holding the throttle body cover assembly along with its 2 brackets. Disconnect the vacuum hose assembly by removing the bolt then detach the air cleaner hose assembly. The process requires removal of the 2 bolts securing the No. 2 water by-pass pipe followed by disconnecting its 2 water hoses before extracting the pipe. Stop and detach the EFI fuel pipe clamp before disconnecting the No. 2 and No. 1 fuel pipe sub-assemblies. The intake manifold assembly requires the removal of the throttle body connector while disconnecting the 2 water by-pass hoses followed by loosening 2 clamps for removing the No. 1 ventilation hose and unconnecting the purge VSV connector and line hose separately from the vacuum switching valve assembly connector and wire harness bracket removal together with their clamps. The removal process concludes with detachments of the eight injector connectors followed by bolt removal from the engine wire protector and unfastening of six bolts while removing four nuts to extract the intake manifold assembly together with its accompanying gaskets. Detach the throttle body assembly by disassembling its nut and 3 bolts and gasket while also disconnecting the purge line hose then extracting the purge VSV. The last step requires you to uninstall both the vacuum switching valve assembly and the fuel delivery pipe sub-assembly.
    Posted by ToyotaPartsNow Specialist
    Q:
    How to remove the intake manifold on Toyota Tundra? Posted by Customer
    A:
    Start by discharging fuel system pressure before undertaking the removal of the 1GR-FE engine intake manifold. Disconnect the cable from the negative battery terminal then prepare to note whether systems need an initialization after the battery cable is reconnected. Drain the engine coolant from the No. 1 engine compartment before removing its under cover. First detach the front wiper motor and link assembly before removing the front cowl top outer panel sub-assembly by disconnecting 2 washer hoses and removing the total of 7 bolts. The operation begins by removing the V-bank cover through removal of its 2 nuts. Screw off the hose clamp before unfastening the two bolts which will detach the No. 2 air cleaner hose. To access the air cleaner assembly with element users must disconnect No. 2 ventilation hose while detaching the hose clamp and then disconnect vacuum hose and the MAF meter connector. A clip remover enables personnel to detach the 2 wire harness clamps following steps to loosen the hose clamp and remove the 2 bolts which allows the extraction of the air cleaner with element. The technician must next remove the throttle position sensor connector together with the throttle control motor connector and numerous hose connections which include the No. 4 and No. 5 water by-pass hoses along with the purge line hose and purge VSV connector, and union to check valve hose, No. 1 ventilation hose and vacuum switching valve connector. The 2 wire harness clamps need removal using a clip remover while the service technician removes the 2 throttle body bolts and detach the wire harness clamp before taking off the 2 bolts and throttle body bracket. Use a wrench to remove the two bolts from the No. 1 and No. 2 surge tank stays before disconnecting the two nuts. A hexagon wrench with 8 mm size enables users to remove four bolts to extract the intake air surge tank with its gasket before eliminating the fuel delivery pipe sub-assembly. Detach the intake manifold and remove its two gaskets by taking off all ten bolts.
    Posted by ToyotaPartsNow Specialist
    Q:
    How to remove the intake manifold on Toyota Tundra? Posted by Customer
    A:
    The first step to remove an intake manifold on a 1GR-FE engine demands a fuel system pressure discharge. After disconnecting the negative battery cable you should note that some systems need a reset once you reconnect it. The first task is to remove the No. 1 under engine cover and drain all engine coolant from the system. Start by removing the front wiper motor and links and then disconnect the front cowl top outer panel sub-assembly through the process of unclipping two washer hoses and removing seven bolts. Start by uninstalling the V-bank cover through the process of removing its 2 nuts. To begin the process remove the No. 2 air cleaner hose by first releasing the clamp fastener and following with the removal of 2 bolts. Start by disconnecting the No. 2 ventilation hose and detaching its hose clamp and vacuum hose as well as separating the MAF meter connector and detaching 2 wire harness clamps using a clip remover before loosening the hose clamp to remove the 2 bolts of the air cleaner assembly with element. To work on the intake air surge tank, you must disconnect eight elements: throttle position sensor and throttle control motor connector with the No. 4 and No. 5 water by-pass hoses, purge line hose, purge VSV connector and union to check valve hose, and finally the No. 1 ventilation hose along with the vacuum switching valve connector. Start by using a clip remover to detach wire harness clamps then remove 2 bolts holding the throttle body bracket, the clamp and bolt from the wire harness and finally uninstall the No. 1 and No. 2 surge tank stays by removing 2 bolts. Finish the process by unscrewing the 2 nuts then use an 8 mm hexagon wrench to detach 4 bolts from around the intake air surge tank and gasket. Remove the fuel delivery pipe sub-assembly followed by the intake manifold sub-assembly by taking out the 10 bolts and two gaskets and the intake manifold.
    Posted by ToyotaPartsNow Specialist
    Q:
    How should the throttle body cover sub-assembly be installed for the 2008 Toyota Sequoia? Posted by Customer
    A:
    Secure 2 throttle body cover brackets with 2 bolts torqued to 7.5 Nm (76 kgf-cm, 66 in-lbf) and the cover with 2 nuts at the same torque.
    Posted by ToyotaPartsNow Specialist
    See expert answers on similar Intake Manifold
    Q:
    What connections need to be disconnected for the intake manifold assembly for the 2009 Toyota Sequoia? Posted by Customer
    A:
    Disconnect the throttle body connector, the 2 water by-pass hoses, the No. 1 ventilation hose, the purge VSV connector, the purge line hose, and the vacuum switching valve assembly connector.
    Posted by ToyotaPartsNow Specialist
    See expert answers on similar Intake Manifold
    Q:
    What is the installation process for the intake manifold for the 2007 Toyota Tundra? Posted by Customer
    A:
    Set a new gasket on each cylinder head, align with port holes, place the intake manifold, and uniformly tighten the 10 bolts to a torque of 26 N.m.
    Posted by ToyotaPartsNow Specialist
    See expert answers on similar Intake Manifold
    Q:
    How do you connect the water by-pass hoses for the 2009 Toyota Tundra? Posted by Customer
    A:
    Connect the No. 4 and No. 5 water by-pass hoses, and the throttle position sensor and throttle control motor connector.
    Posted by ToyotaPartsNow Specialist
    See expert answers on similar Intake Manifold
    Q:
    How should the oil baffle plate be attached for the 2008 Toyota Tundra? Posted by Customer
    A:
    Attach the oil baffle plate with one bolt at 9.0 Nm (92 kgf-cm, 80 in-lbf).
    Posted by ToyotaPartsNow Specialist
    See expert answers on similar Intake Manifold
    If you have any questions about this product, please don't hesitate to ask us. We will be happy to help you!

OEM Toyota 17120-50020, Excellent Performance and Perfect Fitment

To ensure reliability, purchase Toyota part # 17120-50020 Intake Manifold. It is sometimes referred to as Toyota Intake Manifold. OEM parts are unrivaled in terms of quality. They go through extensive quality control inspections and are produced in accordance with Toyota's official factory specifications. All of these remove defects and imperfections. So you can relax knowing they promise exceptional lifespan and flawless fitment.

ToyotaPartsNow.com is a leading supplier of genuine Toyota parts such as Toyota 1712050020 Intake Manifold. At ToyotaPartsNow.com, we have a wide variety of OEM Toyota parts available at competitive prices. Our comprehensive range of genuine Toyota parts come with a manufacturer's warranty for peace of mind. We also prioritize customer satisfaction, providing a hassle-free return policy and expedited delivery for all our parts. For detailed Toyota parts information, click here.
Choose ToyotaPartsNow for discounted prices, exceptional service and fast delivery