My Garage
Cart
Make sure this part fits

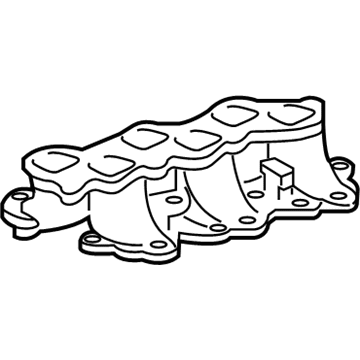
Toyota 17111-31141
Manifold, Intake, Lower

2006-2017 Toyota 1711131141

Customer Questions & Expert Answers (8)
Toyota 17111-31141 Manifold, Intake, Lower
  • Part Description
    Intake Manifold
  • Part Name Code
    17111
  • Position
    Lower
  • Manufacturer
    Toyota
Make sure this part fits
$381.24 MSRP: $558.71
You Save: $177.47 (32%)
Ships in 1-3 Business Days
1
ADD TO CART
  • Related Parts
  • Product Specifications
  • Vehicle Fitment
  • Customer Questions & Expert Answers
  • Product Specifications

    BrandGenuine Toyota
    Part Name Code17111
    Manufacturer Part Number17111-31141
    Part DescriptionIntake Manifold
    Item Dimensions18.7 x 14.1 x 8.3 inches
    Item Weight9.60 Pounds
    PositionLower
    ConditionNew
    Fitment TypeDirect Replacement
    ManufacturerToyota
    SKU17111-31141
    WarrantyThis genuine Toyota part is guaranteed by Toyota's factory warranty.
    Shipping & ReturnShipping Policy Return Policy
    Warning: California's Proposition 65
  • Vehicle Fitment

    Year Make Model Trim Engine
    2011-2012, 2006-2008 Toyota AvalonBase, Limited, Touring, XL, XLS6 Cyl 3.5 L GAS
    2007-2017 Toyota CamrySE, XLE, XSE6 Cyl 3.5 L GAS
    2008-2016 Toyota HighlanderBase, Hybrid, Hybrid Limited, Limited, Plus, SE6 Cyl 3.5 L FULL HYBRID EV-GAS (FHEV), 6 Cyl 3.5 L GAS
    2006-2012 Toyota RAV4Base, Limited, Sport6 Cyl 3.5 L GAS
    2007-2009 Toyota SiennaCE, LE, Limited, XLE6 Cyl 3.5 L GAS
    2009-2015 Toyota VenzaBase, LE, Limited, XLE6 Cyl 3.5 L GAS
  • Customer Questions & Expert Answers

    Q:
    Is 17111-31141 a good match for my car? Posted by ToyotaPartsNow Specialist
    A:
    Find out if part number 17111-31141 is the right fit for your car by Selecting Your Vehicle model.
    Posted by ToyotaPartsNow Specialist
    Q:
    How to remove the intake manifold on Toyota RAV4? Posted by Customer
    A:
    Before starting the process for removing the intake manifold on 2AR-FE engines, operators should discharge fuel system pressure initially. The first step involves taking off the engine under cover at position No. 1 before emptying the engine coolant. The battery cable needs disconnection from the negative terminal while remaining without power for at least 90 seconds to deactivate the SRS system. The front wiper motor with link must be disassembled before removing the cowl ventilator housing through its 4 clamps. Unscrew the three clamps followed by disconnecting the wire harness to pull off the cowl top outer panel which requires disconnecting the union to connector tube hose. Remove the two tube nuts while disconnecting the hose before detaching both heater radiator unit and cylinder head inlet and outlet heater hoses. The procedure consists of removing the No. 1 engine cover sub-assembly together with the air cleaner cap sub-assembly along with the throttle body assembly. Vehicle maintenance requires disconnecting the fuel tube sub-assembly along with the wire harness through disconnecting the 4 injector connectors and 2 other connectors followed by removing the 2 bolts and brackets. Connect the battery voltage to the connector terminals for 1 to 3 seconds which should not exceed 3 seconds to prevent damage to the tumble control valves. You need to remove the bolt before you detach the 2 clamps from the intake manifold and bracket along with disconnecting the intake air control valve actuator connector and detaching the clamp with wire harness. The ACIS maintenance process involves removing the vacuum switching valve assembly after disconnecting both vacuum hoses and the union to connector tube hose with the help of a bolt. Remove the No. 2 ventilation hose from the intake manifold before removing its 6 bolts while keeping valves in the closed position. First disconnect both vacuum hoses from the check valve and intake manifold positions followed by gasket removal from the intake manifold and unhooking the hose connecting the union to the connector tube. First disconnect the wiring harness clamp bracket then remove the purge line hose from the clamp followed by removing the clamp from the intake manifold.
    Posted by ToyotaPartsNow Specialist
    Q:
    How to install the intake manifold on Toyota RAV4? Posted by Customer
    A:
    The first task for installing the 2AR-FE engine intake manifold involves fitting the intake air control valve actuator for the TCV. The clamp installation on the intake manifold should be followed by the purge line hose connection at the clamp interface. You should install the wiring harness clamp bracket through a bolt application at 10 Nm (102 kgf-cm, 7 ft-lbf) torque. The check valve installation requires two vacuum hoses to connect to the intake manifold as per the installation checklist. The installer must attach the connector tube hose with union to the intake manifold. The tumble control valves should stay closed during intake manifold installation to avoid damage while both the manifold and the gasoline tank parts must be assembled using 6 bolts at 21 Nm (214 kgf-cm, 15 ft-lbf). After connecting the No. 2 ventilation hose to the intake manifold you must proceed with the fuel delivery pipe sub-assembly installation. Secure the vacuum switching valve assembly for ACIS with a bolt to a torque of 9.0 Nm (92 kgf-cm, 80 in-lbf) while attaching the 2 vacuum hoses and union to connector tube hose. You should clamp and connect the wire harness before installing the bracket with a bolt tightened to 10 Nm (102 kgf-cm, 7 ft-lbf). Then attach the intake air control actuator connector before securing the wire harness with bolts and clamps. Use 2 bolts to join the 2 wire harness brackets at 10 Nm (102 kgf-cm, 7 ft-lbf). Each bolt should achieve this torque. After which, connect the 2 connectors along with their 4 injector connectors. After assembly of the fuel tube sub-assembly and throttle body assembly and air cleaner cap sub-assembly one should proceed with installation. First attach the outlet heater water hose to both the by-pass pipe and heater radiator unit followed by the inlet heater water hose connection to the cylinder head and heater radiator unit. The hose requires installation through the hose tube using two nuts tightened to 5.4 Nm (55 kgf-cm, 48 in-lbf) before attaching the hose. Secure the tube end of connector tube hose to the tube using the union component. Fasten the cowl top outer panel sub-assembly using 14 bolts which need tightening to a torque of 7.0 Nm (71 kgf-cm, 62 in-lbf) followed by attaching 3 clamps. The cowl ventilator housing sub-assembly requires four clamps for installation before installing the front wiper motor and link. To complete the procedure, attach the cable to the negative battery terminal, add engine coolant and inspect for coolant and fuel leaks before installing the No. 1 engine under cover and No. 1 engine cover sub-assembly.
    Posted by ToyotaPartsNow Specialist
    Q:
    What follows the removal of the wiper assemblies for the 2008 Toyota Highlander? Posted by Customer
    A:
    Remove the cowl top ventilator louver sub-assembly, windshield wiper motor and link assembly, and the outer cowl top panel sub-assembly.
    Posted by ToyotaPartsNow Specialist
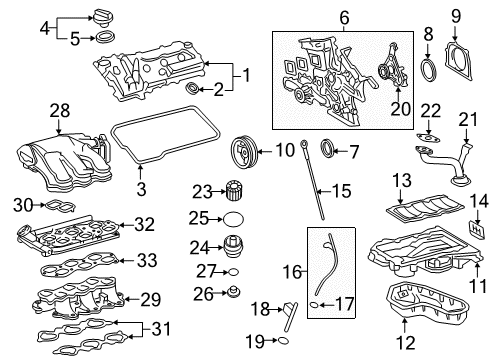
    See expert answers on similar Intake Manifold
    Q:
    What should be noted about the valves before removal for the 2009 Toyota Highlander? Posted by Customer
    A:
    The valves may be damaged if not closed before removal.
    Posted by ToyotaPartsNow Specialist
    See expert answers on similar Intake Manifold
    Q:
    What hoses should be connected next for the 2009 Toyota Highlander? Posted by Customer
    A:
    Connect the outlet and inlet heater water hoses.
    Posted by ToyotaPartsNow Specialist
    See expert answers on similar Intake Manifold
    Q:
    What is the final step in the installation process for the 2009 Toyota Venza? Posted by Customer
    A:
    Inspect for fuel leaks.
    Posted by ToyotaPartsNow Specialist
    See expert answers on similar Intake Manifold
    Q:
    What should be done after discharging the fuel system pressure for the 2009 Toyota Venza? Posted by Customer
    A:
    Disconnect the cable from the negative battery terminal, noting that some systems may require initialization after reconnection.
    Posted by ToyotaPartsNow Specialist
    See expert answers on similar Intake Manifold
    If you have any questions about this product, please don't hesitate to ask us. We will be happy to help you!

OEM Toyota 17111-31141, Excellent Performance and Perfect Fitment

To ensure reliability, purchase Toyota part # 17111-31141 Manifold, Intake, Lower. It is sometimes referred to as Toyota Intake Manifold. OEM parts are unrivaled in terms of quality. They go through extensive quality control inspections and are produced in accordance with Toyota's official factory specifications. All of these remove defects and imperfections. So you can relax knowing they promise exceptional lifespan and flawless fitment.

ToyotaPartsNow.com is a leading supplier of genuine Toyota parts such as Toyota 1711131141 Manifold, Intake, Lower. At ToyotaPartsNow.com, we have a wide variety of OEM Toyota parts available at competitive prices. Our comprehensive range of genuine Toyota parts come with a manufacturer's warranty for peace of mind. We also prioritize customer satisfaction, providing a hassle-free return policy and expedited delivery for all our parts. For detailed Toyota parts information, click here.
Choose ToyotaPartsNow for discounted prices, exceptional service and fast delivery