My Garage
Cart
Make sure this part fits

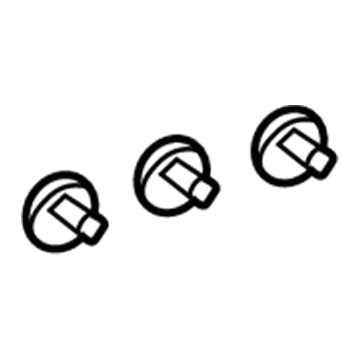
Toyota 55905-17090
Knob

2000-2005 Toyota 5590517090

Customer Questions & Expert Answers (6)
Toyota 55905-17090 Knob
  • Part Description
    Knob Sub-Assembly, Control; HVAC Heater Control Knob
  • Part Name Code
    55905K
  • Replaces
    55905-2B080, 55905-17080, 55905-2B750
  • Manufacturer
    Toyota
Make sure this part fits
$14.20 MSRP: $19.77
You Save: $5.57 (29%)
Ships in 1-3 Business Days
1
ADD TO CART
  • Related Parts
  • Product Specifications
  • Vehicle Fitment
  • Customer Questions & Expert Answers
  • Product Specifications

    BrandGenuine Toyota
    Part Name Code55905K
    Manufacturer Part Number55905-17090
    Part DescriptionKnob Sub-Assembly, Control; HVAC Heater Control Knob
    Other NamesKnob, Heater Control
    Item Weight0.50 Pounds
    ConditionNew
    Fitment TypeDirect Replacement
    Replaces55905-2B080, 55905-17080, 55905-2B750
    Require Quantity3
    ManufacturerToyota
    SKU55905-17090
    WarrantyThis genuine Toyota part is guaranteed by Toyota's factory warranty.
    Shipping & ReturnShipping Policy Return Policy
    Warning: California's Proposition 65
  • Vehicle Fitment

    Year Make Model Trim Engine
    2000-2005 Toyota CelicaGT, GTS4 Cyl 1.8 L GAS
    2000-2005 Toyota MR2 SpyderBase4 Cyl 1.8 L GAS
  • Customer Questions & Expert Answers

    Q:
    Will this 55905-17090 work for my car? Posted by ToyotaPartsNow Specialist
    A:
    Find out if part number 55905-17090 is the right fit for your car by Selecting Your Vehicle model.
    Posted by ToyotaPartsNow Specialist
    Q:
    How to service and repair the A/C Switch on Toyota Celica? Posted by Customer
    A:
    Service and repair operations on the Heater Control Assembly must start with the removal of the center cluster finish panel followed by disconnecting the heater control cables but maintaining the air mix damper control cables intact. Proceed to remove the heater control assembly by disengaging its 2 claws followed by pulling out the A/C control assembly then unlink the connector. The procedure for heater control panel service requires removal of 2 screws before sliding out the A/C control assembly. Begin installation of the A/C control panel by using its two screws to fasten the unit. Place the A/C control assembly temporarily while aligning the A/C control cables according to illustrations before inserting the 2 heater control assembly claws through the instrument panel hole. Follow the wiring steps by setting the air inlet control lever to "RECIRC" at the same time as the temperature control dial to "MAX. COOL" and the mode control dial to "DEF." COOL," and the mode control dial to "DEF." The adjustment of the air inlet damper control cable requires moving the air inlet damper control lever to "RECIRC," then linking the inner cable to its pin and clamping the outer cable before securing the clamp with mild pressure on the specified direction of the cable. To change the air mix damper control cable position set the air mix damper control lever to "MAX COOL. " The process of controlling the outer cable begins with locking the clamp mechanism while applying gentle pressure in the shown direction. The procedure ends by pulling the air outlet damper control link to "DEF" then connecting the control cable before locking the clamp while applying gentle pressure on the outer cable according to the indications.
    Posted by ToyotaPartsNow Specialist
    Q:
    How to service and repair the A/C Switch on Toyota MR2 Spyder? Posted by Customer
    A:
    Service and repair of the Heater Control Assembly requires center cluster finish panel removal following these steps: first unmount all 4 knobs and 2 screws and detach the panel with a taped-tipped screwdriver until you disconnect the clock connector and remove the panel. Begin by taking out the glove compartment door after which disconnect the heater control cables while keeping away from bending them. The heater control assembly requires removal through screwing off 4 screws and disconnecting 2 connectors. When installing the heater control assembly users need to connect its two connectors before threading the A/C control cables as shown in the diagram and then using four screws to secure it. All installation work concludes when you connect the clock connector before fastening the 2 screws and putting back the 4 knobs to replace the center cluster finish panel. Connect the heater control cables by positioning the air inlet control lever to "RECIRC," the temperature control dial to "MAX. COOL," the mode control dial to "FACE". Set the mode control dial to "FACE" after setting the temperature control dial to "MAX. COOL" and the "COOL" setting on the air inlet lever. The air inlet damper control adjustment requires setting the lever to RECIRC position and connecting the inner cable to the lever pin before clamping the outer cable with gentle cable tensioning according to the provided directions. Follow the same procedure for the air mix damper control cable by positioning the lever at "MAX. COOL. To adjust the outer cable controls we use the COOL setting on the lever followed by connecting the two cables and clamping the outer cable while performing the specified clamping action. Use the face adjustment to pull the link on the air outlet damper control before connecting the cables and securing the clamp then replace the glove compartment door.
    Posted by ToyotaPartsNow Specialist
    Q:
    What is the next step after removing the combination meter for the 2005 Toyota Celica? Posted by Customer
    A:
    Remove the ECM.
    Posted by ToyotaPartsNow Specialist
    See expert answers on similar A/C Switch
    Q:
    How do you adjust the air mix damper control cable for the 2000 Toyota Celica? Posted by Customer
    A:
    Set the air mix damper control lever to "MAX. COOL," connect the inner cable to the lever pin, and clamp the outer cable, locking the clamp while lightly pushing the outer cable in the indicated direction.
    Posted by ToyotaPartsNow Specialist
    See expert answers on similar A/C Switch
    Q:
    What are the steps for installation of the heater control assembly for the 2003 Toyota MR2 Spyder? Posted by Customer
    A:
    Connect the 2 connectors to the heater control assembly, pass the A/C control cables through as illustrated, and secure the assembly with the 4 screws.
    Posted by ToyotaPartsNow Specialist
    See expert answers on similar A/C Switch
    If you have any questions about this product, please don't hesitate to ask us. We will be happy to help you!

OEM Toyota 55905-17090, Excellent Performance and Perfect Fitment

To ensure reliability, purchase Toyota part # 55905-17090 Knob. It is sometimes referred to as Toyota A/C Switch, Toyota Blower Control Switches. OEM parts are unrivaled in terms of quality. They go through extensive quality control inspections and are produced in accordance with Toyota's official factory specifications. All of these remove defects and imperfections. So you can relax knowing they promise exceptional lifespan and flawless fitment.

ToyotaPartsNow.com is a leading supplier of genuine Toyota parts such as Toyota 5590517090 Knob. At ToyotaPartsNow.com, we have a wide variety of OEM Toyota parts available at competitive prices. Our comprehensive range of genuine Toyota parts come with a manufacturer's warranty for peace of mind. We also prioritize customer satisfaction, providing a hassle-free return policy and expedited delivery for all our parts. For detailed Toyota parts information, click here.
Choose ToyotaPartsNow for discounted prices, exceptional service and fast delivery