My Garage
Cart
Make sure this part fits

Toyota 23209-0P040
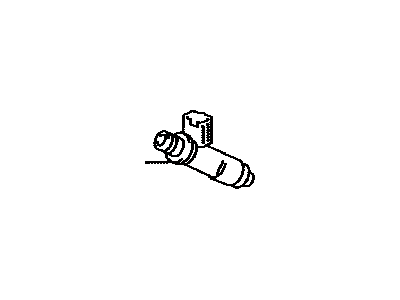
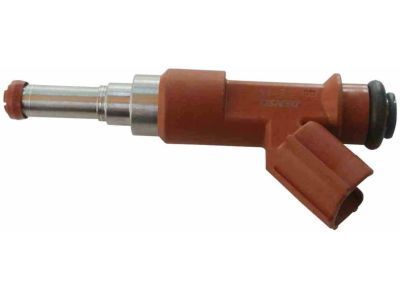
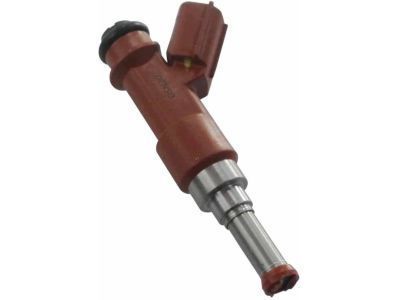
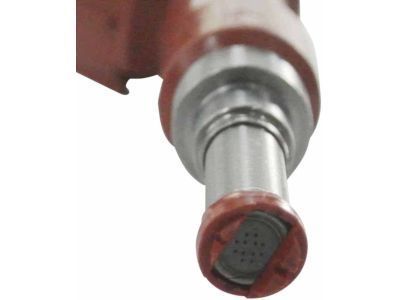
Injector

2005-2015 Toyota 232090P040

Customer Questions & Expert Answers (25)
Toyota 23209-0P040 Injector
  • Part Description
    Injector Set, Fuel; Fuel Injector
  • Part Name Code
    23250
  • Replaces
    23209-31050
  • Manufacturer
    Toyota
Make sure this part fits
$146.39 MSRP: $207.24
You Save: $60.85 (30%)
Ships in 1-3 Business Days
1
ADD TO CART
  • Related Parts
  • Product Specifications
  • Vehicle Fitment
  • Customer Questions & Expert Answers
  • Product Specifications

    BrandGenuine Toyota
    Part Name Code23250
    Manufacturer Part Number23209-0P040
    Part DescriptionInjector Set, Fuel; Fuel Injector
    Other NamesInjector Assembly, Fuel
    Manufacturer Note(L)
    Item Dimensions3.7 x 2.8 x 1.4 inches
    Item Weight0.50 Pounds
    ConditionNew
    Fitment TypeDirect Replacement
    Replaces23209-31050
    Require Quantity6
    ManufacturerToyota
    SKU23209-0P040
    WarrantyThis genuine Toyota part is guaranteed by Toyota's factory warranty.
    Shipping & ReturnShipping Policy Return Policy
    Warning: California's Proposition 65
  • Vehicle Fitment

    Year Make Model Trim Engine
    2005-2012 Toyota AvalonBase, Limited, Touring, XL, XLS6 Cyl 3.5 L GAS
    2007-2011 Toyota CamryLE, SE, XLE6 Cyl 3.5 L GAS
    2008-2010 Toyota HighlanderBase, Limited, SE, Sport6 Cyl 3.5 L GAS
    2006-2012 Toyota RAV4Base, Limited, Sport6 Cyl 3.5 L GAS
    2007-2010 Toyota SiennaCE, LE, Limited, XLE6 Cyl 3.5 L GAS
    2009-2015 Toyota VenzaBase, LE, Limited, XLE6 Cyl 3.5 L GAS
  • Customer Questions & Expert Answers

    Q:
    Any advice on whether 23209-0P040 is suitable for my car? Posted by ToyotaPartsNow Specialist
    A:
    Find out if part number 23209-0P040 is the right fit for your car by Selecting Your Vehicle model.
    Posted by ToyotaPartsNow Specialist
    Q:
    How to remove the fuel injector on Toyota Avalon? Posted by Customer
    A:
    You need to drain the fuel system pressure before taking off the 2GR-FE fuel injector component while also disconnecting the negative battery terminal cable with a note about post-reconnection system initialization. As the first step drain all engine coolant then remove both windshield wipers and their attached arm and blades simultaneously followed by removing the right cowl top ventilator louver and the windshield wiper motor together with link assembly. After removing the outer cowl top panel and V-bank cover sub-assembly you must remove their three retaining clips in their proper order. To reach the air cleaner cap with its attached hose, disconnect the 3 vacuum hoses and ventilation hose No. 1, air flow meter connector, fuel vapor feed hose No. 1 before loosening the hose clamp bolt and removing the 3 clamps. After detaching the 2 water by-pass hoses and vapor feed hose as well as the throttle with motor body assembly connector and clamp the ventilation hose No. 2 and union to check valve hose follow to remove the bolt then vacuum hose clamp before disconnecting the connector use a 5 mm socket hexagon wrench to remove the 4 bolts and then 2 nuts and 2 bolts followed by the intake air surge tank extraction. It is necessary to disconnect the fuel tube sub-assembly through these steps: remove fuel pipe clamp No. 2 and pinch the tube connector and pull out the fuel pipe and prevent dirt entry into the connector. You can remove the fuel injector assembly by disconnecting all six fuel injector connectors and extracting five bolts that hold the fuel delivery pipe with its six fuel injectors then carefully retrieve them without letting them drop and afterwards remove the six insulators around the intake manifold before extracting the fuel injector from the delivery pipe.
    Posted by ToyotaPartsNow Specialist
    Q:
    How to remove the fuel injector on Toyota Sienna? Posted by Customer
    A:
    The first step to remove the fuel injector from a 2GR-FE engine starts with discharging fuel system pressure while disconnecting the negative battery terminal cable. The next step requires users to detach the No. 1 engine under cover followed by draining the engine coolant from the system. Start by taking off the wiper arm head cap from the front followed by right and left front wiper arm removal then move onto the cowl top ventilator louver sub-assembly. Begin by removing the windshield wiper motor and link assembly and proceed to extract the No. 1 cowl top to cowl brace inner by uninstalling its 2 bolts. You need to start by removing the cowl top panel sub-assembly outer front through a process of wire harness clamp disconnection and fuel pump resistor connector detachment and 7 bolt removal. Your task begins with taking out the V-bank cover sub-assembly and then moving to the air cleaner cap sub-assembly where you must disconnect 3 vacuum hoses and remove the No. 2 ventilation hose and air cleaner hose band then release the EVAP vacuum hose and remove 2 bolts. To remove the intake air surge tank assembly use a 5 mm socket hexagon wrench which first requires removing four bolts then two nuts and two bolts afterward followed by the gasket removal. Disconnect the fuel tube sub-assembly by unclamping the No. 2 fuel pipe and drawing out the fuel pipe until completion without allowing dirt to penetrate the quick connector. To remove the fuel injector assembly, first disconnect the 6 fuel injector connectors then remove 5 bolts that let go of the fuel delivery pipe sub-assembly along with its 6 fuel injectors while keeping an eye out for drops. Wrap up the process by taking away the 6 injector vibration insulators from the intake manifold and extracting the fuel injectors from the fuel delivery pipe sub-assembly followed by removing the 6 O-rings from the fuel injectors.
    Posted by ToyotaPartsNow Specialist
    Q:
    What should be done with the insulators after removing the fuel injectors for the 2008 Toyota Avalon? Posted by Customer
    A:
    Finally, remove the 6 insulators from the intake manifold and pull out the fuel injectors from the fuel delivery pipe.
    Posted by ToyotaPartsNow Specialist
    See expert answers on similar Fuel Injector
    Q:
    What components need to be removed next for the 2008 Toyota Camry? Posted by Customer
    A:
    Remove the air cleaner cap sub-assembly and the No. 1 engine cover sub-assembly.
    Posted by ToyotaPartsNow Specialist
    See expert answers on similar Fuel Injector
    Q:
    How should the surge tank be secured for the 2009 Toyota Avalon? Posted by Customer
    A:
    Install the surge tank with 2 nuts and 2 bolts, torquing the nuts to 16 Nm and the bolts to 21 Nm.
    Posted by ToyotaPartsNow Specialist
    See expert answers on similar Fuel Injector
    Q:
    How should the fuel injectors be installed onto the fuel delivery pipe for the 2008 Toyota Camry? Posted by Customer
    A:
    Install the right and left fuel injectors onto the fuel delivery pipe, ensuring the O-ring is not cracked or jammed.
    Posted by ToyotaPartsNow Specialist
    See expert answers on similar Fuel Injector
    Q:
    What is the process to remove the fuel injector assembly for the 2007 Toyota Avalon? Posted by Customer
    A:
    Disconnect the 6 fuel injector connectors, remove the 5 bolts, and pull out the fuel injectors from the fuel delivery pipe.
    Posted by ToyotaPartsNow Specialist
    See expert answers on similar Fuel Injector
    Q:
    What is the process to remove the fuel injector assembly for the 2006 Toyota Avalon? Posted by Customer
    A:
    Disconnect the 6 fuel injector connectors, remove the 5 bolts, and take out the fuel delivery pipe with the 6 fuel injectors, then remove the 6 insulators from the intake manifold and pull out the fuel injectors.
    Posted by ToyotaPartsNow Specialist
    See expert answers on similar Fuel Injector
    Q:
    What is the next step after connecting the fuel tube sub-assembly for the 2009 Toyota Highlander? Posted by Customer
    A:
    Install the No. 1 fuel pipe clamp and the fuel tube sub-assembly to the fuel hose clamp.
    Posted by ToyotaPartsNow Specialist
    See expert answers on similar Fuel Injector
    Q:
    What is the final step regarding the battery for the 2010 Toyota Camry? Posted by Customer
    A:
    Connect the cable to the negative battery terminal and inspect for fuel leaks.
    Posted by ToyotaPartsNow Specialist
    See expert answers on similar Fuel Injector
    Q:
    What is the next step after removing the air cleaner cap sub-assembly for the 2008 Toyota Highlander? Posted by Customer
    A:
    Disconnect the engine room main wire.
    Posted by ToyotaPartsNow Specialist
    See expert answers on similar Fuel Injector
    Q:
    How do you connect the fuel tube sub-assembly for the 2007 Toyota Camry? Posted by Customer
    A:
    Install the fuel tube to the fuel hose clamp, push the connector until it clicks, and install the No. 1 fuel pipe clamp.
    Posted by ToyotaPartsNow Specialist
    See expert answers on similar Fuel Injector
    Q:
    What components need to be removed next for the 2009 Toyota Camry? Posted by Customer
    A:
    Remove the air cleaner cap sub-assembly and the No. 1 engine cover sub-assembly.
    Posted by ToyotaPartsNow Specialist
    See expert answers on similar Fuel Injector
    Q:
    What components need to be removed to access the fuel injector for the 2006 Toyota RAV4? Posted by Customer
    A:
    Remove the No. 1 engine cover and the air cleaner cap sub-assembly, then disconnect the fuel main tube without bending it.
    Posted by ToyotaPartsNow Specialist
    See expert answers on similar Fuel Injector
    Q:
    What components need to be removed next for the 2009 Toyota Highlander? Posted by Customer
    A:
    Remove the No. 1 engine cover sub-assembly and the air cleaner cap sub-assembly.
    Posted by ToyotaPartsNow Specialist
    See expert answers on similar Fuel Injector
    Q:
    What is the next step regarding the battery for the 2008 Toyota RAV4? Posted by Customer
    A:
    Disconnect the cable from the negative battery terminal and wait at least 90 seconds to prevent airbag activation.
    Posted by ToyotaPartsNow Specialist
    See expert answers on similar Fuel Injector
    Q:
    What should be done after installing the O-rings on the fuel injectors for the 2008 Toyota RAV4? Posted by Customer
    A:
    Apply a light coat of gasoline or spindle oil to the part of the fuel delivery pipe that contacts the O-ring of the fuel injector, then apply it again to the O-ring before installing the right and left fuel injectors onto the fuel delivery pipe.
    Posted by ToyotaPartsNow Specialist
    See expert answers on similar Fuel Injector
    Q:
    How do you connect the fuel tube for the 2009 Toyota RAV4? Posted by Customer
    A:
    Connect the fuel tube by pushing the connector until it clicks, then install the No. 2 fuel pipe clamp and secure the fuel tube to the fuel hose clamp.
    Posted by ToyotaPartsNow Specialist
    See expert answers on similar Fuel Injector
    Q:
    What is the procedure for installing the injectors for the 2007 Toyota RAV4? Posted by Customer
    A:
    Install the injectors and ensure they rotate smoothly, then install new insulators and delivery pipe spacers.
    Posted by ToyotaPartsNow Specialist
    See expert answers on similar Fuel Injector
    Q:
    How do you install the fuel injectors for the 2007 Toyota Sienna? Posted by Customer
    A:
    Push the fuel injector while turning it to install it in the fuel delivery pipe, ensuring the connector is positioned outward.
    Posted by ToyotaPartsNow Specialist
    See expert answers on similar Fuel Injector
    Q:
    What is the procedure for installing the air cleaner cap sub-assembly for the 2008 Toyota Sienna? Posted by Customer
    A:
    Install the air cleaner cap sub-assembly with 2 bolts, connect the No. 2 ventilation hose, air cleaner hose band, vacuum hose (EVAP), and 3 vacuum hoses.
    Posted by ToyotaPartsNow Specialist
    See expert answers on similar Fuel Injector
    Q:
    What components need to be removed next for the 2009 Toyota Venza? Posted by Customer
    A:
    Remove the windshield wiper motor and link assembly, followed by the outer cowl top panel.
    Posted by ToyotaPartsNow Specialist
    See expert answers on similar Fuel Injector
    Q:
    What should be done after disconnecting the battery for the 2009 Toyota Sienna? Posted by Customer
    A:
    Remove the No. 1 engine under cover and drain the engine coolant.
    Posted by ToyotaPartsNow Specialist
    See expert answers on similar Fuel Injector
    Q:
    How do you ensure a proper connection of the tube connector for the 2009 Toyota Venza? Posted by Customer
    A:
    Push the tube connector to the pipe until it clicks, ensuring there is no damage or foreign matter on the connecting part, and check the connection by trying to pull them apart.
    Posted by ToyotaPartsNow Specialist
    See expert answers on similar Fuel Injector
    If you have any questions about this product, please don't hesitate to ask us. We will be happy to help you!

OEM Toyota 23209-0P040, Excellent Performance and Perfect Fitment

To ensure reliability, purchase Toyota part # 23209-0P040 Injector. It is sometimes referred to as Toyota Fuel Injector. OEM parts are unrivaled in terms of quality. They go through extensive quality control inspections and are produced in accordance with Toyota's official factory specifications. All of these remove defects and imperfections. So you can relax knowing they promise exceptional lifespan and flawless fitment.

ToyotaPartsNow.com is a leading supplier of genuine Toyota parts such as Toyota 232090P040 Injector. At ToyotaPartsNow.com, we have a wide variety of OEM Toyota parts available at competitive prices. Our comprehensive range of genuine Toyota parts come with a manufacturer's warranty for peace of mind. We also prioritize customer satisfaction, providing a hassle-free return policy and expedited delivery for all our parts. For detailed Toyota parts information, click here.
Choose ToyotaPartsNow for discounted prices, exceptional service and fast delivery