My Garage
Cart
Make sure this part fits

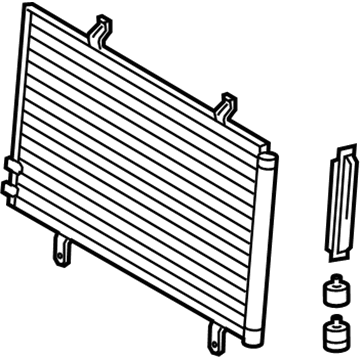
Toyota 88460-06210
Condenser Assembly

2006-2015 Toyota 8846006210

Customer Questions & Expert Answers (12)
Toyota 88460-06210 Condenser Assembly
  • Part Description
    A/C Condenser
  • Part Name Code
    88460
  • Replaces
    88460-33100
  • Manufacturer
    Toyota
Make sure this part fits
$346.22 MSRP: $507.40
You Save: $161.18 (32%)
Ships in 1-3 Business Days
1
ADD TO CART
  • Related Parts
  • Product Specifications
  • Vehicle Fitment
  • Customer Questions & Expert Answers
  • Product Specifications

    BrandGenuine Toyota
    Part Name Code88460
    Manufacturer Part Number88460-06210
    Part DescriptionA/C Condenser
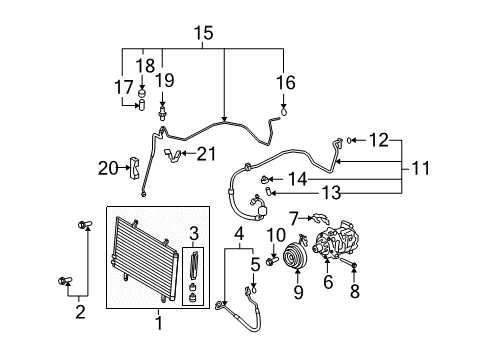
    Other NamesCondenser; Condenser Assembly, Cooler
    Item Dimensions40.1 x 23.2 x 6.4 inches
    Item Weight10.40 Pounds
    ConditionNew
    Fitment TypeDirect Replacement
    Replaces88460-33100
    ManufacturerToyota
    SKU88460-06210
    WarrantyThis genuine Toyota part is guaranteed by Toyota's factory warranty.
    Shipping & ReturnShipping Policy Return Policy
    Warning: California's Proposition 65
  • Vehicle Fitment

    Year Make Model Trim Engine
    2006-2012 Toyota AvalonBase, Limited, Touring, XL, XLS6 Cyl 3.5 L GAS
    2007-2011 Toyota CamryBase, CE, LE, SE, XLE4 Cyl 2.4 L GAS, 4 Cyl 2.5 L GAS, 6 Cyl 3.5 L GAS
    2009-2015 Toyota VenzaBase, LE, Limited, XLE4 Cyl 2.7 L GAS, 6 Cyl 3.5 L GAS
  • Customer Questions & Expert Answers

    Q:
    Can you provide the right 88460-06210 for my car? Posted by ToyotaPartsNow Specialist
    A:
    Find out if part number 88460-06210 is the right fit for your car by Selecting Your Vehicle model.
    Posted by ToyotaPartsNow Specialist
    Q:
    How to remove the A/C Condenser on Toyota Camry? Posted by Customer
    A:
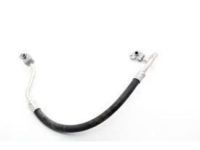
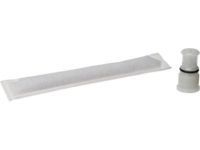
    As the first step to remove the HVAC condenser technicians must recover refrigerant from the refrigeration system. The process of condenser replacement starts with removing the V-bank cover sub-assembly together with the cool air intake duct seal and air cleaner cap sub-assembly followed by the air cleaner inlet assembly and No. 1 air cleaner inlet of the 2GR-FE engine. Both the 2AZ-FE engine requires the removal of the air cleaner cap sub-assembly in addition to the air cleaner inlet sub-assembly. The installation procedure begins by taking out the front bumper assembly including or omitting fog lights and the radiator support upper. You need to extract the hood lock support sub-assembly by unbolt the fastener. Remove the bolt securing the air conditioner tube and then take off the condenser air conditioning tube assembly before extracting its O-ring from the assembly. Use vinyl tape to seal the opened sections of parts to avoid both moisture and foreign materials. The cooing refrigerant discharge pipe can be removed from the condenser by dislodging its bolt and pipe. After extracting the O-ring from the pipe finish the sealing process according to prior protocol. To end the process remove the cooler condenser assembly through bolt removal of the four holding bolts and condenser unit followed by a 14 mm straight hexagon wrench to detach the cap from the modulator and then pliers to separate the cooler dryer unit.
    Posted by ToyotaPartsNow Specialist
    Q:
    How to remove and install an A/C Condenser in a refrigeration system on Toyota Avalon? Posted by Customer
    A:
    The condenser removal procedure starts by discharging refrigerant from the system followed by air cleaner inlet No.2 and air cleaner inlet No.1 removal and hood lock assembly detachment until finally separating the radiator support upper. Before continuing disconnect the bolt holding cooler refrigerant discharge hose No.1 along with its O-ring along with sealing the openings with vinyl tape to stop moisture and foreign matter from entering. The air conditioner tube and accessory should be detached by unbolting them and covering their openings with vinyl tape for sealing. You need to remove the cooler condenser assembly through the removal of its 4 bolts. The installation process starts with fitting the cooler condenser assembly by tightening 4 bolts to 5.0 N.m (51 kgf.cm, 44 in.lbf). Additional 40 cc (1.4 fl. oz.) of ND-8 or equivalent compressor oil should be added when replacing with a new condenser. To install the air conditioner components, start by using ND-OIL 8 or equivalent compressor oil to a new O-ring and the fitting surface before placing the O-ring then fastening the tube with the accessory bolt at 9.8 N.m (100 kgf.cm, 87 in.lbf). After removing the tape from cooler refrigerant discharge hose Number 1 you must apply compressor oil to a new O-ring which you should then install using a torque of 9.8 N.m (100 kgf.cm, 87 in.lbf). The process ends with reinstalling the radiator support upper along with the hood lock assembly before charging the refrigerant and engine warming and leak inspections.
    Posted by ToyotaPartsNow Specialist
    Q:
    How to remove the A/C Condenser on Toyota Camry? Posted by Customer
    A:
    The HVAC condenser needs removal which requires performing refrigerant recovery from the refrigeration system followed by coolant drain of the inverter. The first step requires removal of the air cleaner inlet assembly followed by front bumper assembly and front bumper energy absorber. The work sequence starts with removal of the radiator support upper and subsequent removal of the radiator assembly. You must disconnect the liquid tube sub-assembly through the bolt removal along with O-ring replacement before securing the separated components with vinyl tape for moisture and foreign particles exclusion. Next follow the steps to disconnect the cooler refrigerant discharge pipe after removing its bolt and O-ring while performing vinyl tape seals on all open sections. The final step involves unfastening the 2 bolts holding the condenser before removing the condenser assembly and the cooler dryer through use of a 14 mm straight hexagon wrench to uninstall the modulator cap followed by pliers for removing the coil dryer.
    Posted by ToyotaPartsNow Specialist
    Q:
    How to install an A/C Condenser and its related components on Toyota Venza? Posted by Customer
    A:
    Apply 4 bolts for the cooler condenser assembly installation with 6.0 Nm (61 kgf-cm, 53 in-lbf) torque and add 40 cc (1.35 fl oz.) of ND-OIL 8 or equivalent compressor oil when using a new condenser unit. After removing the vinyl tape from the air conditioning tube and cooler condenser assembly users must apply ND-OIL 8 or equivalent compressor oil to a new O-ring while attaching the tube to the fitting surface with the bolt torqued to 9.8 Nm (100 kgf-cm, 87 in-lbf). Surely for the HVAC discharge hose you should remove the tape, apply compression oil to a new O-ring followed by installation before securing it with a bolt while torquing at 9.8 Nm (100 kgf-cm, 87 in-lbf). Mount the upper radiator support and hood lock support sub-assembly through two bolts before mounting each clamp. The installation sequence includes the hood lock assembly followed by both high-pitched and low-pitched horn assemblies and the three air cleaners and battery before adding the air cleaner case and caps and radiator grille protector and cool air intake duct seal. Attach the cable to the negative terminal while understanding that system initialization might be needed following reinstallation. After charging with refrigerant the technician should warm up the engine before inspecting for refrigerant leaks and conducting checks on the hood sub-assembly followed by necessary adjustments.
    Posted by ToyotaPartsNow Specialist
    Q:
    What should be done for cooler refrigerant discharge hose No.1 for the 2009 Toyota Avalon? Posted by Customer
    A:
    Remove the vinyl tape from the pipe and the cooler condenser assembly connection, apply ND-OIL 8 or equivalent compressor oil to a new O-ring and the fitting surface of the pipe joint, install the O-ring, and secure the hose with a torque of 9.8 Nm (100 kgf-cm, 87 in-lbf).
    Posted by ToyotaPartsNow Specialist
    See expert answers on similar A/C Condenser
    Q:
    What should be reinstalled after connecting the hoses for the 2006 Toyota Avalon? Posted by Customer
    A:
    Reinstall the radiator support upper and hood lock assembly.
    Posted by ToyotaPartsNow Specialist
    See expert answers on similar A/C Condenser
    Q:
    What is the first step in the installation process for the 2007 Toyota Camry? Posted by Customer
    A:
    Install the cooler dryer with pliers, applying sufficient compressor oil to an O-ring and cap fitting surface.
    Posted by ToyotaPartsNow Specialist
    See expert answers on similar A/C Condenser
    Q:
    What steps should be taken regarding coolant and refrigerant for the 2010 Toyota Camry? Posted by Customer
    A:
    Add coolant for the inverter, inspect for coolant leaks, charge with refrigerant, warm up the engine, and inspect for refrigerant leaks.
    Posted by ToyotaPartsNow Specialist
    See expert answers on similar A/C Condenser
    Q:
    What should be applied to the new O-ring and the fitting surface of the hose joint for the 2008 Toyota Avalon? Posted by Customer
    A:
    Apply ND-OIL 8 or equivalent compressor oil.
    Posted by ToyotaPartsNow Specialist
    See expert answers on similar A/C Condenser
    Q:
    What components need to be taken out for the 2008 Toyota Camry? Posted by Customer
    A:
    Remove the air cleaner inlet assembly.
    Posted by ToyotaPartsNow Specialist
    See expert answers on similar A/C Condenser
    Q:
    What additional parts should be removed after the grille for the 2009 Toyota Venza? Posted by Customer
    A:
    Remove inlet No. 2 air cleaner, air cleaner cap sub-assembly, air cleaner case, battery, and inlet No. 1 air cleaner.
    Posted by ToyotaPartsNow Specialist
    See expert answers on similar A/C Condenser
    If you have any questions about this product, please don't hesitate to ask us. We will be happy to help you!

OEM Toyota 88460-06210, Excellent Performance and Perfect Fitment

To ensure reliability, purchase Toyota part # 88460-06210 Condenser Assembly. It is sometimes referred to as Toyota A/C Condenser. OEM parts are unrivaled in terms of quality. They go through extensive quality control inspections and are produced in accordance with Toyota's official factory specifications. All of these remove defects and imperfections. So you can relax knowing they promise exceptional lifespan and flawless fitment.

ToyotaPartsNow.com is a leading supplier of genuine Toyota parts such as Toyota 8846006210 Condenser Assembly. At ToyotaPartsNow.com, we have a wide variety of OEM Toyota parts available at competitive prices. Our comprehensive range of genuine Toyota parts come with a manufacturer's warranty for peace of mind. We also prioritize customer satisfaction, providing a hassle-free return policy and expedited delivery for all our parts. For detailed Toyota parts information, click here.
Choose ToyotaPartsNow for discounted prices, exceptional service and fast delivery