My Garage
Cart
Make sure this part fits

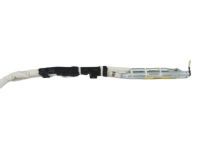
Toyota 84306-07040
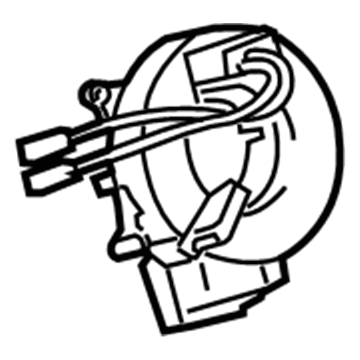
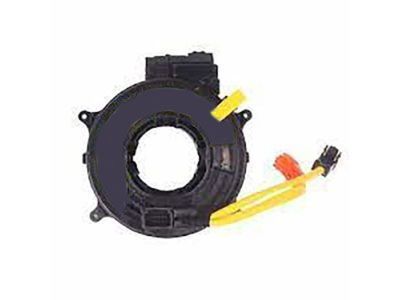
Clockspring

2003-2014 Toyota 8430607040

Customer Questions & Expert Answers (22)
Toyota 84306-07040 Clockspring
  • Part Description
    Cable Sub-Assembly, Spiral; Air Bag Clockspring
  • Part Name Code
    84306
  • Replaces
    84306-06070, 84306-60080, 84306-33090
  • Manufacturer
    Toyota
Make sure this part fits
$247.55 MSRP: $353.45
You Save: $105.90 (30%)
Ships in 1-3 Business Days
1
ADD TO CART
  • Related Parts
  • Product Specifications
  • Vehicle Fitment
  • Customer Questions & Expert Answers
  • Product Specifications

    BrandGenuine Toyota
    Part Name Code84306
    Manufacturer Part Number84306-07040
    Part DescriptionCable Sub-Assembly, Spiral; Air Bag Clockspring
    Item Dimensions6.2 x 5.5 x 4.6 inches
    Item Weight3.30 Pounds
    ConditionNew
    Fitment TypeDirect Replacement
    Replaces84306-06070, 84306-60080, 84306-33090
    ManufacturerToyota
    SKU84306-07040
    WarrantyThis genuine Toyota part is guaranteed by Toyota's factory warranty.
    Shipping & ReturnShipping Policy Return Policy
    Warning: California's Proposition 65
  • Vehicle Fitment

    Year Make Model Trim Engine
    2003-2009 Toyota 4RunnerLimited, Sport, SR56 Cyl 4.0 L GAS, 8 Cyl 4.7 L GAS
    2003-2004 Toyota AvalonXL, XLS6 Cyl 3.0 L GAS
    2007-2014 Toyota FJ CruiserBase, Trail Teams Special Edition, TRD Special Edition6 Cyl 4.0 L GAS
    2003-2007 Toyota Land CruiserBase8 Cyl 4.7 L GAS
    2005-2007 Toyota SequoiaLimited, SR58 Cyl 4.7 L GAS
    2004-2006 Toyota SolaraSE, SE Sport, SLE4 Cyl 2.4 L GAS, 6 Cyl 3.3 L GAS
    2005-2006 Toyota TundraBase, Limited, SR56 Cyl 4.0 L GAS, 8 Cyl 4.7 L GAS
  • Customer Questions & Expert Answers

    Q:
    Can you provide the right 84306-07040 for my car? Posted by ToyotaPartsNow Specialist
    A:
    Find out if part number 84306-07040 is the right fit for your car by Selecting Your Vehicle model.
    Posted by ToyotaPartsNow Specialist
    Q:
    How do you remove the Clock Spring Assembly / Spiral Cable on Toyota 4Runner? Posted by Customer
    A:
    An essential first step for Clock Spring Assembly / Clock Spring replacement involves reading all precautionary procedures. Before proceeding disconnect the negative terminal cable of the car battery while allowing 90 seconds for an Air Bag deployment prevention period. Once finished position the steering wheel so that it faces frontward. The technician must start by removing steering wheel cover lower No. 3 and then continue with lower No. 2 before removing the steering pad. The steering wheel assembly requires removal as the next step. The next step requires three screw removal to extract the steering column cover lower before taking off the steering column cover upper. Disconnect the clock spring connectors after ensuring no harm to either the Air Bag wire harness or Air Bag connector while performing the removing process of its 4 claws.
    Posted by ToyotaPartsNow Specialist
    Q:
    How do you service the Clock Spring Assembly / Spiral Cable on Toyota 4Runner? Posted by Customer
    A:
    The procedure for servicing the Clock Spring Assembly / Clock Spring starts by following all instructions from the Restraint Systems Service Precautions. The negative battery terminal cable needs to be disconnected before waiting 90 seconds to avoid Air Bag deployment. Undock the steering wheel assembly while you take away steering pad and steering wheel cover lower No.2 and No.3. Proceed to remove the steering column cover lower by unscrewing the 3 attachment points before moving onto the upper steering column cover. Disconnect the clock spring connectors while protecting the Air Bag wire harness before removing the cable through disengaging its 4 claws. Install the components when front wheels point straight ahead while maintaining the turn signal switch in neutral position to protect the pin from damage. The installation of the clock spring requires four screws while you need to remove the lock pin if doing a replacement alongside connecting new connectors. The upper and lower steering column covers should be installed after adjusting the clock spring according to instructions that require a switched-off ignition and negative battery terminal disconnection for at least 90 seconds. Tighten the clock spring by rotating it counterclockwise before rotating it clockwise twice to place the marks in proper alignment while keeping away from the Air Bag wire harness. The procedure ends with assembly of the steering wheel and check on the steering wheel center point followed by reinstallation of the steering pad and both steering wheel covers before reattaching the negative battery terminal while checking the SRS warning light.
    Posted by ToyotaPartsNow Specialist
    Q:
    How to install the Clock Spring correctly on Toyota FJ Cruiser? Posted by Customer
    A:
    Installation of the clock spring should start with both front wheels oriented directly ahead while the turn signal switch stands at neutral to stop pin damage. The installation of 4 screws will secure the clock spring while you should remove the lock pin before mounting a new steering wheel assembly. Attachment of connectors to the clock spring must be done with caution because Air Bag wire harness damage can occur when handling the Air Bag connector. Proceed to add both steering column upper and lower cover parts to their respective locations. Limitations of the clock spring need to be done when the ignition switch is OFF while disconnecting the negative battery terminal for a minimum of 90 seconds. The clock spring must be turned counterclockwise by hand until firm before performing a clockwise rotation of 2.5 turns for mark alignment while maintaining the Air Bag wire harness and connectors separate from the rotation. The installation of steering wheel assembly requires a steering wheel center point check. Afterwards you can install and attach the steering pad while adding steering wheel covers to positions No.2 and No.3. Reinstall the cable onto the negative battery terminal while using 3.9 Nm (40 kgf-cm, 35 in-lbf) torque and examine the steering pad. Initialization tests may be required by certain systems after removing the cable from the negative battery terminal while the inspection of the SRS warning light completes the procedure.
    Posted by ToyotaPartsNow Specialist
    Q:
    How do you service the Clock Spring Assembly / Spiral Cable on Toyota Land Cruiser? Posted by Customer
    A:
    A safe procedure for servicing the Clock Spring Assembly / Clock Spring requires a negative cable battery disconnect followed by a 90-second wait period to avoid Air Bag and seat belt pretensioner activation. Service the Clock Spring Assembly / Clock Spring by first removing steering pad assembly, steering wheel assembly, front door scuff plate LH, cowl side trim board LH, front door opening trim Weather Strip LH, and instrument cluster finish panel sub-assembly, No.1 lower panel and steering column cover. Then separate the clock spring sub-assembly by detaching its connectors and removing the 4 screws. The front wheels must be positioned forward as you install the clock spring sub-assembly while securing it with four screws. Breaking the lock pin only occurs when you need to replace it with a new one before attaching the connectors. The sequence for installation involves first adding the steering column cover as well as the No. 1 lower panel and instrument cluster finish panel sub-assembly and front door opening trim Weather Strip LH and cowl side trim board LH and front door scuff plate LH. To properly install the clock spring workers should rotate it counterclockwise until it reaches a firm position and then rotate it clockwise for approximately 2.5 turns to achieve marking alignment while avoiding the Air Bag wire harness for any turning operation. The final steps include steering wheel and steering pad assembly installation while you reconnect the cable to the negative terminal before initializing relevant systems and checking the SRS warning light and steering wheel placement.
    Posted by ToyotaPartsNow Specialist
    Q:
    How do you replace the Clock Spring Assembly / Spiral Cable on Toyota Solara? Posted by Customer
    A:
    The first step for Clock Spring Assembly / Clock Spring replacement involves positioning the front wheels directly ahead and disconnecting the battery terminal with the negative cable. Begin the steering wheel replacement by removing steering wheel cover lower No.2 and No.3. Proceed to take out the horn button assembly followed by the steering wheel assembly using Special Service Tool set 09950-50013 (09951-05010, 09952-05010, 09953-05020, 09954-05021). Remove the steering column cover lower through two screw removal followed by cutting its connectors from a clock spring sub-assembly while avoiding any damage to the Air Bag wire harness. Attention must be given to the clock spring sub-assembly for any damage indications including scratches, cracks and dents or chips before deciding on replacement. Install the clock spring sub-assembly through these steps: turn the turn signal switch to neutral and fasten it with 4 screws then match connectors. Secure the steering column cover along with the lower steering column cover through two bolts. A proper adjustment of the clock spring sub-assembly requires a procedure which begins by turning off the ignition switch and disconnecting the negative battery terminal for a minimum of 90 seconds followed by turning the clock spring counterclockwise until it feels secure and then clocking it up 2.5 times to bring the marks into alignment. The last requirement includes steering wheel assembly installation after inspecting the center point and horn button assembly reinstall followed by battery negative terminal reconnection for horn button and SRS warning light inspection before system initialization after battery reconnection.
    Posted by ToyotaPartsNow Specialist
    Q:
    What is the first step to service and repair the Clockspring Assembly / Spiral Cable for the 2004 Toyota Avalon? Posted by Customer
    A:
    Begin by removing the steering wheel pad, steering wheel, upper and lower column covers, and the spiral cable.
    Posted by ToyotaPartsNow Specialist
    See expert answers on similar Clock Spring
    Q:
    What covers need to be installed after connecting the spiral cable for the 2008 Toyota 4Runner? Posted by Customer
    A:
    Install the upper steering column cover, followed by the lower steering column cover using 3 screws.
    Posted by ToyotaPartsNow Specialist
    See expert answers on similar Clock Spring
    Q:
    What precautions should be taken before adjusting the spiral cable for the 2009 Toyota 4Runner? Posted by Customer
    A:
    Ensure the ignition switch is off and the battery negative (-) terminal is disconnected, waiting at least 90 seconds after removal.
    Posted by ToyotaPartsNow Specialist
    See expert answers on similar Clock Spring
    Q:
    What is the procedure for installing the new spiral cable sub-assembly for the 2005 Toyota 4Runner? Posted by Customer
    A:
    Install it with the 4 screws, making sure to remove the lock pin if applicable.
    Posted by ToyotaPartsNow Specialist
    See expert answers on similar Clock Spring
    Q:
    What is the first step to replace the Clockspring Assembly / Spiral Cable for the 2003 Toyota 4Runner? Posted by Customer
    A:
    Begin by disconnecting the battery negative terminal and ensuring the front wheels are facing straight ahead.
    Posted by ToyotaPartsNow Specialist
    See expert answers on similar Clock Spring
    Q:
    What is the first step to service the Spiral Cable for the 2007 Toyota FJ Cruiser? Posted by Customer
    A:
    Begin by thoroughly reading the precautions related to Restraint Systems.
    Posted by ToyotaPartsNow Specialist
    See expert answers on similar Clock Spring
    Q:
    What is the first step to install the spiral cable for the 2008 Toyota FJ Cruiser? Posted by Customer
    A:
    Ensure the front wheels are facing straight ahead and the turn signal switch is in the neutral position to prevent the pin from snapping.
    Posted by ToyotaPartsNow Specialist
    See expert answers on similar Clock Spring
    Q:
    What is the final step in removing the spiral cable for the 2009 Toyota FJ Cruiser? Posted by Customer
    A:
    Disengage the 4 screws to remove the spiral cable.
    Posted by ToyotaPartsNow Specialist
    See expert answers on similar Clock Spring
    Q:
    How do you position the spiral cable for the 2007 Toyota Land Cruiser? Posted by Customer
    A:
    Slowly rotate it counterclockwise by hand until it feels firm, then rotate it clockwise approximately 2.5 turns to align the marks, avoiding the use of the airbag wire harness for turning.
    Posted by ToyotaPartsNow Specialist
    See expert answers on similar Clock Spring
    Q:
    What should be done after reconnecting the battery cable for the 2005 Toyota Sequoia? Posted by Customer
    A:
    Perform initialization, as some systems require this after disconnection.
    Posted by ToyotaPartsNow Specialist
    See expert answers on similar Clock Spring
    Q:
    What should be inspected on the spiral cable sub-assembly for the 2005 Toyota Solara? Posted by Customer
    A:
    Inspect the spiral cable sub-assembly for any scratches, cracks, dents, or chips, and replace it if any of these conditions are present.
    Posted by ToyotaPartsNow Specialist
    See expert answers on similar Clock Spring
    Q:
    What is the next step after installing the instrument cluster finish panel for the 2004 Toyota Land Cruiser? Posted by Customer
    A:
    Install the front door opening trim LH, cowl side trim LH, and front door scuff plate LH.
    Posted by ToyotaPartsNow Specialist
    See expert answers on similar Clock Spring
    Q:
    What should be done with the battery before starting the service for the 2007 Toyota Sequoia? Posted by Customer
    A:
    Disconnect the cable from the negative battery terminal and wait for 90 seconds to prevent airbag activation.
    Posted by ToyotaPartsNow Specialist
    See expert answers on similar Clock Spring
    Q:
    What should be ensured during installation of the spiral cable sub-assembly for the 2006 Toyota Solara? Posted by Customer
    A:
    Ensure the front wheels are still straight, set the turn signal switch to the neutral position to avoid snapping the pin, and install the spiral cable sub-assembly with the 4 screws, connecting the connectors afterward while being cautious with the airbag connector.
    Posted by ToyotaPartsNow Specialist
    See expert answers on similar Clock Spring
    Q:
    What should be done if the steering wheel pad is dropped or shows defects for the 2005 Toyota Tundra? Posted by Customer
    A:
    It must be replaced with a new one.
    Posted by ToyotaPartsNow Specialist
    See expert answers on similar Clock Spring
    Q:
    Why is it important to follow the correct procedure for the removal and installation of the steering wheel pad for the 2006 Toyota Tundra? Posted by Customer
    A:
    It is essential to avoid any issues.
    Posted by ToyotaPartsNow Specialist
    See expert answers on similar Clock Spring
    If you have any questions about this product, please don't hesitate to ask us. We will be happy to help you!

OEM Toyota 84306-07040, Excellent Performance and Perfect Fitment

To ensure reliability, purchase Toyota part # 84306-07040 Clockspring. It is sometimes referred to as Toyota Clock Spring. OEM parts are unrivaled in terms of quality. They go through extensive quality control inspections and are produced in accordance with Toyota's official factory specifications. All of these remove defects and imperfections. So you can relax knowing they promise exceptional lifespan and flawless fitment.

ToyotaPartsNow.com is a leading supplier of genuine Toyota parts such as Toyota 8430607040 Clockspring. At ToyotaPartsNow.com, we have a wide variety of OEM Toyota parts available at competitive prices. Our comprehensive range of genuine Toyota parts come with a manufacturer's warranty for peace of mind. We also prioritize customer satisfaction, providing a hassle-free return policy and expedited delivery for all our parts. For detailed Toyota parts information, click here.
Choose ToyotaPartsNow for discounted prices, exceptional service and fast delivery