My Garage
Cart
Make sure this part fits

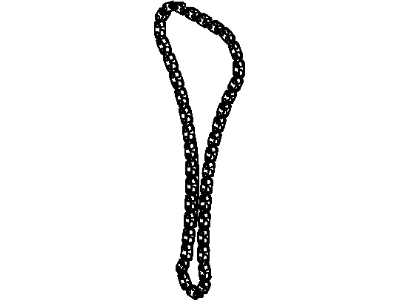
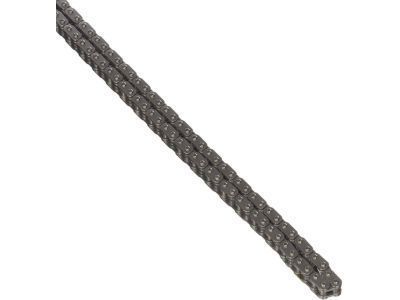
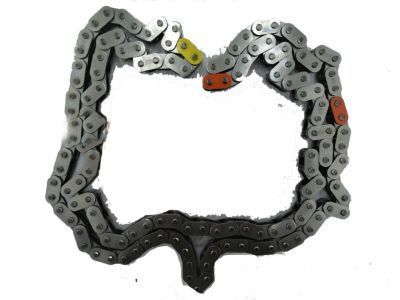
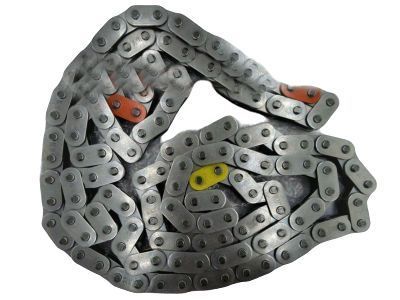
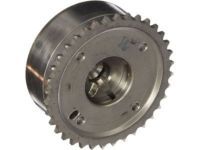
Toyota 13506-88600
Timing Chain

2000-2006 Toyota 1350688600

Customer Questions & Expert Answers (16)
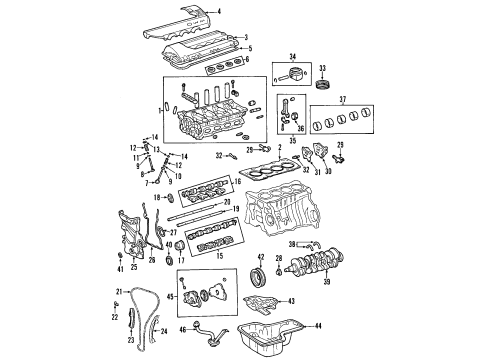
Toyota 13506-88600 Timing Chain
  • Part Description
    Chain Sub-Assembly
  • Part Name Code
    13506
  • Manufacturer
    Toyota
Make sure this part fits
$272.71 MSRP: $389.37
You Save: $116.66 (30%)
Ships in 1-3 Business Days
1
ADD TO CART
  • Related Parts
  • Product Specifications
  • Vehicle Fitment
  • Customer Questions & Expert Answers
  • Product Specifications

    BrandGenuine Toyota
    Part Name Code13506
    Manufacturer Part Number13506-88600
    Part DescriptionChain Sub-Assembly
    Item Dimensions6.3 x 3.2 x 1.3 inches
    Item Weight1.30 Pounds
    ConditionNew
    Fitment TypeDirect Replacement
    ManufacturerToyota
    SKU13506-88600
    WarrantyThis genuine Toyota part is guaranteed by Toyota's factory warranty.
    Shipping & ReturnShipping Policy Return Policy
    Warning: California's Proposition 65
  • Vehicle Fitment

    Year Make Model Trim Engine
    2000-2005 Toyota CelicaGTS4 Cyl 1.8 L GAS
    2005-2006 Toyota CorollaXRS4 Cyl 1.8 L GAS
    2003-2006 Toyota MatrixXRS4 Cyl 1.8 L GAS
  • Customer Questions & Expert Answers

    Q:
    Is 13506-88600 a good match for my car? Posted by ToyotaPartsNow Specialist
    A:
    Find out if part number 13506-88600 is the right fit for your car by Selecting Your Vehicle model.
    Posted by ToyotaPartsNow Specialist
    Q:
    How to Replace a Timing Chain on Toyota Matrix? Posted by Customer
    A:
    Replace the timing chain by first stripping off both engine under cover RH and draining off coolant. Remove cylinder head cover No. 2 by uninstalling the 3 bolts and existing nut before removing the cover. The engine wire harness must be disconnected before the bolt and wiring harness clamp bracket can be removed. The removal of the suction hose sub-assembly starts with the removal of its two nuts together with the hose itself. Using a drive belt tensioner tool to turn clockwise you can first loosen V-belts between the fan and generator before you remove both generator bracket No. 1 along with the generator assembly. The service process starts with disconnecting the ignition coil connectors along with the oil control valve and crankshaft position sensor connector and finally removing the bolt and nut for the earth. The procedure to remove the cylinder head cover sub-assembly includes disconnecting the fuel hose clamp and 2 PCV hoses followed by removing 2 nuts, a bolt and No. 3 ventilation hose before removing 8 bolts, wire harness protector and cylinder head cover and its gasket. Strapping a jack beneath the engine while placing a wooden block between it and the jack enables removal of the 5 bolts and 2 nuts from the engine mounting insulator sub-assembly RH and cylinder head cover through their ordered sequence. Use the crankshaft pulley to set No. 1 cylinder at TDC/compression through alignment of its timing groove with "0" while ensuring the camshaft timing sprocket and VVT timing sprocket point marks match. Detach each of the components including the V-ribbed belt tensioner assembly and crankshaft pulley using Special Service Tools: 09213-70011 (09213-70020) and 09330-00021 as well as the water pump pulley using Special Service Tool: 09960-10010. After uninstalling the water pump assembly through 6 bolts removal you must separate the transverse engine mounting bracket after 4 bolt removal and disconnect the compressor with magnetic clutch by deleting the hoses. Use a torx wrench screw (E8) to delete the timing chain or belt cover sub-assembly and chain tensioner assembly No. 1 with its 2 nuts. The technician must replace the timing gear cover oil seal and crankshaft position sensor plate No. 1 together with chain tensioner slipper and chain vibration damper No. 1. Dismantle the timing chain together with the crankshaft timing gear while using screwdrivers but maintain the engine with a shop rag to prevent damage to the valves. Installation of the chain sub-assembly requires setting No. 1 cylinder to TDC/compression position followed by sprocket point mark alignment and placement of the timing chain on the crankshaft timing sprocket where the yellow mark link should be aligned. Special Service Tool 09223-22010 should be used for sprocket and timing chain installation on camshaft timing sprockets. Install and torque the chain vibration damper No. 1 along with the chain tensioner slipper according to manufacturer specifications. Environmental Service Tool: 09223-22010 to perform a new oil seal install by tapping in direction while the crankshaft position sensor plate number one should receive facing forward orientation with "F" marking visible and receive an MP grease application on its oil sealing lip. The timing chain cover surfaces should be cleaned after which you must apply two types of seal packing (Part No. 08826-00100 or equivalent + Part No. 08826-00080 or equivalent) onto the gasket sites before tightening the timing chain cover with the correct torque. Set the chain tensioner assembly No. 1 with correctly positioned hook while also cleaning the O-ring before assembly. Safely install the crankshaft pulley by aligning it properly then torque it according to specifications while also installing the crank position sensor and compressor and magnetic clutch. The service team should install the water pump assembly with its new O-ring by performing torque specifications followed by the transverse engine mounting bracket and water pump pulley. Add V-ribbed belt tensioner assembly together with an engine mounting insulator sub-assembly RH and cylinder head cover sub-assembly alongside its gaskets and seal packing and an ignition coil assembly and generator assembly and generator bracket No. 1 and suction hose sub-assembly and wire harness clamp and cylinder head cover No. 2 after adding coolant to the system and inspecting for all possible leaks.
    Posted by ToyotaPartsNow Specialist
    Q:
    What additional steps are needed for the 2ZZ-GE engine for the 2001 Toyota Celica? Posted by Customer
    A:
    Disconnect the ventilation hoses and remove the ventilation pipe and gasket.
    Posted by ToyotaPartsNow Specialist
    See expert answers on similar Timing Chain
    Q:
    What is the procedure for removing the timing chain cover for the 1ZZ-FE for the 2004 Toyota Celica? Posted by Customer
    A:
    Remove 11 bolts and a nut, use a torx wrench socket (E8) to remove the stud bolt, and pry the cover off carefully.
    Posted by ToyotaPartsNow Specialist
    See expert answers on similar Timing Chain
    Q:
    What are the replacement criteria for the camshaft and crankshaft diameters for the 2003 Toyota Celica? Posted by Customer
    A:
    If the camshaft diameter is less than 97.3 mm (3.831 inch) or the crankshaft diameter is less than 51.6 mm (2.031 inch), replace the chain and sprockets.
    Posted by ToyotaPartsNow Specialist
    See expert answers on similar Timing Chain
    Q:
    What is the next step after disconnecting the crankshaft position sensor for the 2003 Toyota Celica? Posted by Customer
    A:
    Remove the drive belt tensioner by taking out the bolt and nut.
    Posted by ToyotaPartsNow Specialist
    See expert answers on similar Timing Chain
    Q:
    How do you remove the cylinder head cover for the 1ZZ-FE for the 2005 Toyota Celica? Posted by Customer
    A:
    Remove the cylinder head cover by taking off the 2 nuts, 2 clips, 4 ignition coils, 2 PCV hoses, and 9 bolts with 2 seal washers and 2 nuts.
    Posted by ToyotaPartsNow Specialist
    See expert answers on similar Timing Chain
    Q:
    How do you replace the crankshaft front oil seal if the timing chain cover is installed for the 2005 Toyota Celica? Posted by Customer
    A:
    Cut off the oil seal lip, pry out the old seal with a screwdriver (taking care not to damage the crankshaft), and then use Special Service Tool: 09309-37010 to tap in the new seal until flush with the cover edge.
    Posted by ToyotaPartsNow Specialist
    See expert answers on similar Timing Chain
    Q:
    What is the final step after all components are installed for the 2000 Toyota Celica? Posted by Customer
    A:
    Install the PS pump, generator, drive belt, right-hand engine under cover, right-hand front wheel, fill with engine coolant, and check for leaks after starting the engine.
    Posted by ToyotaPartsNow Specialist
    See expert answers on similar Timing Chain
    Q:
    What should be applied to the timing chain cover before installation for the 2005 Toyota Corolla? Posted by Customer
    A:
    Apply seal packing (Water pump part: Part No.08826-00100 or equivalent; Other part: Part No.08826-00080 or equivalent).
    Posted by ToyotaPartsNow Specialist
    See expert answers on similar Timing Chain
    Q:
    What tool is used to remove the crankshaft pulley bolt for the 2006 Toyota Matrix? Posted by Customer
    A:
    Special Service Tool: 09960-10010 (09962-01000, 09963-01000).
    Posted by ToyotaPartsNow Specialist
    See expert answers on similar Timing Chain
    Q:
    What is the final step after reassembling the components for the 2005 Toyota Matrix? Posted by Customer
    A:
    Add engine coolant, reconnect the battery negative terminal, check for leaks, and install cylinder head cover No. 2 and the front wheel RH, torquing to specified values.
    Posted by ToyotaPartsNow Specialist
    See expert answers on similar Timing Chain
    Q:
    How do you install the crankshaft position sensor plate for the 2003 Toyota Matrix? Posted by Customer
    A:
    Install it with the "F" mark facing forward.
    Posted by ToyotaPartsNow Specialist
    See expert answers on similar Timing Chain
    Q:
    How should the timing chain or belt cover sub-assembly be installed for the 2006 Toyota Corolla? Posted by Customer
    A:
    Install it with a continuous bead of seal packing and ensure proper torque specifications with 10 bolts and 2 nuts.
    Posted by ToyotaPartsNow Specialist
    See expert answers on similar Timing Chain
    Q:
    What components should be removed after the timing chain cover for the 2002 Toyota Celica? Posted by Customer
    A:
    Remove the crank angle sensor plate, chain tensioner slipper, timing chain, crankshaft timing sprocket, chain vibration damper, and valve timing control assembly.
    Posted by ToyotaPartsNow Specialist
    See expert answers on similar Timing Chain
    Q:
    What is the first step to replace the timing chain for the 2004 Toyota Matrix? Posted by Customer
    A:
    Begin by removing the engine under cover RH, draining the coolant, and taking off the front wheel RH.
    Posted by ToyotaPartsNow Specialist
    See expert answers on similar Timing Chain
    If you have any questions about this product, please don't hesitate to ask us. We will be happy to help you!

OEM Toyota 13506-88600, Excellent Performance and Perfect Fitment

To ensure reliability, purchase Toyota part # 13506-88600 Timing Chain. It is sometimes referred to as Toyota Timing Chain. OEM parts are unrivaled in terms of quality. They go through extensive quality control inspections and are produced in accordance with Toyota's official factory specifications. All of these remove defects and imperfections. So you can relax knowing they promise exceptional lifespan and flawless fitment.

ToyotaPartsNow.com is a leading supplier of genuine Toyota parts such as Toyota 1350688600 Timing Chain. At ToyotaPartsNow.com, we have a wide variety of OEM Toyota parts available at competitive prices. Our comprehensive range of genuine Toyota parts come with a manufacturer's warranty for peace of mind. We also prioritize customer satisfaction, providing a hassle-free return policy and expedited delivery for all our parts. For detailed Toyota parts information, click here.
Choose ToyotaPartsNow for discounted prices, exceptional service and fast delivery