×
ToyotaParts- Hello
- Login or Register
- Quick Links
- Live Chat
- Track Order
- Parts Availability
- RMA
- Help Center
- Contact Us
- Shop for
- Toyota Parts
- Scion Parts
My Garage
My Account
Cart
OEM Toyota Tundra Transfer Case
Speed Transfer Case- Select Vehicle by Model
- Select Vehicle by VIN
Select Vehicle by Model
orMake
Model
Year
Select Vehicle by VIN
For the most accurate results, select vehicle by your VIN (Vehicle Identification Number).
13 Transfer Cases found


Toyota Tundra Transfer Case Part Number: 36100-34171
$2022.56 MSRP: $2520.80You Save: $498.24 (20%)Toyota Tundra Transfer Case Part Number: 36100-34161
$2083.71 MSRP: $2597.03You Save: $513.32 (20%)
Toyota Tundra Transfer Case Part Number: 36100-0C020
$2567.02 MSRP: $3199.39You Save: $632.37 (20%)Ships in 1-3 Business DaysToyota Tundra Transfer Case Part Number: 36100-0C010
$2552.04 MSRP: $3180.71You Save: $628.67 (20%)Ships in 1-3 Business DaysToyota Tundra Transfer Case Part Number: 36100-34173
$2760.65 MSRP: $3440.72You Save: $680.07 (20%)Ships in 1-3 Business DaysToyota Tundra Transfer Case Part Number: 36100-34163
$2762.81 MSRP: $3443.41You Save: $680.60 (20%)Ships in 1-3 Business Days

Toyota Tundra Transfer Case Part Number: 36100-34170

Toyota Tundra Transfer Case Part Number: 36100-3D500
$2525.41 MSRP: $3147.53You Save: $622.12 (20%)Toyota Tundra Transfer Case Part Number: 36110-34030
Toyota Tundra Transfer Case Part Number: 36110-34020
Toyota Tundra Transfer Case Part Number: 36110-34010

Toyota Tundra Transfer Case Part Number: 36110-35430
Toyota Tundra Transfer Case Part Number: 36110-35341
Toyota Tundra Transfer Case
Choose genuine Transfer Case that pass strict quality control tests. You can trust the top quality and lasting durability. Shopping for OEM Transfer Case for your Toyota Tundra? Our website is your one-stop destination. We stock an extensive selection of genuine Toyota Tundra parts. The price is affordable so you can save more. It only takes minutes to browse and find the exact fit. Easily add to cart and check out fast. Our hassle-free return policy will keep you stress-free. We process orders quickly for swift delivery. Your parts will arrive faster, so you can get back on the road sooner.
Toyota Tundra Transfer Case Parts and Q&A
- Q: How to remove the Transfer Case on Toyota Tundra?A:The transfer unit requires removal by first unfastening the transfer shift lever knob before proceeding to remove the 4 screws and shift lever boot retainer together with shift lever boot. You should use snap ring pliers to extract the snap ring before removing the transfer shift lever by pulling it from the "H4" position. After separating the breather hose from the transfer unite the vehicle must be lifted up to drain the transfer oil. The first step for transfer unit removal is to separate the front and rear propeller shafts before uninstalling the dynamic damper through its 2 bolts. The transmission requires support from a transmission jack before you detach its rear bolts along with the four bolts and four nuts that anchor the crossmember. The removal of four bolts separates the engine rear mounting from its connection to the transfer adaptor. Detach the vehicle Speed Sensor along with transfer detection switch wires. After supporting the transfer with another transmission jack users should remove its eight bolts before pulling it down and toward the rear of the transfer adaptor.
- Q: How to install the transfer case on Toyota Tundra?A:You must raise the vehicle and align the transfer case to the adaptor through the 8 bolts while tightening them to 240 kgf-cm (50nm, 17 ft. lbs.) to preserve the seal of the transfer input shaft from the transfer adaptor rear lip. After attaching vehicle Speed Sensor and transfer detection switch connectors, install the engine rear mounting to the transfer adaptor with 4 bolts which reach a torque specification of 65 Nm (650 kgf-cm, 48 ft. lbs.). Begin installation of the crossmember first with its 4 bolts along with nuts before tightening all components to 72 Nm (740 kgf-cm, 53 ft. lbs.) then add 4 more bolts which are torqued to 18 Nm (185 kgf-cm, 13 ft. lbs.) and transmit jacks should be removed. Install the dynamic damper onto the transfer through 2 bolts with torque setting at 38 Nm (380 kgf-cm, 28 ft. lbs.). Then install the front and rear propeller shafts. The transfer requires a fluid fill using oil grade API GL-4 or GL-5 SAE 75W-90 with 1.0-Liter capacity while torquing the fill plug to 37 Nm. The breather hose needs to be properly connected to the transfer with installation depth reaching 13 mm (0.51 inches) or more. Set the vehicle at its lowest position for snapping the transfer shift lever tip into place while using MP grease on the tip. After pressing down on the transfer shift lever cap slip a snap ring plier beneath the snap ring to install it. Complete the procedure by attaching the shift lever boot and shift lever boot retainer with 4 screws then fastening the transfer shift lever knob. Testing should be conducted during a road journey to verify smooth shifting and check for abnormal noises.

Related Toyota Tundra Parts
 Toyota Tundra Shift Solenoid
 Toyota Tundra Torque Converter
 Toyota Tundra Automatic Transmission Filter
 Toyota Tundra Automatic Transmission Output Shaft Seal
 Toyota Tundra Automatic Transmission Shift Levers
 Toyota Tundra Clutch Fork
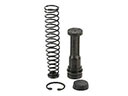 Toyota Tundra Clutch Master Repair Kit
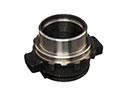 Toyota Tundra Clutch Release Bearing
 Toyota Tundra Flywheel
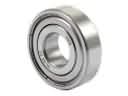 Toyota Tundra Pilot Bearing
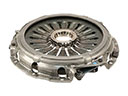 Toyota Tundra Pressure Plate
 Toyota Tundra Transmission Drain Plug