My Garage
Cart
Make sure this part fits

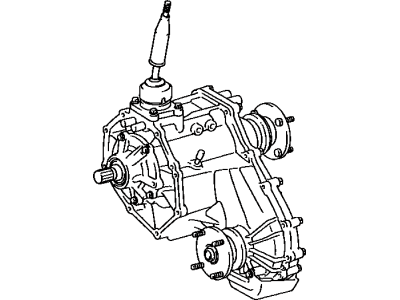
Toyota 36110-34020
Transfer Case

2000-2004 Toyota Tundra 3611034020

Customer Questions & Expert Answers (4)
Toyota 36110-34020 Transfer Case
  • Part Description
    Transfer Assembly
  • Part Name Code
    36100
  • Manufacturer
    Toyota
  • Manufacturer's Notes
    This part is discontinued.
Make sure this part fits
  • Product Specifications
  • Vehicle Fitment
  • Customer Questions & Expert Answers
  • Product Specifications

    BrandGenuine Toyota
    Part Name Code36100
    Manufacturer Part Number36110-34020
    Part DescriptionTransfer Assembly
    Item Dimensions26.5 x 22.5 x 21.2 inches
    Item Weight51.80 Pounds
    ConditionNew
    Fitment TypeDirect Replacement
    ManufacturerToyota
    SKU36110-34020
    WarrantyThis genuine Toyota part is guaranteed by Toyota's factory warranty.
    Shipping & ReturnShipping Policy Return Policy
    Warning: California's Proposition 65
  • Vehicle Fitment

    Year Make Model Trim Engine
    2000-2004 Toyota TundraBase6 Cyl 3.4 L GAS
  • Customer Questions & Expert Answers

    Q:
    Can you provide the right 36110-34020 for my car? Posted by ToyotaPartsNow Specialist
    A:
    Find out if part number 36110-34020 is the right fit for your car by Selecting Your Vehicle model.
    Posted by ToyotaPartsNow Specialist
    Q:
    How to install the transfer case on Toyota Tundra? Posted by Customer
    A:
    You must raise the vehicle and align the transfer case to the adaptor through the 8 bolts while tightening them to 240 kgf-cm (50nm, 17 ft. lbs.) to preserve the seal of the transfer input shaft from the transfer adaptor rear lip. After attaching vehicle speed sensor and transfer detection switch connectors, install the engine rear mounting to the transfer adaptor with 4 bolts which reach a torque specification of 65 Nm (650 kgf-cm, 48 ft. lbs.). Begin installation of the crossmember first with its 4 bolts along with nuts before tightening all components to 72 Nm (740 kgf-cm, 53 ft. lbs.) then add 4 more bolts which are torqued to 18 Nm (185 kgf-cm, 13 ft. lbs.) and transmit jacks should be removed. Install the dynamic damper onto the transfer through 2 bolts with torque setting at 38 Nm (380 kgf-cm, 28 ft. lbs.). Then install the front and rear propeller shafts. The transfer requires a fluid fill using oil grade API GL-4 or GL-5 SAE 75W-90 with 1.0-Liter capacity while torquing the fill plug to 37 Nm. The breather hose needs to be properly connected to the transfer with installation depth reaching 13 mm (0.51 inches) or more. Set the vehicle at its lowest position for snapping the transfer shift lever tip into place while using MP grease on the tip. After pressing down on the transfer shift lever cap slip a snap ring plier beneath the snap ring to install it. Complete the procedure by attaching the shift lever boot and shift lever boot retainer with 4 screws then fastening the transfer shift lever knob. Testing should be conducted during a road journey to verify smooth shifting and check for abnormal noises.
    Posted by ToyotaPartsNow Specialist
    Q:
    How to disassemble the transfer case on Toyota Tundra? Posted by Customer
    A:
    The first step to disassemble the transfer case involves taking out the vehicle speed sensor assembly together with its bolt and O-ring followed by clipping off the driven gear. The transfer L4 position switch removal along with its gasket from M/T (with Diff. lock or ABS) and A/T requires 37 Nm (380 kgf-cm, 27 ft. lbs.) torque when installing a new gasket for reassembly. The next step involves removing the transfer 4WD position switch and gasket according to those specified torque values yet withholding the same procedure for the A/T transfer neutral position switch and gasket. Direct the technician to evacuate two plugs with their accompanying gaskets through the front case because this step helps the input and output shafts perform smoothly when reinstalling the system. Remove the protector through a process of four bolt removal with 18 Nm (185 kgf-cm, 13 ft. lbs.) torque. To remove shift gear heads No. 1 and No. 2 on A/T you must drive out two slotted spring pins before removing the heads. The process begins by detaching the front bearing retainer through five bolts tightened at 11 Nm (115 kgf-cm, 8 ft. lbs.). After threading the bolts with liquid sealer apply a plastic hammer to separate the retainer. M/T requires the pop-out of four bolts operating at 18 Nm torque (185 kgf-cm, 13 ft. lbs.) to free control retainer along with deflector and release select return spring while A/T needs removal of upper cover coupled with deflector by getting rid of four bolts each. The removal of upper cover and oil deflector requires you to detach four bolts along with two gaskets by applying identical torque specifications. Lifting the vehicle and securing it on dolly stands in a safe work area in alignment level to within one inch for each 150cm along the floor is essential before proceeding. The front companion flange removal process begins with unstaking the companion flange nut using a chisel and hammer followed by torqueing the Special Service Tool: 09330-00021 to hold the flange. The companion flange lock nut must be removed carefully with at least 118 Nm (1,200 kgf-cm, 87 ft.lbs.) torque using Special Service Tool: 09950-00011 (or any acceptable equivalent The operation to remove the rear companion flange includes the same removal steps but requires attention to the alternating bolt thickness. Detach the extension housing by first removing five bolts with 12 Nm (120 kgf-cm, 9 ft. lbs.) torque then finish the removal using a plastic hammer. The vehicle speed sensor drive gear with its washers should be removed before the front and rear case separation using twelve bolts at 28 Nm (285 kgf-cm, 21 ft. lbs.) plus a screwdriver. Unscrew and remove the straight screw plug and its spring along with the locking ball under a hexagon wrench torque of 19 Nm (190 kgf-cm, 14 ft. lbs.). Keep the pin punch in place while extracting the front drive fork shaft along with its shift fork and spring and stopper. After using a snap ring expander with a plastic hammer the technician should remove the rear output shaft assembly and the driven sprocket assembly together with the chain. M/T requires the removal of the input shaft's synchronizer ring for which you should use MP grease during assembly. The oil pump body assembly must be detached through separator removal with oil strainer and magnet after using a torque wrench of 7.5 Nm to loosen the three bolts. Reassemble the parts in correct order while aligning snap ring gaps properly. The procedure includes removal of the oil pump drive gear, planetary gear assembly with input shaft assembly and low gear spline piece. Start by removing the needle roller bearing from the input shaft assembly and input gear stopper and thrust bearing and race. Then remove the planetary ring gear yet apply liquid sealer to plugged threads with 19 Nm torque (190 kgf-cm, 14 ft. lbs.) and set snap ring gaps correctly. The inspection of the switch should follow to determine if replacement is needed.
    Posted by ToyotaPartsNow Specialist
    Q:
    How do you finally remove the transfer unit for the 2003 Toyota Tundra? Posted by Customer
    A:
    Support the transfer with another transmission jack, remove the 8 transfer mounting bolts, and pull the transfer out from the transfer adaptor down and toward the rear.
    Posted by ToyotaPartsNow Specialist
    See expert answers on similar Transfer Case
    If you have any questions about this product, please don't hesitate to ask us. We will be happy to help you!

OEM Toyota 36110-34020, Excellent Performance and Perfect Fitment

To ensure reliability, purchase Toyota part # 36110-34020 Transfer Case. It is sometimes referred to as Toyota Transfer Case. OEM parts are unrivaled in terms of quality. They go through extensive quality control inspections and are produced in accordance with Toyota's official factory specifications. All of these remove defects and imperfections. So you can relax knowing they promise exceptional lifespan and flawless fitment.

ToyotaPartsNow.com is a leading supplier of genuine Toyota parts such as Toyota 3611034020 Transfer Case. At ToyotaPartsNow.com, we have a wide variety of OEM Toyota parts available at competitive prices. Our comprehensive range of genuine Toyota parts come with a manufacturer's warranty for peace of mind. We also prioritize customer satisfaction, providing a hassle-free return policy and expedited delivery for all our parts. For detailed Toyota parts information, click here.
Choose ToyotaPartsNow for discounted prices, exceptional service and fast delivery