×
ToyotaParts- Hello
- Login or Register
- Quick Links
- Live Chat
- Track Order
- Parts Availability
- RMA
- Help Center
- Contact Us
- Shop for
- Toyota Parts
- Scion Parts
My Garage
My Account
Cart
OEM Toyota MR2 Spyder Windshield
Glass Windshield- Select Vehicle by Model
- Select Vehicle by VIN
Select Vehicle by Model
orMake
Model
Year
Select Vehicle by VIN
For the most accurate results, select vehicle by your VIN (Vehicle Identification Number).
2 Windshields found

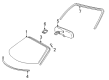
Toyota MR2 Spyder Windshield, Front Part Number: 56101-17020
$517.66 MSRP: $758.64You Save: $240.98 (32%)Toyota MR2 Spyder Windshield, Front Part Number: 56101-17040
Toyota MR2 Spyder Windshield
Choose genuine Windshield that pass strict quality control tests. You can trust the top quality and lasting durability. Shopping for OEM Windshield for your Toyota MR2 Spyder? Our website is your one-stop destination. We stock an extensive selection of genuine Toyota MR2 Spyder parts. The price is affordable so you can save more. It only takes minutes to browse and find the exact fit. Easily add to cart and check out fast. Our hassle-free return policy will keep you stress-free. We process orders quickly for swift delivery. Your parts will arrive faster, so you can get back on the road sooner.
Toyota MR2 Spyder Windshield Parts and Q&A
- Q: How to remove and install a windshield on Toyota MR2 Spyder?A:The windshield removal process starts by taping the screwdriver tip then continuing with the head cap removal of the wiper arm followed by the removal of two nuts and two wiper arms. Initial steps require removal of 6 clips and 5 screws which allows you to take out the cowl top ventilator louver. Then proceed with removing the removable roof hook through its 2 screws. Use a screwdriver to eliminate front pillar garnishes from both sides before using screw removal to take off sun visors. Open the map light cover with a screwdriver while extracting two screws then chopping the connector. Start by using a screwdriver to remove the front roof headlining trim followed by detachment of the inner rear view mirror assembly. Discard the external windshield moulding by cutting it along the edges with a knife before pulling it off. To remove the windshield glass use piano wire as a tool by inserting it between body and glass then attaching wooden blocks to each end and cutting the adhesive through wire motion while keeping wire harness and paint damage-free. Using a knife and cleaner-soaked shop rag you should cleanse the body surface for contact and maintain as much adhesive as feasible. The cleaning process for removed glass involves removal of defective No.2 stoppers and dams followed by scraping off adhesive before usage of cleaner. Use new No.1 stoppers to fit glass pieces by setting them to ceramic notches and apply new dams through double-stick tape installation. To begin cleaning the black-colored contact surface around the glass rim you must first position the glass correctly then check the contact parts followed by marking reference points. Primer M needs application to visible areas of the body while using a brush but the process must avoid contact with adhesive region. Apply Primer G coating along the glass rim before wiping off residual solution and give it 3-minute drying time. Use cartridge nozzle Part No. 08850-00801 or equivalent to cut the tip followed by a sealer gun loading operation then apply it onto glass surfaces. Use a suction rubber to position the windshield glass according to reference marks while gently pressing down until a spatula can eliminate excess adhesive. Insert the new windshield moulding to its proper body position before the adhesive sets up while removing any extra material. Driving your vehicle should be avoided while protective tape secures the windshield glass together with the moulding until the adhesive hardens. The end of the hardening period allows for leak inspections where required repairs take place. Install the inner rear view mirror along with front roof headlining trim, map light assembly, sun visors and front pillar garnishes and cowl top ventilator louver together with wiper arms by setting wipers to 25 - 40 mm (0.98 - 1.57 in.) and torquing them at 20 N.m (200 kgf.cm, 15 ft.lbf).

Related Toyota MR2 Spyder Parts
 Toyota MR2 Spyder Seat Covers
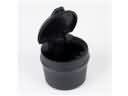 Toyota MR2 Spyder Ashtray
 Toyota MR2 Spyder Car Mirror
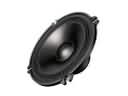 Toyota MR2 Spyder Car Speakers
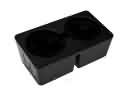 Toyota MR2 Spyder Cup Holder
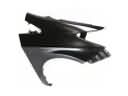 Toyota MR2 Spyder Fender
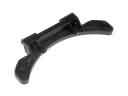 Toyota MR2 Spyder Fuel Door Hinge
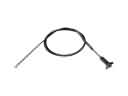 Toyota MR2 Spyder Fuel Door Release Cable
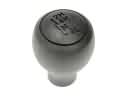 Toyota MR2 Spyder Shift Knob
 Toyota MR2 Spyder Windshield Washer Fluid Reservoir
 Toyota MR2 Spyder Wiper Linkage
 Toyota MR2 Spyder Wiper Motor