×
ToyotaParts- Hello
- Login or Register
- Quick Links
- Live Chat
- Track Order
- Parts Availability
- RMA
- Help Center
- Contact Us
- Shop for
- Toyota Parts
- Scion Parts
My Garage
My Account
Cart
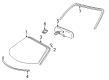
OEM 2003 Toyota MR2 Spyder Windshield
Glass Windshield- Select Vehicle by Model
- Select Vehicle by VIN
Select Vehicle by Model
orMake
Model
Year
Select Vehicle by VIN
For the most accurate results, select vehicle by your VIN (Vehicle Identification Number).
1 Windshield found

 Product Specifications
- Other Name: Glass Sub-Assembly, Windshield; Windshield Glass, Front; Glass, Windshield
- Manufacturer Note: *LAM,T=4.56,GREEN
- Position: Front
- Part Name Code: 56111
- Condition: New
- Fitment Type: Direct Replacement
- SKU: 56101-17040
- Warranty: This genuine part is guaranteed by Toyota's factory warranty.
2003 Toyota MR2 Spyder Windshield
Looking for affordable OEM 2003 Toyota MR2 Spyder Windshield? Explore our comprehensive catalogue of genuine 2003 Toyota MR2 Spyder Windshield. All our parts are covered by the manufacturer's warranty. Plus, our straightforward return policy and speedy delivery service ensure an unparalleled shopping experience. We look forward to your visit!
2003 Toyota MR2 Spyder Windshield Parts Q&A
- Q: How to remove and install a windshield on 2003 Toyota MR2 Spyder?A: Tape the screwdriver tip to prevent damage before you take off the wiper arm head cap, 2 nuts, and 2 wiper arms. Afterwards remove the cowl top ventilator louver through its 5 screws and 6 metal clips as well as the removable roof hook using 2 screws. Use a screwdriver to remove front pillar garnish pieces on each side after which pull off sun visors by unscrewing 4 fasteners. To remove the map light assembly start by inserting a screwdriver under the cover and taking out the 2 mounting screws before disconnecting the cable. Press the cover of the inner rear view mirror to expose the knob and slide the mirror off using a screwdriver while keeping the claw engaged. Carefully slice through the windshield outside trim with a knife and keep the body intact then pull out the whole molding part. To remove the windshield glass thread a piano wire between glass and body, fasten wire ends to wooden blocks and cut the adhesive very close to wire. Adjust safety to prevent tire harness or damage to car paint. Keep the body surface adhesive untouched after the installation. Before installation you need to use cleaning tools to prepare and shape the contact area of the body part while keeping authentic paint and glue layers intact. Wash the extracted glass by removing harming stoppers and dams and then erase stubborn adhesive stains before using cleaner. New No.1 stoppers are installed on top of glass ceramic notches before double-stick tape keeps new dampers in place. Place the glass properly to confirm its flatness then create marks on the scored strips for later detachment. Use Primer M to treat the exposed body part and let it dry for at least 3 minutes before cleaning the black contact surfaces around the glass rim. Use Primer "G" on the glass edge and remove any extra material prior to its drying phase. Use cartridge Part No. 08850-00801 or equivalent adhesive quickly before its expiration time. Position the new windshield glass by matching its reference points and gently push the front surface down. Use a spatula to fix any adhesive unevenness. Put in the fresh molding onto the windshield before the adhesive solidifies while sitting it at the body center and removing extra adhesive. Keep the vehicle stationary while secure the windshield glass and moulding using protective tape until the adhesive cures completely. Reposition the inner rear view mirror and roof trim pieces after leak testing using the map light assembly, sun visors, and front pillars. Also reattach wiper arms with their heads at 25 - 40 mm distance and torque nuts to 20 N.m.
Related 2003 Toyota MR2 Spyder Parts
 2003 Toyota MR2 Spyder Car Mirror
 2003 Toyota MR2 Spyder Door Lock Actuator
 2003 Toyota MR2 Spyder Door Lock Cylinder
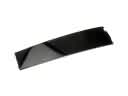 2003 Toyota MR2 Spyder Door Moldings
 2003 Toyota MR2 Spyder Hood Cable
 2003 Toyota MR2 Spyder Instrument Cluster
 2003 Toyota MR2 Spyder Interior Door Handle
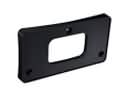 2003 Toyota MR2 Spyder License Plate
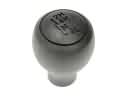 2003 Toyota MR2 Spyder Shift Knob
 2003 Toyota MR2 Spyder Washer Pump
 2003 Toyota MR2 Spyder Wheelhouse
 2003 Toyota MR2 Spyder Wiper Blade