×
ToyotaParts- Hello
- Login or Register
- Quick Links
- Live Chat
- Track Order
- Parts Availability
- RMA
- Help Center
- Contact Us
- Shop for
- Toyota Parts
- Scion Parts
My Garage
My Account
Cart
OEM 2001 Toyota MR2 Spyder Windshield
Glass Windshield- Select Vehicle by Model
- Select Vehicle by VIN
Select Vehicle by Model
orMake
Model
Year
Select Vehicle by VIN
For the most accurate results, select vehicle by your VIN (Vehicle Identification Number).
1 Windshield found

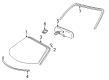
2001 Toyota MR2 Spyder Windshield, Front
Part Number: 56101-17020$517.66 MSRP: $758.64You Save: $240.98 (32%)Product Specifications- Other Name: Glass Sub-Assembly, Windshield; Windshield Glass, Front; Glass, Windshield
- Manufacturer Note: *LAM,T=4.56,GREEN
- Position: Front
- Part Name Code: 56111
- Condition: New
- Fitment Type: Direct Replacement
- SKU: 56101-17020
- Warranty: This genuine part is guaranteed by Toyota's factory warranty.
2001 Toyota MR2 Spyder Windshield
Looking for affordable OEM 2001 Toyota MR2 Spyder Windshield? Explore our comprehensive catalogue of genuine 2001 Toyota MR2 Spyder Windshield. All our parts are covered by the manufacturer's warranty. Plus, our straightforward return policy and speedy delivery service ensure an unparalleled shopping experience. We look forward to your visit!
2001 Toyota MR2 Spyder Windshield Parts Q&A
- Q: How to remove and install a windshield on 2001 Toyota MR2 Spyder?A: Start the windshield removal by taping your screwdriver and proceeding to remove the wiper arm head cap and 2 nuts and 2 wiper arms. The sequence starts with removing the cowl top ventilator louver using 5 screws and 6 clips and then continuing to the removable roof hook by loosening its 2 screws. Disassemble the front pillar garnishes using a screwdriver first on one side before repeating the process on the other side. The sun visors can be handled by detaching the 4 screws. The map light assembly demands a screwdriver to move its cover and subsequent removal of two screws before disconnecting the connector. Start by removing the front roof headlining trim using a screwdriver and after that remove the inner rear view mirror assembly. A knife takes off the outside windshield moulding from the car while protecting the body while the user removes the rest of the moulding parts. You should place piano wire under the glass to separate it from the body and secure its ends using wooden blocks prior to cutting the adhesive slowly to avoid harming the wire harness or paint or exterior decorations. All possible adhesive should remain attached to the body. To install the body you should first clean and mold its contact zone by using a knife with cleaner-saturated shop rag until the adhesive stays intact. Wash removed glass by first removing defective No.2 stoppers and dams and carefully scraping off the adhesive before cleaning it without allowing contact to the glass surface. The installation requires placement of new No.1 stoppers according to the ceramic notches on the glass surface followed by double-stick taped new dams. Align the glass properly until it touches the rim of the opening at even measurements before placing reference marks and removing the glass from the aperture. Remove black-colored contact material from the glass rim using cleaner yet prevent cleaning the glass face area. Distribute Primer M onto the visible body parts with a brush before allowing it to dry for a minimum of 3 minutes while avoiding direct application on the adhesive material or keeping unused Primer M open containers. Prior to drying, use Primer G on the glass edges followed by wiping off any excess residue before the end of the minimum 3-minute dry period. The glass gets adhesive application through cartridge nozzle tip cutting (Part No 08850-00801 or equivalent) followed by loader placement into sealer gun and glass coating. Chose a suitable windshield glass position using suction rubber along reference marks and soft pressure until clearance of adhesive issues with a spatula while installing new windshield moulding before the curing process completes. Secure new glass and moulding using protective tape while adhesive sets up because operating the car must be avoided during this period. The final step involves checking for leaks with necessary repairs followed by reinstalling the front roof headlining trim and inner rear view mirror and map light assembly. The wiper arm head cap remains until the wiper arms get reinstalled after torquing the nuts to 20 N.m and adjusting wiper arm positions to 25-40 mm (0.98-1.57 in).
Related 2001 Toyota MR2 Spyder Parts
 2001 Toyota MR2 Spyder Car Mirror
 2001 Toyota MR2 Spyder Door Lock Actuator
 2001 Toyota MR2 Spyder Door Lock Cylinder
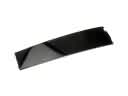 2001 Toyota MR2 Spyder Door Moldings
 2001 Toyota MR2 Spyder Hood Cable
 2001 Toyota MR2 Spyder Instrument Cluster
 2001 Toyota MR2 Spyder Interior Door Handle
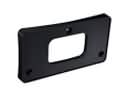 2001 Toyota MR2 Spyder License Plate
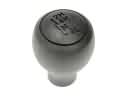 2001 Toyota MR2 Spyder Shift Knob
 2001 Toyota MR2 Spyder Washer Pump
 2001 Toyota MR2 Spyder Wheelhouse
 2001 Toyota MR2 Spyder Wiper Blade