×
ToyotaParts- Hello
- Login or Register
- Quick Links
- Live Chat
- Track Order
- Parts Availability
- RMA
- Help Center
- Contact Us
- Shop for
- Toyota Parts
- Scion Parts
My Garage
My Account
Cart
OEM Toyota Land Cruiser Universal Joint
U-Joint- Select Vehicle by Model
- Select Vehicle by VIN
Select Vehicle by Model
orMake
Model
Year
Select Vehicle by VIN
For the most accurate results, select vehicle by your VIN (Vehicle Identification Number).
8 Universal Joints found


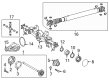
Toyota Land Cruiser Spider Kit, Front Propeller Shaft Universal Joint Part Number: 04371-60070
$57.35 MSRP: $79.83You Save: $22.48 (29%)


Toyota Land Cruiser Universal Joints, Red Part Number: 04371-60060
$71.21 MSRP: $99.95You Save: $28.74 (29%)Ships in 1-2 Business Days


Toyota Land Cruiser Universal Joints Part Number: 04371-60051
$63.50 MSRP: $89.14You Save: $25.64 (29%)Ships in 1 Business Day

Toyota Land Cruiser Universal Joints Part Number: 04371-60210
$59.48 MSRP: $83.48You Save: $24.00 (29%)

Toyota Land Cruiser Universal Joints Part Number: 04371-10011
$37.51 MSRP: $52.22You Save: $14.71 (29%)
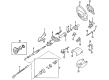
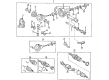
Toyota Land Cruiser Joint Assembly, Steering Shaft Universal Part Number: 45230-50020
$8.71 MSRP: $12.13You Save: $3.42 (29%)Ships in 1-3 Business Days
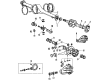
Toyota Land Cruiser Spider Kit, Universal Part Number: 04371-60230
$31.06 MSRP: $43.23You Save: $12.17 (29%)Ships in 1-2 Business Days
Toyota Land Cruiser Spider Kit, Universal Part Number: 04371-60221
$53.52 MSRP: $74.50You Save: $20.98 (29%)Ships in 1-2 Business Days
Toyota Land Cruiser Universal Joint
Choose genuine Universal Joint that pass strict quality control tests. You can trust the top quality and lasting durability. Shopping for OEM Universal Joint for your Toyota Land Cruiser? Our website is your one-stop destination. We stock an extensive selection of genuine Toyota Land Cruiser parts. The price is affordable so you can save more. It only takes minutes to browse and find the exact fit. Easily add to cart and check out fast. Our hassle-free return policy will keep you stress-free. We process orders quickly for swift delivery. Your parts will arrive faster, so you can get back on the road sooner.
Toyota Land Cruiser Universal Joint Parts and Q&A
- Q: How to replace the universal joint on Toyota Land Cruiser?A:Before starting universal joint replacement start by removing the propeller shaft and marking corresponding positions on the shaft and flange yoke and between flange yoke and sleeve yoke. Start by separating the sleeve yoke from the propeller shaft. A brass bar combined with a hammer to tap the bearing outer races should be used followed by extracting the four snap rings using two screwdrivers from their grooves. Startup the spider bearing extraction using Special Service Tool: 09332-25010 which pushes the bearing out of the flange while maintaining enough clearance between "A" and the bearing. The outer bearing race should be placed in a vise during this operation while the flange receives hammer taps to remove it and the process should repeat on the other side. After removing the flange yoke from either the sleeve yoke or propeller shaft install the two extracted bearing outer races onto the spider. To push out the bearing from the yoke utilize Special Service Tool: 09332-25010 while using a vise to clamp the outer bearing race followed by hammer tapping of the yoke as performed for the opposite side. Choose the spider bearing by verifying the drill mark on yoke section then apply MP grease on new replacement parts while watching for excessive grease usage. Special Service Tool: 09332-25010 should be used to install the bearings onto the spider while adjusting both bearing snap rings to reach maximum and equal width. Put in two new snap rings with same thickness so the system shows 0 mm (0 inch) axial play after installation while avoiding used rings and tapping the yoke with a hammer until the bearing outer race touches the snap ring. Put matchmarks on the propeller shaft and flange yoke or on the flange yoke and sleeve yoke beforeInstalling the assembly between these components while using two new spider bearings and their snap rings as installed on the previous flange yoke. Confirm the smooth operation of the spider bearing along with its axial play measurement which should stay within the 0 mm (0 inch) bounds and verify proper orientation of the grease fitting assembly hole as shown in the illustration.

Related Toyota Land Cruiser Parts
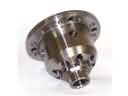 Toyota Land Cruiser Differential
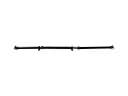 Toyota Land Cruiser Drive Shaft
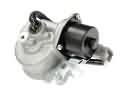 Toyota Land Cruiser 4WD Actuator
 Toyota Land Cruiser CV Joint Companion Flange
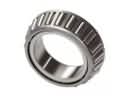 Toyota Land Cruiser Differential Bearing
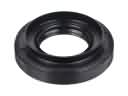 Toyota Land Cruiser Differential Seal
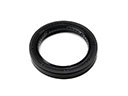 Toyota Land Cruiser Output Shaft Seal
 Toyota Land Cruiser Pinion Bearing
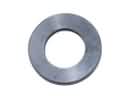 Toyota Land Cruiser Pinion Washer
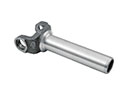 Toyota Land Cruiser Slip Yoke
 Toyota Land Cruiser Transfer Case Bearing
 Toyota Land Cruiser Transfer Case Seal
Browse Toyota Land Cruiser Universal Joint by Years
2025 2024
2021
2020
2019
2018
2017
2016
2015
2014
2013
2011
2010
2009
2008
2007
2006
2005
2004
2003
2002
2001
2000
1999
1998
1997
1996
1995
1994
1993
1992
1991
1990
1989
1988
1987
1986
1985
1984