×
ToyotaParts- Hello
- Login or Register
- Quick Links
- Live Chat
- Track Order
- Parts Availability
- RMA
- Help Center
- Contact Us
- Shop for
- Toyota Parts
- Scion Parts
My Garage
My Account
Cart
OEM Scion xA Shift Cable
Transmission Shift Cable- Select Vehicle by Model
- Select Vehicle by VIN
Select Vehicle by Model
orMake
Model
Year
Select Vehicle by VIN
For the most accurate results, select vehicle by your VIN (Vehicle Identification Number).
2 Shift Cables found


Scion xA Shift Control Cable Part Number: 33820-52022
$407.68 MSRP: $597.46You Save: $189.78 (32%)Scion xA Shift Control Cable Part Number: 33820-52172
Scion xA Shift Cable
Choose genuine Shift Cable that pass strict quality control tests. You can trust the top quality and lasting durability. Shopping for OEM Shift Cable for your Scion xA? Our website is your one-stop destination. We stock an extensive selection of genuine Scion xA parts. The price is affordable so you can save more. It only takes minutes to browse and find the exact fit. Easily add to cart and check out fast. Our hassle-free return policy will keep you stress-free. We process orders quickly for swift delivery. Your parts will arrive faster, so you can get back on the road sooner.
Scion xA Shift Cable Parts and Q&A
- Q: How to replace the Shift Cable ASSY (ATM) on Scion xA?A:The first step to replace the transmission control cable assy (ATM) includes removing the console box rear cover along with console box carpet followed by console box assembly rear then Exhaust Pipe assembly front then front floor heat insulator No.1 and air cleaner assembly. Remove the transmission control cable assembly from the floor shift assembly by unscrewing its nut and then lessening its connection to the shift lever plate with a screwdriver before uninstalling three assembly bolts and finally extracting it from the body. Proceed by first removing the nut which separates the control shaft lever from the cable and then taking off the clip to untether it from the bracket before disconnecting it at its transmission support point. The new transmission control cable assembly connection begins with placing it provisionally onto the control shaft lever and its nut then attaching it to the bracket through a new clip and connecting it to the transmission control cable support before securing it to the body with three bolts torqued to 5.0 Nm (51 kgf-cm, 44 inch lbs.). Attach the shift lever plate cable before installing it on the floor shift assembly with 12 Nm (122 kgf-cm, 9 ft. lbs.) torque. The maintenance process calls for reinstallation of the air cleaner assembly together with front floor heat insulator No.1 (torqued to 5.5 Nm (56 kgf-cm, 49 ft. lbs.)) and exhaust pipe assembly front. Check and verify the shift lever setting before putting back the console box assembly rear and its carpet and rear cover.
- Q: How to service and repair the Shift Cable on Scion xA?A:Service and repairs of the transmission control cable begin by removing Sequentially the front No. 1 floor heat insulator then move to the shift lever knob sub-assembly followed by removing the rear console box assembly. The floor shift lever assembly requires disconnection using wire harness removal along with the removal of 4 bolts. The process begins with detachment of the clip and removal of the transmission control select cable's cable end from the floor shift lever by using a screwdriver to unfasten the claw and disconnecting it from the shift lever retainer. To remove both transmission control cables from the manual transaxle and control cable bracket disconnect them by removing their 2 clips and 2 washers. To remove both cables from the floor opening start by removing the floor retainer bolts followed by unfastening the grommet retainer and pulling cables out of their slots. The first step for installation begins with the transmission control cable assembly and clamp bolt tightening at 5.0 Nm (51 kgf-cm, 44 inch lbs.). After that, insert cables through the floor hole and retainer. Thread the transmission control select cable through the retainer attached to the grommet before positioning its projections into the holes. Fasten the floor retainer to the frame using 2 bolts tightened to 5.0 Nm (51 kgf-cm, 44 inch lbs.) before linking the transmission control shift cable to the floor shift lever retainer and the transmission control cable end to the floor shift lever with a clip. The transmission control select cable needs attachment to the shift lever retainer along with the transmission select cable to the floor shift lever with clips that properly align the serrated select cable portion facing upward. The transaxle end of two cables needs 2 washers and 2 clips for connection before installing new clips onto the control cable bracket. Attach the floor shift lever assembly with 4 bolts reaching 12 Nm torque and then reconnect the wiring harnesses. The work sequence involves fitting the rear console box assembly while also installing the shift lever knob sub-assembly after which the front No. 1 floor heat insulator can be applied with 5.5 Nm (56 kgf-cm, 49 inch lbs.) torque.

Related Scion xA Parts
 Scion xA Automatic Transmission Filter
 Scion xA Automatic Transmission Shift Levers
 Scion xA Clutch Disc
 Scion xA Clutch Fork
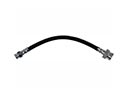 Scion xA Clutch Hose
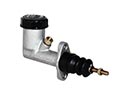 Scion xA Clutch Master Cylinder
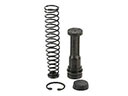 Scion xA Clutch Master Repair Kit
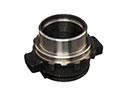 Scion xA Clutch Release Bearing
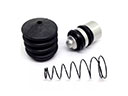 Scion xA Clutch Slave Repair Kit
 Scion xA Flywheel
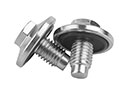 Scion xA Transmission Drain Plug
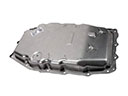 Scion xA Transmission Pan