×
ToyotaParts- Hello
- Login or Register
- Quick Links
- Live Chat
- Track Order
- Parts Availability
- RMA
- Help Center
- Contact Us
- Shop for
- Toyota Parts
- Scion Parts
My Garage
My Account
Cart
OEM 2009 Toyota Sienna Differential
Front Differential- Select Vehicle by Model
- Select Vehicle by VIN
Select Vehicle by Model
orMake
Model
Year
Select Vehicle by VIN
For the most accurate results, select vehicle by your VIN (Vehicle Identification Number).
2 Differentials found

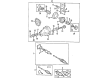
2009 Toyota Sienna Carrier Assembly, Rear
Part Number: 41110-58010$2021.99 MSRP: $2963.25You Save: $941.26 (32%)Ships in 1-3 Business DaysProduct Specifications- Other Name: Carrier Assembly, Differential; Differential Carrier Assembly, Rear; Carrier; Carrier Assembly, Differential, Rear; Differential
- Manufacturer Note: *FGR=41:14=2.928
- Position: Rear
- Part Name Code: 41110
- Item Weight: 78.00 Pounds
- Item Dimensions: 29.9 x 26.6 x 18.0 inches
- Condition: New
- Fitment Type: Direct Replacement
- SKU: 41110-58010
- Warranty: This genuine part is guaranteed by Toyota's factory warranty.


2009 Toyota Sienna Differential Case
Part Number: 41311-14031$291.60 MSRP: $416.34You Save: $124.74 (30%)Product Specifications- Other Name: Case, Differential; Case; Case Sub-Assembly, Rear Differential; Case, Front Differential; Case, Rear Differential; Differential
- Replaces: 41311-14030
- Item Weight: 6.20 Pounds
- Item Dimensions: 6.8 x 6.7 x 6.5 inches
- Condition: New
- Fitment Type: Direct Replacement
- SKU: 41311-14031
- Warranty: This genuine part is guaranteed by Toyota's factory warranty.
2009 Toyota Sienna Differential
Looking for affordable OEM 2009 Toyota Sienna Differential? Explore our comprehensive catalogue of genuine 2009 Toyota Sienna Differential. All our parts are covered by the manufacturer's warranty. Plus, our straightforward return policy and speedy delivery service ensure an unparalleled shopping experience. We look forward to your visit!
2009 Toyota Sienna Differential Parts Q&A
- Q: How to remove and replace the rear differential carrier assembly on 2009 Toyota Sienna?A: The first step for changing the rear differential carrier assembly requires removal of both rear wheels and exhaust pipe assembly. You should remove the propeller alongside the center bearing shaft assembly. A 10 mm hexagon wrench should be used to extract the rear differential filler plug while the drain plug requires removal to allow the oil to drain out. Remove the rear speed sensor LH while keeping in mind that all steps for the RH side follow the same pattern. Extraction of the rear axle shaft nut begins with LH side procedures then follows the same protocol for the RH side. Follow the identical process for the LH rear drive shaft assembly removal together with the same methodology used on the RH side. A jack should support the rear differential carrier assembly before you separate the No. 1 rear differential support by removing its bolt and nut. After this, remove the 2 bolts that separate the rear differential support assembly while avoiding dropping the rear differential carrier assembly. Remove the rear differential support assembly by first disconnecting its 3 bolts then successively remove the 2 bolts which detach the rear differential dynamic damper from the No. 1 rear differential support. The removal of the No. 1 rear differential support ends with 2 bolt and 2 nut procedures.
Related 2009 Toyota Sienna Parts
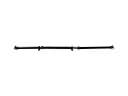 2009 Toyota Sienna Drive Shaft
 2009 Toyota Sienna CV Joint Companion Flange
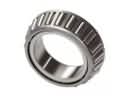 2009 Toyota Sienna Differential Bearing
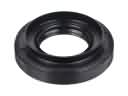 2009 Toyota Sienna Differential Seal
 2009 Toyota Sienna Pinion Bearing
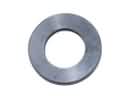 2009 Toyota Sienna Pinion Washer
 2009 Toyota Sienna Transfer Case Bearing
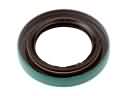 2009 Toyota Sienna Transfer Case Seal