×
ToyotaParts- Hello
- Login or Register
- Quick Links
- Live Chat
- Track Order
- Parts Availability
- RMA
- Help Center
- Contact Us
- Shop for
- Toyota Parts
- Scion Parts
My Garage
My Account
Cart
OEM 2009 Toyota RAV4 Crankshaft Position Sensor
Engine Crankshaft Position Sensor- Select Vehicle by Model
- Select Vehicle by VIN
Select Vehicle by Model
orMake
Model
Year
Select Vehicle by VIN
For the most accurate results, select vehicle by your VIN (Vehicle Identification Number).
3 Crankshaft Position Sensors found


2009 Toyota RAV4 Camshaft Position Sensor, Driver Side
Part Number: 90919-T5005$102.96 MSRP: $144.53You Save: $41.57 (29%)Ships in 1-3 Business DaysProduct Specifications- Other Name: Sensor, Crank Position; Engine Camshaft Position Sensor, Left; Crankshaft Position Sensor; Camshaft Sensor; Cam Sensor; Sensor, Cam Position; Engine Camshaft Position Sensor
- Manufacturer Note: (L)
- Position: Driver Side
- Replaces: 9004A-19003, 90919-05060, 90919-T5002
- Part Name Code: 11101E
- Condition: New
- Fitment Type: Direct Replacement
- Require Quantity: 3
- SKU: 90919-T5005
- Warranty: This genuine part is guaranteed by Toyota's factory warranty.


2009 Toyota RAV4 Crankshaft Position Sensor
Part Number: 90919-A5004$99.41 MSRP: $139.54You Save: $40.13 (29%)Ships in 1-3 Business DaysProduct Specifications- Other Name: Sensor, Crank Position; Engine Crankshaft Position Sensor; Sensor, Crankshaft Pulse; Crankshaft Sensor; Camshaft Position Sensor
- Replaces: 90919-05070
- Item Weight: 1.40 Pounds
- Item Dimensions: 4.7 x 2.9 x 2.1 inches
- Condition: New
- Fitment Type: Direct Replacement
- SKU: 90919-A5004
- Warranty: This genuine part is guaranteed by Toyota's factory warranty.


2009 Toyota RAV4 Sensor, Crank Position
Part Number: 90919-A5003$72.15 MSRP: $101.28You Save: $29.13 (29%)Ships in 1-3 Business DaysProduct Specifications- Other Name: Engine Crankshaft Position Sensor; Crankshaft Position Sensor
- Manufacturer Note: (L)
- Replaces: 90919-05057
- Part Name Code: 11401G
- Item Weight: 0.40 Pounds
- Item Dimensions: 4.9 x 2.8 x 2.0 inches
- Condition: New
- Fitment Type: Direct Replacement
- SKU: 90919-A5003
- Warranty: This genuine part is guaranteed by Toyota's factory warranty.
2009 Toyota RAV4 Crankshaft Position Sensor
Looking for affordable OEM 2009 Toyota RAV4 Crankshaft Position Sensor? Explore our comprehensive catalogue of genuine 2009 Toyota RAV4 Crankshaft Position Sensor. All our parts are covered by the manufacturer's warranty. Plus, our straightforward return policy and speedy delivery service ensure an unparalleled shopping experience. We look forward to your visit!
2009 Toyota RAV4 Crankshaft Position Sensor Parts Q&A
- Q: How to install the Crankshaft Position Sensor on 2009 Toyota RAV4?A: The Crankshaft Position Sensor installation for the 2AR-FE engine control system starts with applying a small quantity of engine oil to the O-ring before making sure the O-ring remains uncracked and untangled. The first step requires applying Toyota Genuine Adhesive 1344, Three Bond 1344 or equivalent to 2 or 3 bolt threads. Use engine oil on the O-ring before installing the sensor with its bolt while tightening both to 10 Nm (102 kgf-cm, 7 ft-lbf). Finally, connect the sensor connector. A post-installation check should identify any oil leakage. Install the rear engine under cover RH as the last step.
Related 2009 Toyota RAV4 Parts
 2009 Toyota RAV4 Oxygen Sensor
 2009 Toyota RAV4 Engine Control Module
 2009 Toyota RAV4 Coolant Temperature Sensor
 2009 Toyota RAV4 Headlight Relay
 2009 Toyota RAV4 Ignition Coil
 2009 Toyota RAV4 Knock Sensor
 2009 Toyota RAV4 Relay
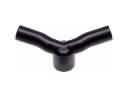 2009 Toyota RAV4 PCV Hose
 2009 Toyota RAV4 Air Bag Control Module
 2009 Toyota RAV4 Camshaft Position Sensor
 2009 Toyota RAV4 Daytime Running Light Relay
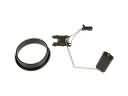 2009 Toyota RAV4 Fuel Level Sensor