×
ToyotaParts- Hello
- Login or Register
- Quick Links
- Live Chat
- Track Order
- Parts Availability
- RMA
- Help Center
- Contact Us
- Shop for
- Toyota Parts
- Scion Parts
My Garage
My Account
Cart
OEM 2009 Toyota Camry Antenna
Radio Antenna- Select Vehicle by Model
- Select Vehicle by VIN
Select Vehicle by Model
orMake
Model
Year
Select Vehicle by VIN
For the most accurate results, select vehicle by your VIN (Vehicle Identification Number).
3 Antennas found
2009 Toyota Camry Antenna
Part Number: 86300-06080$334.80 MSRP: $478.02You Save: $143.22 (30%)Ships in 1-3 Business DaysProduct Specifications- Other Name: Antenna Assembly, Amplifier; Antenna Amplifier; Amplifier
- Part Name Code: 86300B
- Item Weight: 0.90 Pounds
- Item Dimensions: 12.2 x 4.0 x 1.8 inches
- Condition: New
- Fitment Type: Direct Replacement
- SKU: 86300-06080
- Warranty: This genuine part is guaranteed by Toyota's factory warranty.
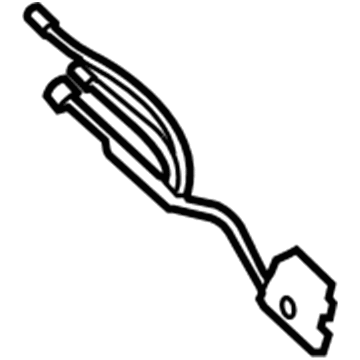
2009 Toyota Camry Antenna, Electrical Key, Rear
Part Number: 89997-41010$104.74 MSRP: $147.02You Save: $42.28 (29%)Ships in 1-3 Business DaysProduct Specifications- Other Name: Antenna, Electrical
- Position: Rear
- Part Name Code: 89997
- Item Weight: 0.60 Pounds
- Condition: New
- Fitment Type: Direct Replacement
- SKU: 89997-41010
- Warranty: This genuine part is guaranteed by Toyota's factory warranty.
2009 Toyota Camry Antenna
Part Number: 86300-06071$342.08 MSRP: $501.32You Save: $159.24 (32%)Ships in 1-3 Business DaysProduct Specifications- Other Name: Antenna Assembly, Amplifier; Antenna Amplifier; Amplifier
- Replaces: 86300-06070, 86300-33310, 86300-33311
- Part Name Code: 86300B
- Item Weight: 0.90 Pounds
- Item Dimensions: 12.0 x 3.8 x 1.8 inches
- Condition: New
- Fitment Type: Direct Replacement
- SKU: 86300-06071
- Warranty: This genuine part is guaranteed by Toyota's factory warranty.
2009 Toyota Camry Antenna
Looking for affordable OEM 2009 Toyota Camry Antenna? Explore our comprehensive catalogue of genuine 2009 Toyota Camry Antenna. All our parts are covered by the manufacturer's warranty. Plus, our straightforward return policy and speedy delivery service ensure an unparalleled shopping experience. We look forward to your visit!
2009 Toyota Camry Antenna Parts Q&A
- Q: How to install the navigation antenna assembly and related components for TMC and TMMK Made on 2009 Toyota Camry?A: The installation of the navigation antenna assembly requires two screws for retention while three clamps should be activated. The TMC Made vehicles require the No. 2 heater at the register duct followed by the No. 3 heater followed by the No. 1 heater being placed at the register duct. All TMMK Made heater installation should follow the same sequence for No. 2, No. 3 and No. 1 heaters. The installation order includes both TMC and TMMK Made vehicles receiving their defroster nozzle assembly followed by the side No. 2 and side No. 1 defroster nozzle ducts for both models. Follow the installation of the No. 3 instrument panel stay and proceed with attaching the instrument panel safety pad assembly to both TMC and TMMK Made vehicles before installing the No. 1 defroster nozzle garnish. The installation requires workers to add the LH front speaker assembly No. 2 next followed by instrument panel No. 1 speaker panel sub-assembly before they install the LH instrument panel No. 1 register assembly. The RH installation follows the exact process that was used for the LH side. The installation process includes placement of the instrument panel No. 2 speaker panel sub-assembly and instrument panel No. 3 register assembly as well as the front pillar garnish for each side. To begin the installation proceed with placing the No. 1 console box insert front for both TMC and TMMK Made vehicles after which the No. 2 console box insert front installation is performed on both models. Proceed to mount both TMC and TMMK Made console box assemblies and subsequent installation of console box carpet and pocket. The assembly process requires installation of navigation receiver with the heater control panel and instrument panel No. 2 register assembly and upper console sub-assembly for both TMC and TMMK Made vehicles. The upper console rear panel sub-assembly should be installed for both automatic and manual transaxles together with the floor shift position indicator housing sub-assembly for automatic transaxles and the upper console panel for manual transaxles. Follow the next steps which include placing the No. 2 instrument cluster finish panel garnish along with the No. 1 instrument cluster finish panel garnish and the shift lever knob sub-assembly for automatic and manual transaxles. Both TMC along with TMMK Made vehicles require installation of their respective lower instrument panel sub-assembly along with the instrument panel No. 2 under cover sub-assembly and cowl side trim sub-assembly RH and front door scuff plate RH. Use the combination meter assembly to install elements of instrument cluster finish panel No. 1 in addition to lower instrument panel finishes for TMC and TMMK Made vehicles with and without Smart Key System. Assemble together the No. 1 instrument panel with the turn signal switch assembly which includes a spiral cable and then perform the spiral cable adjustment procedure. The workshop service requires the installation of the steering column cover which applies to both TMC and TMMK Made vehicles and both lower instrument panel finish panels. Also required are the front door scuff plate LH and cowl side trim sub-assembly LH. Select the steering wheel assembly as well as the steering pad along with the lower No. 3 steering wheel cover and the lower No. 2 steering wheel cover then attach the cable to the negative battery terminal followed by a steering pad inspection then SRS warning light examination.


