×
ToyotaParts- Hello
- Login or Register
- Quick Links
- Live Chat
- Track Order
- Parts Availability
- RMA
- Help Center
- Contact Us
- Shop for
- Toyota Parts
- Scion Parts
My Garage
My Account
Cart
OEM 2009 Toyota 4Runner TPMS Sensor
Tire Pressure Monitoring System Sensor- Select Vehicle by Model
- Select Vehicle by VIN
Select Vehicle by Model
orMake
Model
Year
Select Vehicle by VIN
For the most accurate results, select vehicle by your VIN (Vehicle Identification Number).
2 TPMS Sensors found


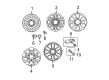
2009 Toyota 4Runner Valve Sub-Assembly, Tire
Part Number: 42607-33022$83.89 MSRP: $117.75You Save: $33.86 (29%)Ships in 1-2 Business DaysProduct Specifications- Other Name: VALVE SUB-ASSY, TIRE; TPMS Sensor Service Kit; TPMS Sensor
- Replaces: 42607-30030, 42607-33021
- Item Weight: 3.10 Pounds
- Item Dimensions: 17.5 x 7.5 x 5.5 inches
- Condition: New
- SKU: 42607-33022
- Warranty: This genuine part is guaranteed by Toyota's factory warranty.
 Product Specifications
- Other Name: Valve Sub-Assembly, Tire; TPMS Sensor; TPMS Sensor Service Kit; Tire Pressure Sensor; Valve Stem; Tire Sensor; Pressure Sensor; Pressure Valve; Sensor
- Replaces: 42607-34020, 42607-52030, 42607-35030, 42607-52010, 42607-33010, 42607-33011, 42607-35010
- Condition: New
- SKU: 42607-33012
- Warranty: This genuine part is guaranteed by Toyota's factory warranty.
2009 Toyota 4Runner TPMS Sensor
Looking for affordable OEM 2009 Toyota 4Runner TPMS Sensor? Explore our comprehensive catalogue of genuine 2009 Toyota 4Runner TPMS Sensor. All our parts are covered by the manufacturer's warranty. Plus, our straightforward return policy and speedy delivery service ensure an unparalleled shopping experience. We look forward to your visit!
2009 Toyota 4Runner TPMS Sensor Parts Q&A
- Q: How to install the TPMS Sensor and transmitter on 2009 Toyota 4Runner?A: The installation process begins by inserting the new grommet included with the valve and transmitter before putting these components into the valve installation hole from inside the rim with the print surface showing. There are two steps to valve and transmitter installation that begin inside the rim opening to achieve proper viewing of the print surface. Reattach the grommet even if it looks intact while cleaning the rim hole and valve alongside transmitter as well as washer and nut from any oil or water or lubricant to prevent incorrect assembly. Look for deformations or damage on the valve and transmitter while checking the inner grommet and rim hole for foreign substances from outside sources. Upward installation of the valve and transmitter can cause the devices to suffer damage and prevent them from transmitting signals quickly. The new valve and transmitter ID numbers require recording before installation because ECU registration needs the information. Install a new washer and nut to the valve and transmitter from the rim side while tightening them to 4.0 Nm (41 kgf-cm, 35 in-lbf) except for additional tightening afterward. The washer and nut need to be clean from all foreign contaminants. Plug the wheel disc to the mounting machine before bead installation and place the valve and transmitter main body in the marked shaded area hence blocking potential interference sources. Additional lubrication is necessary for bead installation but it should be applied to other components besides the valve and transmitter. The installation process requires setting the upper bead but ensuring both the valve and transmitter remain interference-free. You must put in the valve core before tire inflation while verifying air tightness by adding soapy water to loose valve nuts. After setting the tire air pressure correctly install the valve cap together with transmitter. Screw both front and rear wheel bolt patterns to 112 Nm torque using 1142 kgf-cm or 83 ft-lbf measure. Record the transmitter ID after inspecting the tire according to the required process. End the repair sequence by confirming the actual tire pressures show correctly in the Data List.
Related 2009 Toyota 4Runner Parts
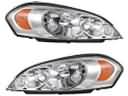 2009 Toyota 4Runner Headlight
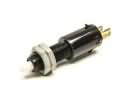 2009 Toyota 4Runner Brake Light Switch
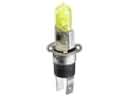 2009 Toyota 4Runner Fog Light Bulb
 2009 Toyota 4Runner Headlight Relay
 2009 Toyota 4Runner Horn
 2009 Toyota 4Runner Ignition Coil
 2009 Toyota 4Runner Knock Sensor
 2009 Toyota 4Runner Neutral Safety Switch
 2009 Toyota 4Runner Seat Belt
 2009 Toyota 4Runner ABS Relay
 2009 Toyota 4Runner Air Bag Control Module
 2009 Toyota 4Runner Ignition Lock Assembly