×
ToyotaParts- Hello
- Login or Register
- Quick Links
- Live Chat
- Track Order
- Parts Availability
- RMA
- Help Center
- Contact Us
- Shop for
- Toyota Parts
- Scion Parts
My Garage
My Account
Cart
OEM 2007 Toyota Yaris Windshield
Glass Windshield- Select Vehicle by Model
- Select Vehicle by VIN
Select Vehicle by Model
orMake
Model
Year
Select Vehicle by VIN
For the most accurate results, select vehicle by your VIN (Vehicle Identification Number).
2 Windshields found
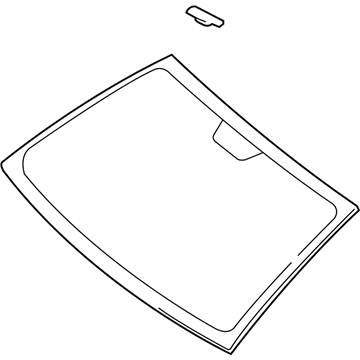
2007 Toyota Yaris Windshield, Front
Part Number: 56101-52322$423.46 MSRP: $620.59You Save: $197.13 (32%)Ships in 1-3 Business DaysProduct Specifications- Other Name: Glass Sub-Assembly, Windshield; Windshield Glass, Front; Glass, Windshield
- Manufacturer Note: *LAM,T=4.56,GREEN
- Position: Front
- Replaces: 56101-52320, 56101-52321, 56101-52510, 56101-52511
- Part Name Code: 56111
- Condition: New
- Fitment Type: Direct Replacement
- SKU: 56101-52322
- Warranty: This genuine part is guaranteed by Toyota's factory warranty.
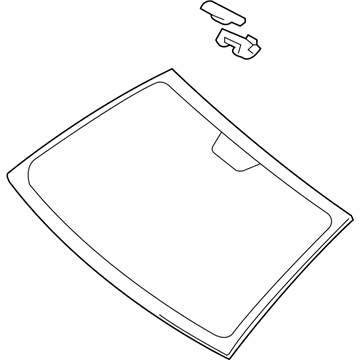
2007 Toyota Yaris Windshield, Front
Part Number: 56101-52490$349.09 MSRP: $511.60You Save: $162.51 (32%)Ships in 1-3 Business DaysProduct Specifications- Other Name: Windshield Glass, Front; Glass, Windshield
- Manufacturer Note: *LAM,T=4.56,GREEN
- Position: Front
- Replaces: 56101-52260
- Part Name Code: 56111
- Condition: New
- Fitment Type: Direct Replacement
- SKU: 56101-52490
- Warranty: This genuine part is guaranteed by Toyota's factory warranty.
2007 Toyota Yaris Windshield
Looking for affordable OEM 2007 Toyota Yaris Windshield? Explore our comprehensive catalogue of genuine 2007 Toyota Yaris Windshield. All our parts are covered by the manufacturer's warranty. Plus, our straightforward return policy and speedy delivery service ensure an unparalleled shopping experience. We look forward to your visit!
2007 Toyota Yaris Windshield Parts Q&A
- Q: How to service the windshield glass for a sedan on 2007 Toyota Yaris?A: Begin servicing the sedan windscreen glass by disconnecting the battery cable from the negative terminal and waiting 90 seconds to avoid Air Bag engagement. Remove the front wiper arm head cap, followed by the front wiper arm and blade assemblies for both the left and right sides, then take out the cowl side ventilator sub-assemblies, cowl top ventilator louver sub-assembly, front door scuff plates, instrument panel under covers, cowl side trim boards, front door opening trim Weather Strips, front pillar garnishes, assist grip cover and sub-assembly, visor assemblies and holders, room light assembly, map light assembly, and the roof headlining assembly, which can be slightly lowered rather than completely removed. Use piano wires cut through adhesive while taping the windshield glass and insert wires through protective tape to shield the safety pad with plastic. Use suction cups to take out the windshield glass but keep as much adhesive on the vehicle body. Rinse both windshield glass and vehicle body areas to create a good joining surface without causing damage. Place new stoppers on the vehicle body and windscreen after Primer G coating dries for 3 minutes. Put Toyota Genuine Windshield Glass Adhesive with Primer G onto both the glass edges where it meets the contact surface before applying the product within its limited lifetime. Access the windshield with suction cups then place it while you match the marks and softly push down while viewing stopper attachment and windscreen body spacing. Use a scraper to clean off extra adhesive from the windscreen surface before installing the outside moulding while the sealant stays in its liquid form. Test your sealed surface after the adhesive is dry and apply auto glass sealer to fix any detected leaks. Finally, reinstall the roof headlining assembly, inner rear view mirror, map light assembly, room light assembly, visor holders and assemblies, assist grip sub-assembly and cover, front pillar garnishes, front door opening trim Weather Strips, cowl side trim boards, instrument panel under covers, front door scuff plates, cowl top ventilator louver sub-assembly, cowl side ventilator sub-assemblies, front wiper arm and blade assemblies, front wiper arm head cap, and reconnect the cable to the negative battery terminal with a torque of 5.4 N.m (55 kgf.cm, 48 in.lbf), followed by inspecting the SRS warning light.


