×
ToyotaParts- Hello
- Login or Register
- Quick Links
- Live Chat
- Track Order
- Parts Availability
- RMA
- Help Center
- Contact Us
- Shop for
- Toyota Parts
- Scion Parts
My Garage
My Account
Cart
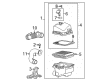
OEM 2007 Toyota Yaris Oxygen Sensor
Oxygen O2 Sensor- Select Vehicle by Model
- Select Vehicle by VIN
Select Vehicle by Model
orMake
Model
Year
Select Vehicle by VIN
For the most accurate results, select vehicle by your VIN (Vehicle Identification Number).
2 Oxygen Sensors found


2007 Toyota Yaris Oxygen Sensor, Front
Part Number: 89467-52020$180.56 MSRP: $257.80You Save: $77.24 (30%)Ships in 1-3 Business DaysProduct Specifications- Other Name: Sensor, Air Fuel Rat; Oxygen Sensor, Front; Front Oxygen Sensor; Sensor, Air Fuel Ratio; Sensor, Oxygen
- Position: Front
- Item Weight: 0.70 Pounds
- Item Dimensions: 13.3 x 11.6 x 2.1 inches
- Condition: New
- Fitment Type: Direct Replacement
- SKU: 89467-52020
- Warranty: This genuine part is guaranteed by Toyota's factory warranty.

2007 Toyota Yaris Oxygen Sensor, Rear
Part Number: 89465-52430$144.40 MSRP: $204.41You Save: $60.01 (30%)Ships in 1-3 Business DaysProduct Specifications- Other Name: Sensor, Oxygen; Oxygen Sensor, Rear; Rear Oxygen Sensor
- Position: Rear
- Part Name Code: 89465A
- Item Weight: 0.60 Pounds
- Item Dimensions: 6.1 x 2.3 x 2.1 inches
- Condition: New
- Fitment Type: Direct Replacement
- SKU: 89465-52430
- Warranty: This genuine part is guaranteed by Toyota's factory warranty.
2007 Toyota Yaris Oxygen Sensor
Looking for affordable OEM 2007 Toyota Yaris Oxygen Sensor? Explore our comprehensive catalogue of genuine 2007 Toyota Yaris Oxygen Sensor. All our parts are covered by the manufacturer's warranty. Plus, our straightforward return policy and speedy delivery service ensure an unparalleled shopping experience. We look forward to your visit!
2007 Toyota Yaris Oxygen Sensor Parts Q&A
- Q: How to service the heated oxygen sensor on 2007 Toyota Yaris?A: Service of the heated oxygen sensor requires users to disconnect the negative battery cable. In Sedan models users need to take out the instrument panel finish panel lower center and the instrument panel finish panel end LH. The service of the heated oxygen sensor begins with shift lever knob sub-assembly removal for Manual Transaxle and shifting hole cover sub-assembly removal for Hatchback Manual Transaxle. The service requires experts to take off the upper console panel sub-assembly (for Sedan) and the console box rear cover (for Hatchback) and the console upper rear panel sub-assembly (for Sedan). First remove the console box carpet then disassemble the rear console box assembly and finally take the instrument pad lower LH apart (for Sedan). To remove heated oxygen sensor No. 2, specialize in using tool 09224-00010 to detach the sensor connector followed by sensor installation through Special Service Tool: 09224-00010. Use Special Service Tool: 09224-00010 to secure the sensor position on the front exhaust pipe. Torque value requirement is 44 Nm (449 kgf.cm, 32 ft. lbs.) without Special Service Tool but 40 Nm (408 kgf.cm, 30 ft. lbs.) when using the tool using a 300 mm (11.81 in.) torque wrench fulcrum length. Move the sensor cable through the floor opening then put on its grommet before final cable attachment. Reinstall the instrument pad lower LH (for Sedan), rear console box assembly, console box carpet, console box rear cover (for Hatchback), console upper rear panel sub-assembly (for Sedan), shifting hole cover sub-assembly (for Hatchback Manual Transaxle), upper console panel sub-assembly (for Sedan), shift lever knob sub-assembly (for Manual Transaxle), instrument panel finish panel end LH (for Sedan), and instrument panel finish panel lower center (for Sedan) in the correct order. Last, connect the cable to the negative terminal of the battery using 5.4 Nm (55 kgf.cm, 48 in. lbs.) torque while inspecting for exhaust gas leakage.
Related 2007 Toyota Yaris Parts
 2007 Toyota Yaris Camshaft Position Sensor
 2007 Toyota Yaris Car Key
 2007 Toyota Yaris Crankshaft Position Sensor
 2007 Toyota Yaris Headlight Relay
 2007 Toyota Yaris Ignition Coil
 2007 Toyota Yaris Spark Plug
 2007 Toyota Yaris Coolant Temperature Sensor
 2007 Toyota Yaris Air Bag Control Module
 2007 Toyota Yaris Engine Control Module
 2007 Toyota Yaris Knock Sensor
 2007 Toyota Yaris Mirror Switch
 2007 Toyota Yaris Relay Block