×
ToyotaParts- Hello
- Login or Register
- Quick Links
- Live Chat
- Track Order
- Parts Availability
- RMA
- Help Center
- Contact Us
- Shop for
- Toyota Parts
- Scion Parts
My Garage
My Account
Cart
OEM 2007 Toyota RAV4 Windshield
Glass Windshield- Select Vehicle by Model
- Select Vehicle by VIN
Select Vehicle by Model
orMake
Model
Year
Select Vehicle by VIN
For the most accurate results, select vehicle by your VIN (Vehicle Identification Number).
1 Windshield found

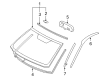
2007 Toyota RAV4 Windshield, Front
Part Number: 56101-0R010$474.31 MSRP: $695.09You Save: $220.78 (32%)Ships in 1-3 Business DaysProduct Specifications- Other Name: Glass Sub-Assembly, Windshield; Windshield Glass, Front; Glass, Windshield
- Manufacturer Note: *LAM,T=4.76,GREEN
- Position: Front
- Replaces: 56101-0R011
- Part Name Code: 56111
- Condition: New
- Fitment Type: Direct Replacement
- SKU: 56101-0R010
- Warranty: This genuine part is guaranteed by Toyota's factory warranty.
2007 Toyota RAV4 Windshield
Looking for affordable OEM 2007 Toyota RAV4 Windshield? Explore our comprehensive catalogue of genuine 2007 Toyota RAV4 Windshield. All our parts are covered by the manufacturer's warranty. Plus, our straightforward return policy and speedy delivery service ensure an unparalleled shopping experience. We look forward to your visit!
2007 Toyota RAV4 Windshield Parts Q&A
- Q: How to remove and install a windshield on 2007 Toyota RAV4?A: Waiting for at least 90 seconds after disconnecting the negative battery cable prevents seat belt pretensioner and Air Bag activation. Start by removing the front door opening trim LH while partially removing the Weather Strip for front pillar garnish LH access followed by doing the same with front door opening trim RH. The service technician should detach and remove the front pillar garnish LH and RH along with the inner rear view mirror assembly as well as the room light assembly followed by the assist grip cover and the assist grip sub-assembly front and visor assembly LH and RH and lastly the visor holder. The front area of the roof headlining can be lowered slightly but it should stay attached to the panel. Remove the front wiper arm head cap, the front wiper arm and blade assembly LH and RH, the front fender to cowl side seal LH and RH, the No. 2 windshield moulding outside LH and RH by removing them with the clip and claw, and the No. 2 windshield outside moulding fastener by applying protective tape to the vehicle body, heating the moulding to 40 to 60 degrees C (104 to 140 degrees F), tying piano wire ends to wooden blocks, cutting the adhesive tape with the piano wire, and removing the clips and moulding fastener. The same process needs to be used for the No. 1 windshield outside moulding fastener. Cut the cowl top ventilator louver and front window moulding inner center carefully with a knife for removal. This procedure includes various steps for windshield glass removal starting with disconnection of any clip and connector that function as windshield deicers followed by protective tape application on the vehicle body. Then insert piano wire under the glass and body before using the wire ends to tie handles while placing matchmarks on both glass and body sections. Cut through the adhesive with piano wire after stopping the adhesive to complete glass removal using suction cups. The cleaning process includes removing damaged stoppers and adhesive as well as squiring and cleaning windshield glass edges with white gasoline. The contact surface cleaning process includes removing additional adhesive from the vehicle body layer followed by vegetable oil treatment on the surface. Place Primer G on the glass installation area that will get spacers before letting it rest for 3 minutes or longer. Afterward, add 2 new spacers. First apply Primer G at spots for adhesive dams on the glass then install the dam by excluding area A. Following this apply Primer G to the glass edges and contact areas before installing the outside windshield moulding. Suction cups will secure the glass while you examine the contact surfaces to establish matchmarks before applying Primer M to the visible auto body surface. First wet the contact surface on the glass with Primer G; then apply adhesive to the glass before installing it onto the vehicle body and making sure matchmarks align correctly. Finally, verify that the glass has a secure fit. Hold the glass in place with protective tape until the adhesive hardens, reconnect the clip and connector if equipped with a windshield deicer, install the cowl top ventilator louver, install the No. 2 and No. 1 windshield outside moulding fasteners with clips and double-sided tape, install the No. 2 windshield moulding outside LH and RH with claw and clip, install the front fender to cowl side seals LH and RH, the front wiper arm and blade assembly LH and RH, the front wiper arm head cap, the roof headlining, the visor holder, the visor assemblies LH and RH, the assist grip sub-assembly and cover, the room light assembly, the inner rear view mirror assembly, the front pillar garnishes LH and RH, the front door opening trims LH and RH, conduct a leak test after the adhesive has hardened, seal any leaks with auto glass sealer, and finally connect the cable to the negative battery terminal.
Related 2007 Toyota RAV4 Parts
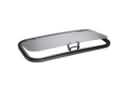 2007 Toyota RAV4 Sunroof
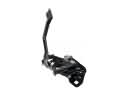 2007 Toyota RAV4 Hood Latch
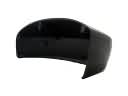 2007 Toyota RAV4 Mirror Cover
 2007 Toyota RAV4 Windshield Wiper
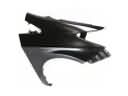 2007 Toyota RAV4 Fender
 2007 Toyota RAV4 Window Regulator
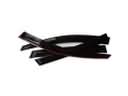 2007 Toyota RAV4 Air Deflector
 2007 Toyota RAV4 Car Mirror
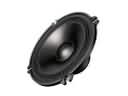 2007 Toyota RAV4 Car Speakers
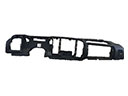 2007 Toyota RAV4 Dash Panel Vent Portion Covers
 2007 Toyota RAV4 Sunroof Cable
 2007 Toyota RAV4 Window Run