×
ToyotaParts- Hello
- Login or Register
- Quick Links
- Live Chat
- Track Order
- Parts Availability
- RMA
- Help Center
- Contact Us
- Shop for
- Toyota Parts
- Scion Parts
My Garage
My Account
Cart
OEM 2007 Toyota Camry Hood Cable
Hood Release Cable- Select Vehicle by Model
- Select Vehicle by VIN
Select Vehicle by Model
orMake
Model
Year
Select Vehicle by VIN
For the most accurate results, select vehicle by your VIN (Vehicle Identification Number).
4 Hood Cables found


2007 Toyota Camry Release Cable, Front
Part Number: 53630-06100$40.14 MSRP: $55.87You Save: $15.73 (29%)Product Specifications- Other Name: Cable Assembly, Hood Lock; Hood Release Cable, Front; Cable Assembly, Hood Lock Control; Hood Release Cable
- Position: Front
- Replaces: 53630-33140
- Part Name Code: 53630
- Item Weight: 0.70 Pounds
- Item Dimensions: 21.5 x 12.4 x 0.9 inches
- Condition: New
- Fitment Type: Direct Replacement
- SKU: 53630-06100
- Warranty: This genuine part is guaranteed by Toyota's factory warranty.


2007 Toyota Camry Cable Handle, Gray, Front
Part Number: 53611-AA010-B1$15.05 MSRP: $20.94You Save: $5.89 (29%)Ships in 1-3 Business DaysProduct Specifications- Other Name: Lever, Hood Lock Control; Hood Release Handle, Front; Release Handle; Lever Sub-Assembly, Hood Lock Control
- Position: Front
- Replaces: 53611-12040-B5
- Part Name Code: 53601
- Item Weight: 0.70 Pounds
- Item Dimensions: 13.4 x 11.1 x 1.5 inches
- Condition: New
- Fitment Type: Direct Replacement
- SKU: 53611-AA010-B1
- Warranty: This genuine part is guaranteed by Toyota's factory warranty.
2007 Toyota Camry Release Handle, Brown, Front
Part Number: 53611-AA010-E1$15.05 MSRP: $20.94You Save: $5.89 (29%)Ships in 1-3 Business DaysProduct Specifications- Other Name: Lever, Hood Lock Control; Hood Release Handle, Front; Lever Sub-Assembly, Hood Lock Control
- Manufacturer Note: GREGE,TRIM4#
- Position: Front
- Replaces: 53611-12040-E2
- Part Name Code: 53601
- Item Weight: 0.70 Pounds
- Item Dimensions: 12.8 x 10.9 x 1.5 inches
- Condition: New
- Fitment Type: Direct Replacement
- SKU: 53611-AA010-E1
- Warranty: This genuine part is guaranteed by Toyota's factory warranty.


2007 Toyota Camry Release Handle, Gray, Front
Part Number: 53611-AA010-B5$15.05 MSRP: $20.94You Save: $5.89 (29%)Ships in 1-3 Business DaysProduct Specifications- Other Name: Lever, Hood Lock Control; Hood Release Handle, Front; Lever Sub-Assembly, Hood Lock Control
- Position: Front
- Part Name Code: 53601
- Item Weight: 0.70 Pounds
- Item Dimensions: 13.3 x 11.4 x 1.5 inches
- Condition: New
- Fitment Type: Direct Replacement
- SKU: 53611-AA010-B5
- Warranty: This genuine part is guaranteed by Toyota's factory warranty.
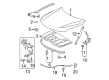
2007 Toyota Camry Hood Cable
Looking for affordable OEM 2007 Toyota Camry Hood Cable? Explore our comprehensive catalogue of genuine 2007 Toyota Camry Hood Cable. All our parts are covered by the manufacturer's warranty. Plus, our straightforward return policy and speedy delivery service ensure an unparalleled shopping experience. We look forward to your visit!
2007 Toyota Camry Hood Cable Parts Q&A
- Q: How to service and repair a Hood Cable on 2007 Toyota Camry?A: A proper replacement and repair process for the hood cable starts with removing the front wheel and front wheel opening extension pad where you need to eliminate the 3 screws. The cool air intake duct seal for the 2GR-FE engine must be uninstalled before moving on to the front bumper assembly that might include fog lights. Disassembly of the front fender liner requires you to remove 5 clips as well as a bolt and 4 screws together with the grommet. Remove the high-pitched horn assembly followed by the hood lock assembly that needs cable connection removal after disassembling three bolts and disconnecting the hood lock control cable unless there is an engine hood courtesy switch that requires disconnected first. You should disconnect the hood lock control cable to proceed with removing the hood lock control lever sub-assembly. When dealing with the hood lock control cable assembly, use a screwdriver to disconnect the clamps while taping the tip of the screwdriver first before pulling the cable from the engine compartment. Put the new hood lock control cable assembly through the upper radiator support then secure the clamps while passing it into the engine compartment. The hood lock control lever sub-assembly installation must be followed by connecting the hood lock control cable. The hood lock assembly requires MP grease on its sliding surfaces and a connection of the hood lock control cable with 3 bolting points at 7.5 N.m torque (77 kgf.cm or 66 in.lbf torque specification). The hood courtesy switch connector should be connected only when the assembly becomes secure. The front fender liner with a grommet should be installed with its 4 screws while the high-pitched horn assembly receives both a bolt and 5 clips. Start by checking and adjusting the hood sub-assembly before putting back the front bumper and then adding the 2GR-FE engine cool air intake duct seal before using the front wheel opening extension pad with three screws and finishing with the front wheel installation. Adjustment preparation should be executed for fog lights followed by an aiming test and required modifications.
Related 2007 Toyota Camry Parts
 2007 Toyota Camry Seat Cover
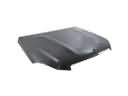 2007 Toyota Camry Hood
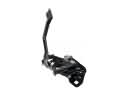 2007 Toyota Camry Hood Latch
 2007 Toyota Camry Grille
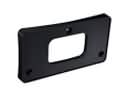 2007 Toyota Camry License Plate
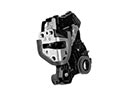 2007 Toyota Camry Door Lock
 2007 Toyota Camry Instrument Cluster
 2007 Toyota Camry Windshield Washer Nozzle
 2007 Toyota Camry Hood Hinge
 2007 Toyota Camry Lift Support
 2007 Toyota Camry Wheelhouse
 2007 Toyota Camry Wiper Linkage