×
ToyotaParts- Hello
- Login or Register
- Quick Links
- Live Chat
- Track Order
- Parts Availability
- RMA
- Help Center
- Contact Us
- Shop for
- Toyota Parts
- Scion Parts
My Garage
My Account
Cart
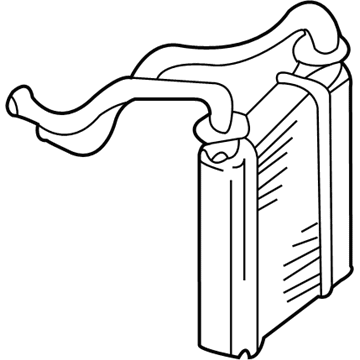
OEM 2006 Scion xA Heater Core
HVAC Heater Core- Select Vehicle by Model
- Select Vehicle by VIN
Select Vehicle by Model
orMake
Model
Year
Select Vehicle by VIN
For the most accurate results, select vehicle by your VIN (Vehicle Identification Number).
1 Heater Core found
- Product Specifications
- Other Name: Unit Sub-Assembly, Radiator; HVAC Heater Core
- Replaces: 87107-52030
- Item Weight: 1.60 Pounds
- Item Dimensions: 13.8 x 11.6 x 8.3 inches
- Condition: New
- SKU: 87107-52031
- Warranty: This genuine part is guaranteed by Toyota's factory warranty.
2006 Scion xA Heater Core
Looking for affordable OEM 2006 Scion xA Heater Core? Explore our comprehensive catalogue of genuine 2006 Scion xA Heater Core. All our parts are covered by the manufacturer's warranty. Plus, our straightforward return policy and speedy delivery service ensure an unparalleled shopping experience. We look forward to your visit!
2006 Scion xA Heater Core Parts Q&A
- Q: How to service and repair the heater core on 2006 Scion xA?A: Starting the heater core repair process requires first removing the air duct assembly by unplugging its 4 claws. Begin by unscrewing the screw to eliminate the heater cover while removing its two claws. First detach the thermistor claw before unclamping its holder while pulling out the thermistor itself. The removal process for the heater radiator unit sub-assembly includes taking out 4 screws along with No. 2 cooler wiring before removing the screw and bracket and detaching the clamp and connector. To reinstall the components begin by fitting the heater radiator unit sub-assembly before connecting the clamp to attach the connector and install the bracket with screw and secure the No. 2 cooler wiring with 4 screws. Install the thermistor before putting the clamp along with the claw in place. The two claws need to be attached during heater cover installation before securing the screw. The air duct assembly installation requires attaching the 4 claws as the final step.


