My Garage
Cart
Make sure this part fits

Toyota 87107-52031
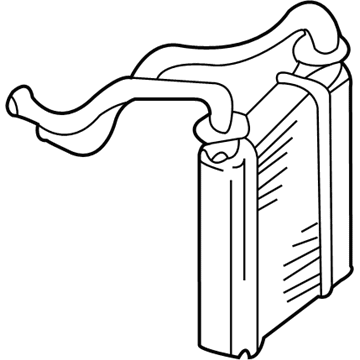
Heater Core

2000-2006 Toyota 8710752031

Customer Questions & Expert Answers (9)
Toyota 87107-52031 Heater Core
  • Part Description
    Unit Sub-Assembly, Radiator; HVAC Heater Core
  • Replaces
    87107-52030
  • Manufacturer
    Toyota
  • Manufacturer's Notes
    This part is discontinued.
Make sure this part fits
  • Related Parts
  • Product Specifications
  • Vehicle Fitment
  • Customer Questions & Expert Answers
  • Product Specifications

    BrandGenuine Toyota
    Manufacturer Part Number87107-52031
    Part DescriptionUnit Sub-Assembly, Radiator; HVAC Heater Core
    Item Dimensions13.8 x 11.6 x 8.3 inches
    Item Weight1.60 Pounds
    ConditionNew
    Replaces87107-52030
    ManufacturerToyota
    SKU87107-52031
    WarrantyThis genuine Toyota part is guaranteed by Toyota's factory warranty.
    Shipping & ReturnShipping Policy Return Policy
    Warning: California's Proposition 65
  • Vehicle Fitment

    Year Make Model Trim Engine
    2004-2006 Scion xABase4 Cyl 1.5 L GAS
    2004-2006 Scion xBBase4 Cyl 1.5 L GAS
    2000-2005 Toyota EchoBase4 Cyl 1.5 L GAS
  • Customer Questions & Expert Answers

    Q:
    Can you provide the right 87107-52031 for my car? Posted by ToyotaPartsNow Specialist
    A:
    Find out if part number 87107-52031 is the right fit for your car by Selecting Your Vehicle model.
    Posted by ToyotaPartsNow Specialist
    Q:
    How to service and repair the heater core on Scion xB? Posted by Customer
    A:
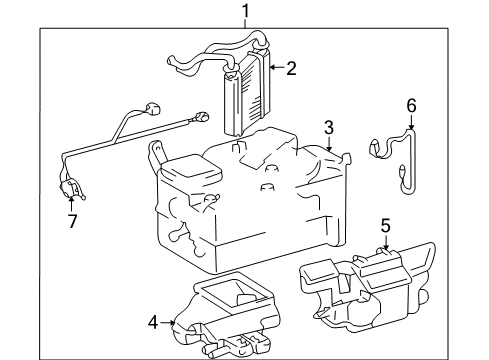
    A technicians must begin heater core repair by discharging refrigerant from the refrigeration system through Special Service Tool: 09870-00015 07110-58060 (07117-58080, 07117-58090, 07117-78050, 07117-88060, 07117-88070, 07117-88080). Users should first disconnect the suction hose sub-assy and the liquid tube sub-assy A with Special Service Tool: 09870-00025 followed by removing the heater water inlet hose A by sliding its clip using pliers. After disconnection of the outer hose A follow the same approach. The technicians should remove the heater control knob followed by the instrument cluster finish panel sub-assy CTR and instrument panel sub-assy w/passenger Air Bag assy until they reach the instrument panel assy lower w/instrument panel reinforcement. First remove the defroster nozzle assembly with clip removal to free the claws then continue removing the ECM followed by the air conditioning blower assembly and defroster damper control cable sub-assembly when both outer and inner cables are disconnected and similar for the air mix damper control cable sub-assembly. Dismantle air duct rear No.2 along with air duct rear No.1 through the same procedure. To remove the heater radiator assembly begin by disconnecting the three connectors followed by unbolting and unearthing both the PTC heater and its attachments then use the two nuts to complete uninstallation. Start by removing the air duct assy after dislodging its 4 claws while subsequently removing the heater cover by unscrewing and separating the claws. To remove Cooler Wiring No.2 disconnect the 5 screws until the thermistor assembly becomes accessible for removal with a claw that can also release the clamp. Installation of the heater radiator unit sub-assembly requires you to first unscrew its bracket then remove the clamp followed by disconnecting the connector. Insert the defroster damper control cable sub-assy facing forward with the arm set at FACE position so that the control lever holds the inner cable end and the wire from the outer cable hooks onto the cable clamp securely without wire bending. The same installation sequence must be performed on the air mix damper control cable sub-assy while keeping the arm in MAX (COOL) position. COOL position. Reinstall the ECM together with instrument panel assy lower w/instrument panel reinforcement and the instrument panel sub-assy w/passenger Air Bag assy and both instrument cluster finish panel sub-assy CTR and heater control knob. The necessary next step includes the installation of liquid tube sub-assy A and suction hose sub-assy followed by engine coolant addition and refrigerant charging through Special Service Tool: 07110-58060 (07117-58060, 07117-58070, 07117-58080, 07117-58090, 07117-78050, 07117-88060, 07117-88070, 07117-88080) with a specified range of 380 plus or minus 30 g (13.9 plus or minus 1.1 oz.). First heat the engine while checking for coolant leaks alongside inspecting the refrigerant system for leaks.
    Posted by ToyotaPartsNow Specialist
    Q:
    How to remove and install the heater core on Scion xA? Posted by Customer
    A:
    A safe heater core removal starts with disconnecting the negative battery cable terminal while extending the waiting period to 90 seconds to avoid Air Bag and seat belt pretensioners from activating. Drain the engine coolant then discharge refrigerant from the system followed by removing the suction hose sub-assembly, liquid tube sub-assembly and heater water inlet hose and outlet hose through usage of pliers to remove the inlet hose clip. To begin disassembly reverse the process by first removing the instrument panel sub-assembly, lower instrument panel assembly, ECM, air conditioning blower assembly, air conditioning amplifier assembly, and defroster nozzle assembly after unclipping the part and detaching both claws. The defroster damper control cable sub-assembly and air mix damper control cable sub-assembly can be removed after disconnecting their inner and outer cables from each sub-assembly. The No. 1 instrument panel brace sub-assembly requires wire harness disconnect and bolt and nut removal before installation. You must disconnect the No. 2 and No. 1 air ducts rear before you can remove the heater radiator assembly by disconnecting the 3 connectors while removing the bolt and ground wire from the PTC heater and taking off the 2 nuts. To install the components begin with heater radiator assembly fittings using two nuts followed by wireless connection between ground wire and PTC heater as well as connector reattachment. You should first connect the rear ends of No. 1 and No. 2 air ducts then install air mix damper control cable sub-assembly and defroster damper control cable sub-assembly through inner and outer cable connections before installing the No. 1 instrument panel brace sub-assembly with 4 bolts and nut while connecting the wire harness. Begin by installing the defroster nozzle assembly through its two claws then place the clip before moving onto the air conditioning amplifier assembly and air conditioning blower assembly and ECM followed by lower instrument panel assembly and instrument panel sub-assembly. Reconnect the heater water outlet hose and inlet hose following the initial procedure before restoring the liquid tube sub-assembly and suction hose sub-assembly and subsequent connection of the cable to the negative battery terminal. After reconnecting the cable the system requires initialization regarding specific needs followed by SRS warning light inspection and adding engine coolant while charging the refrigerant before checking the engine and inspecting for leaks from both coolant and refrigerant.
    Posted by ToyotaPartsNow Specialist
    Q:
    How to service and repair the heater core on Scion xA? Posted by Customer
    A:
    Starting the heater core repair process requires first removing the air duct assembly by unplugging its 4 claws. Begin by unscrewing the screw to eliminate the heater cover while removing its two claws. First detach the thermistor claw before unclamping its holder while pulling out the thermistor itself. The removal process for the heater radiator unit sub-assembly includes taking out 4 screws along with No. 2 cooler wiring before removing the screw and bracket and detaching the clamp and connector. To reinstall the components begin by fitting the heater radiator unit sub-assembly before connecting the clamp to attach the connector and install the bracket with screw and secure the No. 2 cooler wiring with 4 screws. Install the thermistor before putting the clamp along with the claw in place. The two claws need to be attached during heater cover installation before securing the screw. The air duct assembly installation requires attaching the 4 claws as the final step.
    Posted by ToyotaPartsNow Specialist
    Q:
    How to service and repair the heater core on Scion xB? Posted by Customer
    A:
    Service and repair operations on the heater core start with taking apart the heater radiator assembly. The first step involves removing the air duct assembly through detaching its 4 claw connections. The first step to remove the heater cover involves removing the screw then unhooking the 2 claws. Detaching the claw enables thermistor assembly removal which includes clamp removal before you pull out the thermistor. Unscrew the 4 screws securing the heater radiator unit sub-assembly while disconnecting the No. 2 cooler wiring, then remove the screw and bracket, detach the clamp, disconnect the connector to extract the heater radiator unit. The reassembly process starts by fitting the heater radiator unit sub-assembly followed by clamp connector attachment and screwing in the bracket while using the four screws to fix the No. 2 cooler wiring. You should install the thermistor first followed by the application of clamp and claw afterward. The heater cover requires attachment with two claws followed by screwing in the fastener to secure it. The installation of the air duct assembly requires the attachment of its 4 claws.
    Posted by ToyotaPartsNow Specialist
    Q:
    What components need to be removed after the hoses for the 2005 Scion xA? Posted by Customer
    A:
    Remove the instrument panel sub assembly with the passenger airbag assembly, then the instrument panel sub assembly lower with the heater duct.
    Posted by ToyotaPartsNow Specialist
    See expert answers on similar Heater Core
    Q:
    How do you disconnect the air ducts for the 2005 Scion xB? Posted by Customer
    A:
    Disconnect air duct rear No.2 and air duct rear No.1 similarly.
    Posted by ToyotaPartsNow Specialist
    See expert answers on similar Heater Core
    Q:
    What components should be reinstalled after the cables for the 2004 Scion xA? Posted by Customer
    A:
    Reinstall the ECM, instrument panel sub assy lower w/heater duct, and instrument panel sub assy w/passenger airbag assy.
    Posted by ToyotaPartsNow Specialist
    See expert answers on similar Heater Core
    Q:
    What should be done after disconnecting the battery for the 2006 Scion xB? Posted by Customer
    A:
    Drain the engine coolant, discharge the refrigerant from the refrigeration system, and disconnect the suction hose sub-assembly, liquid tube sub-assembly, heater water inlet hose, and heater water outlet hose.
    Posted by ToyotaPartsNow Specialist
    See expert answers on similar Heater Core
    If you have any questions about this product, please don't hesitate to ask us. We will be happy to help you!

OEM Toyota 87107-52031, Excellent Performance and Perfect Fitment

To ensure reliability, purchase Toyota part # 87107-52031 Heater Core. It is sometimes referred to as Toyota Heater Core. OEM parts are unrivaled in terms of quality. They go through extensive quality control inspections and are produced in accordance with Toyota's official factory specifications. All of these remove defects and imperfections. So you can relax knowing they promise exceptional lifespan and flawless fitment.

ToyotaPartsNow.com is a leading supplier of genuine Toyota parts such as Toyota 8710752031 Heater Core. At ToyotaPartsNow.com, we have a wide variety of OEM Toyota parts available at competitive prices. Our comprehensive range of genuine Toyota parts come with a manufacturer's warranty for peace of mind. We also prioritize customer satisfaction, providing a hassle-free return policy and expedited delivery for all our parts. For detailed Toyota parts information, click here.
Choose ToyotaPartsNow for discounted prices, exceptional service and fast delivery