×
ToyotaParts- Hello
- Login or Register
- Quick Links
- Live Chat
- Track Order
- Parts Availability
- RMA
- Help Center
- Contact Us
- Shop for
- Toyota Parts
- Scion Parts
My Garage
My Account
Cart
OEM 2006 Scion xA Alternator
Generator- Select Vehicle by Model
- Select Vehicle by VIN
Select Vehicle by Model
orMake
Model
Year
Select Vehicle by VIN
For the most accurate results, select vehicle by your VIN (Vehicle Identification Number).
1 Alternator found


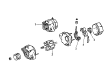
2006 Scion xA Alternator
Part Number: 27060-21140-84$81.79 MSRP: $112.81You Save: $31.02 (28%)Ships in 1-3 Business DaysProduct Specifications- Other Name: Reman Alternator
- Item Weight: 15.70 Pounds
- Item Dimensions: 13.2 x 10.5 x 9.0 inches
- Condition: New
- SKU: 27060-21140-84
- Warranty: This genuine part is guaranteed by Toyota's factory warranty.
2006 Scion xA Alternator
Looking for affordable OEM 2006 Scion xA Alternator? Explore our comprehensive catalogue of genuine 2006 Scion xA Alternator. All our parts are covered by the manufacturer's warranty. Plus, our straightforward return policy and speedy delivery service ensure an unparalleled shopping experience. We look forward to your visit!
2006 Scion xA Alternator Parts Q&A
- Q: How to remove and install an alternator on 2006 Scion xA?A: The first step to remove an alternator involves disconnecting the negative battery cable while waiting for at least 90 seconds to avoid Air Bag and seat belt pretensioner activation. Initiate generator assembly removal by first detaching the terminal cap before eliminating the nut and generator wire and disconnecting the generator connector and wire harness clamp. The technician should first loosen bolts A and B and next release fan and generator V-belt tension before removing the fan and generator V-belt. The technician should begin by removing bolt A followed by the nut and adjusting bar and finally eliminating bolt B and the generator. Before installation, set up the generator first using bolt B while adjusting with bolt A before tightening the nut to reach 11 N.m (112 kgf.cm, 8 ft.lbf). After placing the fan and generator V-belts onto each pulley temporarily you must slip the adjusting bar between the engine mounting bracket and generator while using it to push toward the vehicle front for V-belt tension adjustment until damage risk is minimized between the oil control valve and generator. Tighten bolt A first to 18.5 N.m (189 kgf.cm, 14 ft.lbf) and follow with bolt B to 54 N.m (551 kgf.cm, 40 ft.lbf). Begin by installing the wire harness clamp before connecting the generator connector and installing the generator wire with its nut which should have a final torque of 9.8 N.m (100 kgf.cm, 7 ft.lbf). After that fasten the terminal cap in place. After inspecting the generator V-belt it is necessary to reconnect the cable to the negative battery terminal while performing initialization and specific systems need initialization steps after cable removal and reconnection.
Related 2006 Scion xA Parts
 2006 Scion xA Alternator Brush
 2006 Scion xA Alternator Pulley
 2006 Scion xA Armature
 2006 Scion xA Battery Terminal
 2006 Scion xA Battery Tray
 2006 Scion xA Car Batteries
 2006 Scion xA Starter Drive Gear
 2006 Scion xA Starter Solenoid
 2006 Scion xA Voltage Regulator