×
ToyotaParts- Hello
- Login or Register
- Quick Links
- Live Chat
- Track Order
- Parts Availability
- RMA
- Help Center
- Contact Us
- Shop for
- Toyota Parts
- Scion Parts
My Garage
My Account
Cart
OEM 2004 Toyota Matrix Starter Motor
Starter Ignition- Select Vehicle by Model
- Select Vehicle by VIN
Select Vehicle by Model
orMake
Model
Year
Select Vehicle by VIN
For the most accurate results, select vehicle by your VIN (Vehicle Identification Number).
1 Starter Motor found


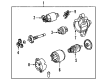
2004 Toyota Matrix Starter
Part Number: 28100-0D080-84$95.68 MSRP: $132.80You Save: $37.12 (28%)Ships in 1-3 Business DaysProduct Specifications- Other Name: Reman Starter 1Zz-Fe; Starter Motor
- Item Weight: 10.40 Pounds
- Item Dimensions: 9.1 x 7.1 x 5.3 inches
- Condition: New
- SKU: 28100-0D080-84
- Warranty: This genuine part is guaranteed by Toyota's factory warranty.
2004 Toyota Matrix Starter Motor
Looking for affordable OEM 2004 Toyota Matrix Starter Motor? Explore our comprehensive catalogue of genuine 2004 Toyota Matrix Starter Motor. All our parts are covered by the manufacturer's warranty. Plus, our straightforward return policy and speedy delivery service ensure an unparalleled shopping experience. We look forward to your visit!
2004 Toyota Matrix Starter Motor Parts Q&A
- Q: How to service and repair the starter motor on 2004 Toyota Matrix?A: Service and repair operations on the starter motor should begin with terminal C lead wire disconnection from terminal C followed by 2 screw removal to detach the starter drive housing repair service kit while simultaneously extracting the return spring and plunger. Start the yoke assembly removal procedure by unscrewing the 2 through bolts and gently pulling the coupling joined with the end frame to separate them. The process requires removal of the starter armature plate from the starter yoke followed by the fast removal of the starter commutator end frame cover using a screwdriver. Feel free to use snap ring pliers and then eliminate the snap ring after which you can extract the washer and starter armature from the starter commutator end frame. Remove the 3 planetary gears from the starter center bearing clutch before extracting the starter center bearing clutch and its accompanying starter drive lever set pin from the starter drive housing where you will eventually eliminate the set pin from the clutch unit. Check the repair service starter kit functions by pushing the plunger then check for quick plunger return. Replace the kit if it does not function correctly. An ohmmeter test of terminals 50 vs C and terminal 50 and switch body continuity should be performed where the kit needs replacement if continuity is not present. The inspection of starter armature assembly requires testing for segment continuity between commutator segments and no continuity between commutator and armature coil core. An armature replacement occurs if necessary. The 400-grit sandpaper should be used to clean commutator surfaces that are burnt or dirty. Measure the commutator depth with a vernier caliper since replacement of the armature becomes necessary when the depth reaches 3.8 mm (0.150 in. or more). Connectivity tests of the end frame assembly must include brush length assessment and discontinuity testing between positive and negative brushes before replacing the frame. The inspection of the starter center bearing clutch sub-assembly requires a clockwise rotation of the clutch pinion gear to check for smooth operation and a counterclockwise rotation to test the locking ability; if either fails replace the sub-assembly along with an evaluation of the gear teeth for signs of wear or damage. Put the starter drive lever set pin into the starter center bearing clutch before mounting the clutch device and pin into the starter drive housing. Apply grease to the planetary gears as well as the pin components before installing the three planetary gears onto the starter center bearing clutch. Before assembling the starter armature with its washer into the starter commutator end frame apply grease to the components. Use snap ring pliers to insert a new snap ring and measure its length to prevent it from exceeding 0.197 inches (5.0 mm). Mount the starter commutator end frame cover while guiding the keyway of the starter armature plate to match the key inside the starter yoke and finish plate installation. Before installation of the starter commutator end frame, align the rubber and its starter yoke cutout then install the frame. Next, align the starter yoke key with the starter drive housing keyway then fix it by tightening two through bolts to a torque of 6.0 Nm (61 kgf-cm, 53 in.-lbf). After applying grease to the plunger and hook you should hang the plunger hook onto the starter drive lever set pin and install the plunger and return spring. Secure the repair service starter kit with 2 screws at 7.5 Nm (76 kgf-cm, 66 in.-lbf) torque setting and connect the lead wire to terminal C using a 10 Nm (102 kgf-cm, 7 ft-lbf) torque.
Related 2004 Toyota Matrix Parts
 2004 Toyota Matrix Starter Solenoid
 2004 Toyota Matrix Alternator Bearing
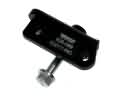 2004 Toyota Matrix Alternator Bracket
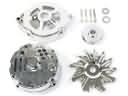 2004 Toyota Matrix Alternator Case Kit
 2004 Toyota Matrix Alternator Pulley
 2004 Toyota Matrix Armature
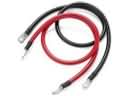 2004 Toyota Matrix Battery Cable
 2004 Toyota Matrix Battery Terminal
 2004 Toyota Matrix Battery Tray
 2004 Toyota Matrix Car Batteries
 2004 Toyota Matrix Starter Drive Gear
 2004 Toyota Matrix Voltage Regulator