My Garage
Cart

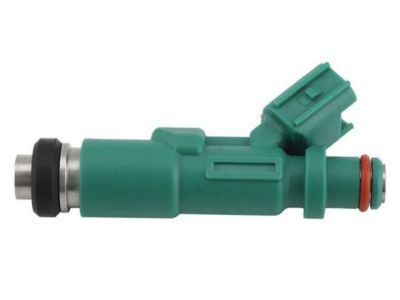
OEM 2004 Scion xB Fuel Injector

Gas Injector
  • Select Vehicle by Model
  • Select Vehicle by VIN
Select Vehicle by Model
Make
Model
Year
or
Select Vehicle by VIN
For the most accurate results, select vehicle by your VIN (Vehicle Identification Number).

1 Fuel Injector found

  • 2004 Scion xB Fuel Injector - 23209-21020
    2004 Scion xB Fuel Injector Diagram - 23209-21020
    View related parts

    2004 Scion xB Injector

    Part Number: 23209-21020
    $158.61 MSRP: $224.54
    You Save: $65.93 (30%)
    Ships in 1-3 Business Days
    ADD TO CART
    Product Specifications
    • Other Name: Injector Set, Fuel; Fuel Injector; Injector Assembly, Fuel
    • Part Name Code: 23250
    • Item Weight: 0.60 Pounds
    • Item Dimensions: 3.7 x 2.6 x 1.4 inches
    • Condition: New
    • Fitment Type: Direct Replacement
    • Require Quantity: 4
    • SKU: 23209-21020
    • Warranty: This genuine part is guaranteed by Toyota's factory warranty.
    More Info
    Fits the following 2004 Scion xB Submodels:
    • Base | 4 Cyl 1.5 L GAS

2004 Scion xB Fuel Injector

Looking for affordable OEM 2004 Scion xB Fuel Injector? Explore our comprehensive catalogue of genuine 2004 Scion xB Fuel Injector. All our parts are covered by the manufacturer's warranty. Plus, our straightforward return policy and speedy delivery service ensure an unparalleled shopping experience. We look forward to your visit!

2004 Scion xB Parts Questions & Experts Answers

  • Q: How to replace the fuel injector assembly on 2004 Scion xB?
    A: The first step to replace the fuel injector assembly requires fuel system pressure discharge. Begin by removing cylinder head cover No.2 through the removal of its 4 nuts. Begin by unplugging the 4 ignition coil connectors before removing the 4 bolts which will detach the ignition coils. Disconnect ventilation hose No. 2 and the other ventilation hose as part of the procedure to take off the cylinder head cover sub-assembly which requires removal of 9 bolts, 2 nuts, and 2 seal washers. Use Special Service Tool: 09268-21010 by fitting it to the connection and rotating until the retainers meet then push the tool toward the fuel tube assembly. Clean the area before uninstalling then carefully maintain straightness of the nylon tube. Shove and pull on the connector if it becomes stuck before you cover all separated parts to protect against damage. Use PPC4504 to detach the 4 fuel injector connectors then remove the 3 bolts from the fuel delivery pipe along with the 4 fuel injectors, taking care to prevent the parts from falling. A technician should remove two head cylinder spacers before extracting the four fuel injectors. New insulators need to be installed with a thin layer of grease or gasoline applying to the O-rings which will be placed on each injector. When installing the fuel delivery pipe with injectors apply grease or gasoline at both points where it meets O-rings. Also during the injector turn process use gentle pressure to guide the device into position without twisting any O-rings. Verify that the installed fuel injectors rotate without any resistance before moving forward with replacement of faulty units. Install the two spacers to the cylinder head and assemble the fuel delivery pipe with four fuel injectors before torquing bolt A to 19 N.m (194 kgf.cm, 14 ft.lbf) and bolt B to 9.0 N.m (92 kgf.cm, 80 in.lbf) and ensuring that the injectors rotate without dropping. Begin by checking the fuel tube alongside fuel injector connectors for damage while examining it for foreign objects. Then secure each wound connection by pulling on it before you install the fuel pipe clamp. The technician must install the cylinder head cover sub-assembly within three minutes after applying specified seal packing (Part No. 08826-00080 or equivalent) to designated locations. The technician then needs two hours to avoid engine starting time. Sea the cylinder head cover through its 9 bolts and two seal washers together with two nuts while tightening all fasteners uniformly to 10 Nm (102 kgf.cm, 7 ft.lbf). Afterwards secure ventilation hoses. The procedure to install ignition coil No.1 includes applying 9.0 N.m (92 kgf.cm, 80 in.lbf) torque while inspecting for fuel leaks before tightening nut B to 7.0 Nm (71 kgf.cm, 62 in.lbf) torque.

Related 2004 Scion xB Parts