×
ToyotaParts- Hello
- Login or Register
- Quick Links
- Live Chat
- Track Order
- Parts Availability
- RMA
- Help Center
- Contact Us
- Shop for
- Toyota Parts
- Scion Parts
My Garage
My Account
Cart
OEM 2004 Scion xA Clutch Slave Cylinder
- Select Vehicle by Model
- Select Vehicle by VIN
Select Vehicle by Model
orMake
Model
Year
Select Vehicle by VIN
For the most accurate results, select vehicle by your VIN (Vehicle Identification Number).
1 Clutch Slave Cylinder found


 Product Specifications
- Other Name: Cylinder Assembly, Clutch Release With Bearing; Clutch Slave Cylinder
- Replaces: 31470-52011, 31470-52010
- Item Weight: 1.40 Pounds
- Item Dimensions: 3.7 x 2.8 x 5.5 inches
- Condition: New
- SKU: 31470-12200
- Warranty: This genuine part is guaranteed by Toyota's factory warranty.
2004 Scion xA Clutch Slave Cylinder
Looking for affordable OEM 2004 Scion xA Clutch Slave Cylinder? Explore our comprehensive catalogue of genuine 2004 Scion xA Clutch Slave Cylinder. All our parts are covered by the manufacturer's warranty. Plus, our straightforward return policy and speedy delivery service ensure an unparalleled shopping experience. We look forward to your visit!
2004 Scion xA Clutch Slave Cylinder Parts Q&A
- Q: How to service and repair the Clutch Slave Cylinder on 2004 Scion xA?A: First service the Clutch Slave Cylinder by disconnecting the clutch release cylinder from the flexible hose tube through the use of tool 09020-00100 while capturing fluid into a container. Follow this by removing the two bolts holding the clutch release cylinder assembly before extracting the part from the system. Disassemble the system by removing the union bolt, clutch release union, together with both gaskets. Separate the clutch release cylinder kit by breaking loose the boot then the push rod and finally the piston from the cylinder body without damaging any internal elements. The next step involves taking off both the spring and bleeder plug cap which secure the bleeder plug. Begin installation with the bleeder plug then continue with the clutch release cylinder kit by reinstalling the bleeder plug cap followed by new spring application and grease application from lithium soap base glycol before putting the piston and push rod and boot onto the cylinder body. The assembly process requires installation of the clutch release union by torquing the union bolt to 25 Nm (250 kgf-cm, 18 ft. lbs.) with an installed angle of 0 degrees - 3 degrees. Use two new gaskets for proper installation of the body. Before installation of the clutch release cylinder assembly use the two bolts to fasten it and complete the torquing process to 12 Nm (120 kgf-cm, 9 ft. lbs.). Use Special Service Tool: 09023-00100 to connect the clutch release cylinder to the flexible hose tube by torquing it to 15 Nm (155 kgf-cm, 11 ft. lbs.). The next step involves filling the brake fluid reservoir while using a torque wrench of 8.4 Nm to bleed the clutch system before inspecting for any fluid leakage.
Related 2004 Scion xA Parts
 2004 Scion xA Automatic Transmission Shift Levers
 2004 Scion xA Clutch Disc
 2004 Scion xA Clutch Fork
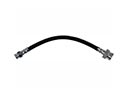 2004 Scion xA Clutch Hose
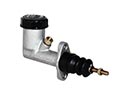 2004 Scion xA Clutch Master Cylinder
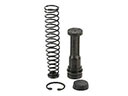 2004 Scion xA Clutch Master Repair Kit
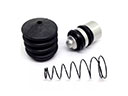 2004 Scion xA Clutch Slave Repair Kit
 2004 Scion xA Flywheel
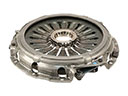 2004 Scion xA Pressure Plate
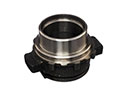 2004 Scion xA Release Bearing
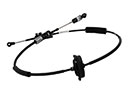 2004 Scion xA Shift Cable
 2004 Scion xA Wheel Seal