×
ToyotaParts- Hello
- Login or Register
- Quick Links
- Live Chat
- Track Order
- Parts Availability
- RMA
- Help Center
- Contact Us
- Shop for
- Toyota Parts
- Scion Parts
My Garage
My Account
Cart
OEM 2003 Toyota MR2 Spyder Shock Absorber
Suspension Shock Absorber- Select Vehicle by Model
- Select Vehicle by VIN
Select Vehicle by Model
orMake
Model
Year
Select Vehicle by VIN
For the most accurate results, select vehicle by your VIN (Vehicle Identification Number).
2 Shock Absorbers found
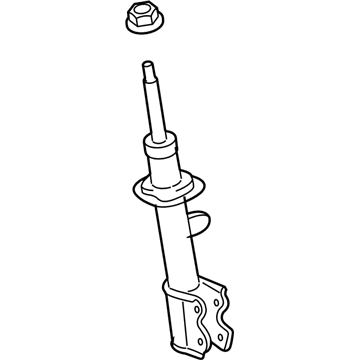
2003 Toyota MR2 Spyder Strut, Rear Driver Side
Part Number: 48540-19375$149.33 MSRP: $211.39You Save: $62.06 (30%)Ships in 1-2 Business DaysProduct Specifications- Other Name: Absorber Assembly, Shock; Suspension Strut, Rear Left; Shock Absorber; Absorber Assembly, Shock, Rear Driver Side
- Manufacturer Note: MARK 48540-17230
- Position: Rear Driver Side
- Replaces: 48540-19366, 48540-19365
- Part Name Code: 48540
- Item Weight: 6.50 Pounds
- Item Dimensions: 26.4 x 6.6 x 5.8 inches
- Condition: New
- Fitment Type: Direct Replacement
- SKU: 48540-19375
- Warranty: This genuine part is guaranteed by Toyota's factory warranty.
2003 Toyota MR2 Spyder Strut, Rear Passenger Side
Part Number: 48530-80078$142.75 MSRP: $202.08You Save: $59.33 (30%)Ships in 1-3 Business DaysProduct Specifications- Other Name: Absorber Assembly, Shock; Suspension Strut, Rear Right; Shock Absorber; Absorber Assembly, Shock, Rear Passenger Side
- Manufacturer Note: MARK 48530-17230
- Position: Rear Passenger Side
- Replaces: 48530-80027, 48530-80060
- Part Name Code: 48530
- Item Weight: 6.90 Pounds
- Item Dimensions: 25.6 x 6.6 x 5.7 inches
- Condition: New
- Fitment Type: Direct Replacement
- SKU: 48530-80078
- Warranty: This genuine part is guaranteed by Toyota's factory warranty.
2003 Toyota MR2 Spyder Shock Absorber
Looking for affordable OEM 2003 Toyota MR2 Spyder Shock Absorber? Explore our comprehensive catalogue of genuine 2003 Toyota MR2 Spyder Shock Absorber. All our parts are covered by the manufacturer's warranty. Plus, our straightforward return policy and speedy delivery service ensure an unparalleled shopping experience. We look forward to your visit!
2003 Toyota MR2 Spyder Shock Absorber Parts Q&A
- Q: How to Service and Repair a Shock Absorber on 2003 Toyota MR2 Spyder?A: The first step to servicing the suspension strut starts with removing the rear wheel while tightening it to 103 Nm (1,050 kgf-cm, 76 ft. lbs.). Next disconnect the stabilizer bar link by removering the nut with a torque of 44 Nm (449 kgf-cm, 32 ft. lbs) yet if the ball joint turns with the nut apply a 5 mm hexagon wrench to hold the stud. The shock absorber flexible hose requires removal by unbolted the clamp using a torque of 29 Nm (2g6 kgf-cm, 21 ft. lbs.). The first step for the rear shock absorber involves loosening two lower side nuts while applying 173 Nm (1,765 kgf-cm, 128 ft. lbs.) of torque but no need to remove the two bolts and two nuts. The shock absorber upper brace disconnects through separating its 3 upper side nuts using a torque force of 80 Nm (816 kgf-cm, 59 ft. lbs.). The final removal task should start with the 2 lower-side nuts and 2 bolts and 4 washers before applying engine oil to the nut threads during assembly. The last step involves removing the shock absorber together with coil spring as well as suspension support cover. The procedure for installing components involves doing them in the reverse order of removal and wheel alignment testing should happen after installation.


