×
ToyotaParts- Hello
- Login or Register
- Quick Links
- Live Chat
- Track Order
- Parts Availability
- RMA
- Help Center
- Contact Us
- Shop for
- Toyota Parts
- Scion Parts
My Garage
My Account
Cart
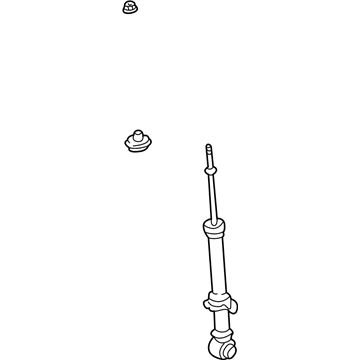
OEM 2001 Toyota Prius Shock Absorber
Suspension Shock Absorber- Select Vehicle by Model
- Select Vehicle by VIN
Select Vehicle by Model
orMake
Model
Year
Select Vehicle by VIN
For the most accurate results, select vehicle by your VIN (Vehicle Identification Number).
1 Shock Absorber found
2001 Toyota Prius Shock Absorber
Part Number: 48530-49186$81.40 MSRP: $114.26You Save: $32.86 (29%)Ships in 1-3 Business DaysProduct Specifications- Other Name: Absorber Assembly, Shock; Strut; Absorber Assembly, Shock, Rear Passenger Side; Absorber Assembly, Shock, Rear Driver Side
- Manufacturer Note: MARK 48530-47020
- Replaces: 48530-49185
- Item Weight: 6.90 Pounds
- Item Dimensions: 26.4 x 6.5 x 5.7 inches
- Condition: New
- Fitment Type: Direct Replacement
- SKU: 48530-49186
- Warranty: This genuine part is guaranteed by Toyota's factory warranty.
2001 Toyota Prius Shock Absorber
Looking for affordable OEM 2001 Toyota Prius Shock Absorber? Explore our comprehensive catalogue of genuine 2001 Toyota Prius Shock Absorber. All our parts are covered by the manufacturer's warranty. Plus, our straightforward return policy and speedy delivery service ensure an unparalleled shopping experience. We look forward to your visit!
2001 Toyota Prius Shock Absorber Parts Q&A
- Q: How to service and repair the Shock Absorber on 2001 Toyota Prius?A: You must begin suspension strut repair and service by compressing the coil spring using Special Service Tool: 09727-30021 (09727-00010, 09727-00021, 09727-00031) but do not use an impact wrench due to risk of damaging the tool. First use a 6 mm hexagon wrench to grasp the piston rod before removing the nut followed by removing the support plate and cushion as well as the spring bracket and upper insulator and suspension support and spring bumper and coil spring in sequence. The shock absorber should be inspected while pressing and extending the rod to listen for unusual sounds and abnormal resistance; any discovered problems require shock absorber replacement. Apply the following procedure for shock absorber disposal by extending the rod fully before drilling a hole into the cylinder while watching for chips and being aware of the non-toxic and odorless and colorless nature of the gas. Pressuring the coil spring using Special Service Tool: 09727-30021 (09727-00010, 09727-00021, 09727-00031) enables its insertion into the shock absorber with the lower segment fitting to the spring lower seat gap. Begin by placing the spring bumper followed by suspension support and upper insulator and spring bracket, cushion and suspension plate. Tighten the center nut only momentarily. Contrary to initial installation, use Special Service Tool: 09727-30021 (09727-00010, 09727-00021, 09727-00031) to check spring bracket direction prior to securing the nut to 56 Nm (571 kgf-cm, 41 ft. lbs.) with a 6 mm hexagon wrench holding the piston rod in place.


