My Garage
Cart
Make sure this part fits

Toyota 46540-60060
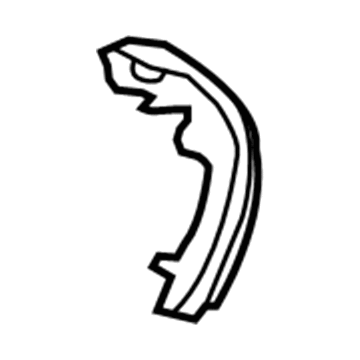
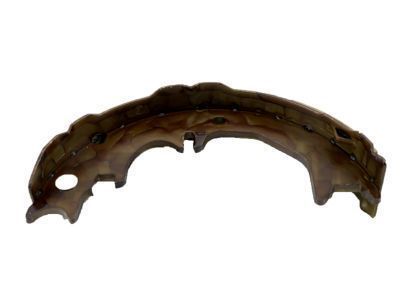
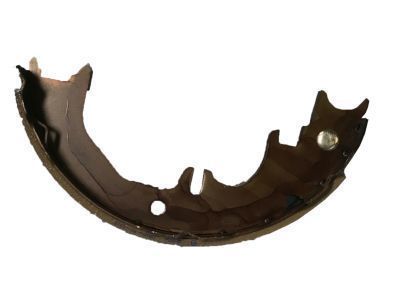
Brake Shoes, Driver Side

2001-2023 Toyota 4654060060

Customer Questions & Expert Answers (7)
Toyota 46540-60060 Brake Shoes, Driver Side
  • Part Description
    Shoe Assembly, Parking Brake; Parking Brake Shoe, Rear Left
  • Part Name Code
    46580
  • Position
    Driver Side
  • Replaces
    46540-60040
  • Manufacturer
    Toyota
Make sure this part fits
$42.63 MSRP: $59.33
You Save: $16.70 (29%)
Ships in 1-3 Business Days
1
ADD TO CART
  • Related Parts
  • Product Specifications
  • Vehicle Fitment
  • Customer Questions & Expert Answers
  • Product Specifications

    BrandGenuine Toyota
    Part Name Code46580
    Manufacturer Part Number46540-60060
    Part DescriptionShoe Assembly, Parking Brake; Parking Brake Shoe, Rear Left
    Other NamesParking Brake Shoes; Shoes; Shoe Assembly, Parking Brake, Driver Side; Parking Brake Shoe
    Item Dimensions12.4 x 3.7 x 7.7 inches
    Item Weight1.60 Pounds
    PositionDriver Side
    ConditionNew
    Fitment TypeDirect Replacement
    Replaces46540-60040
    ManufacturerToyota
    SKU46540-60060
    WarrantyThis genuine Toyota part is guaranteed by Toyota's factory warranty.
    Shipping & ReturnShipping Policy Return Policy
    Warning: California's Proposition 65
  • Vehicle Fitment

    Year Make Model Trim Engine
    2003-2023 Toyota 4Runner40th Anniversary Edition, Limited, Nightshade, Sport, SR5, SR5 Premium, Trail, TRD Off-Road, TRD Off-Road Premium, TRD Pro, TRD Sport, Venture4 Cyl 2.7 L GAS, 6 Cyl 4.0 L GAS, 8 Cyl 4.7 L GAS
    2007-2014 Toyota FJ CruiserBase, Trail Teams Special Edition, TRD Special Edition6 Cyl 4.0 L GAS
    2001-2006 Toyota SequoiaLimited, SR58 Cyl 4.7 L GAS
  • Customer Questions & Expert Answers

    Q:
    Will 46540-60060 fit my vehicle? Posted by ToyotaPartsNow Specialist
    A:
    Find out if part number 46540-60060 is the right fit for your car by Selecting Your Vehicle model.
    Posted by ToyotaPartsNow Specialist
    Q:
    How to overhaul the Parking Brake Shoe on Toyota 4Runner? Posted by Customer
    A:
    As a first step to overhaul the parking brake assembly the mechanic must remove the rear wheel before disassembling the rear disc brake caliper assembly LH by removing 2 bolts without disconnecting the flexible hose. Remove the parking brake and take out the rear disc while marking both the disc and axle shaft. Adjust the shoe until wheel rotation becomes easy if needing to remove difficult discs. The brake drum gauge should measure the disc's inside diameter to confirm it remains within the specifications of 210 mm and 211 mm. Utilize needle-nose pliers to remove the 2 return tension springs before sliding out the front shoe for compression spring extraction. Proceed to remove the parking brake shoe strut LH and the brake shoe by releasing the cup claw to disconnect the parking brake cable from the shoe lever followed by removing the tension spring and shoe adjuster screw set as well as the pair of shoe hold-down springs and 4 cups and 2 pins. A screwdriver should be used to remove the C-washer along with the parking brake shoe shim and shoe lever. Use a ruler to check if the lining on the shoe meets the required standards of 4.0 mm while being at least 1.0 mm thick; install a new brake shoe when necessary. A thorough inspection requires you to grind the shoe lining with chalk on the disc until they reach proper contact. High-temperature grease needs to be applied on the shoe-attached surface of the backing plate prior to shoe and lever installation and C-washer addition. Use a feeler gauge to check the clearance which must be below 0.25 mm; obtain a new shim if the measurements fail to meet criteria. The adjusting bolt and piece should be lubricated before adding the shoe adjusting screw set and tension spring to both shoes followed by installing the pins and 4 cups and 2 shoe hold-down springs. The first step is connecting the parking brake cable to the shoe lever before moving to install the front and rear parking brake shoe followed by the parking brake shoe strut LH and compression spring with return tension springs where the front side spring should be installed first. Regular inspection of all components must verify complete installation together with no residue of oil or grease located on friction surfaces. Temporarily attach hub nuts to adjust the parking brake shoe clearance by removing the hole plug while expanding the shoes until a disc lock occurs then contracting the adjuster to achieve 8 notched smooth rotation of the disc. Check that the brake system is free of drag before placing the hole plug in position. While finishing the installation of the rear disc brake caliper assembly LH, use two bolts to fasten the components with 105 Nm torque then reinstall the rear wheel applying 112 Nm torque to it before adjusting the parking brake pedal travel to proper setting.
    Posted by ToyotaPartsNow Specialist
    Q:
    What is the procedure to overhaul the Parking Brake Shoe with a 210 mm brake disc on Toyota 4Runner? Posted by Customer
    A:
    Start the parking brake overhaul process by taking off the rear wheel followed by disconnecting the rear disc brake caliper assembly LH through unbolting its 2 mounting points that do not affect the flexible hose. After releasing the parking brake to remove the rear disc you must mark its brake disc and axle shaft location and readjust the shoe till the wheel spins freely. Use a brake drum gauge to check the brake disc inside diameter for compliance with the specification of 210 mm and maximum 211 mm. Sliding out the front shoe requires using needle-nose pliers to remove the 2 return tension springs until the compression spring can be extracted. The parking brake shoe strut LH and brake shoe require removal after disassembling the cup claw followed by disconnecting the parking brake cable from the shoe lever and removing the tension spring in combination with shoe adjuster screw set and 2 shoe hold-down springs along with 4 cups and 2 pins. To remove the C-washer operate a screwdriver before removing the shim and shoe lever from the parking brake shoe. Use a ruler to check shoe lining thickness because it should rest between 4.0 mm and 1.0 mm specifications. Perform replacement if necessary. Deaden the brake disc by applying chalk before adjusting the shoe lining contact with the brake disc through grinding as needed. High-temperature grease should be used to coat the shoe attached surface of the backing plate before you place the parking brake shoe along with its shoe lever and shim which will require a new C-washer. A feeler gauge measurement must show clearance below 0.25 mm for the correct shim replacement if the specification is not met. After applying grease to the adjusting bolt and piece the technician installs the shoe adjusting screw set and tension spring and positions the 2 pins, 4 cups, and 2 shoe hold-down springs. Next they must connect the parking brake cable to the shoe lever before mounting the front and rear parking brake shoe. Install the parking brake shoe strut LH and pair it with compression spring while adding return tension springs but line up the front side spring as the first step of assembly. Make certain that each component is correctly placed without any oil or grease contacting the friction surfaces. The shoes should be adjusted until the disc becomes locked then the adjuster is contracted 8 notches while the disc spins effortlessly. Check whether the brakes free correctly before you reinstall the hole plug. The rear disc brake caliper assembly LH requires installation with two bolts torquing to 105 Nm before installation of the rear wheel torquing to 112 Nm. The completion of the process requires an inspection and adjustment of parking brake pedal travel when needed.
    Posted by ToyotaPartsNow Specialist
    Q:
    How to service and repair the parking brake shoe on Toyota Sequoia? Posted by Customer
    A:
    Service and repair of the parking brake shoe requires you to first remove a rear wheel with a torque of 110 Nm then adjust to 1,150 kgf-cm and 83 ft. lbs. First detach the rear disc brake assembly when you remove its 2 mounting bolts with proper torque of 105 Nm (1,070 kgf-cm, 77 ft. lbs.) Securely suspend the assembly to protect the hose from stretching. Begin by loosening the parking brake lever then creating matchmarks on the disc and rear axle hub. After that remove the disc but if you find removal difficult adjust the shoe before wheel rotation becomes effortless. To reassemble the device you must detach the shoe return springs using needle-nose pliers before taking out the shoe strut that should face forward with its spring turned towards the front. You can take out the front shoe adjuster by sliding the shoe outward then disconnect the front shoe tension springs and anchor while using pliers before you remove the shoe with a clip remover while maintaining the cup position. Obtain the rear shoe after detaching the parking brake cable from the parking brake shoe lever. Check all uninstalled components for wear and rust and for damage by measuring the brake shoe lining dimensions which should be 4.0 mm (0.157 inch) but not lower than 1.0 mm (0.039 inch); change any components when needed. Examine the interior disc diameter and reject it for replacement or perform grinding when the diameter exceeds 211 mm (8.31 inch) maximum while maintaining a standard 210 mm (8.27 inch) inside diameter. Use chalk on the disc surface to check proper contact between the parking brake shoe lining and disc before necessary lining grinding occurs. A feeler gauge should measure the parking brake shoe-lever clearance to check if it stays below 0.25 mm (0.010 inch); the shoe needs replacement if out of specifications. Reassemble the components by undoing steps from disassembly but apply high-temperature grease to designated parts and set adjuster notch at 8 after stretching shoes with the 3 hub nuts installed until disc locking occurs. Drive the vehicle at 50 km/h (31 mph) for 400 meters (0.25 mile) while pressing the parking brake pedal to 147 N (15 kgf, 33 lbs.) limit. Perform this driving procedure 2 or 3 times before adjusting the parking brake pedal travel if needed.
    Posted by ToyotaPartsNow Specialist
    Q:
    How do you detach the rear disc brake assembly for the 2001 Toyota Sequoia? Posted by Customer
    A:
    Remove the 2 mounting bolts with a torque of 105 Nm (1,070 kgf-cm, 77 ft. lbs.) and suspend it securely to avoid stretching the hose.
    Posted by ToyotaPartsNow Specialist
    See expert answers on similar Parking Brake Shoe
    Q:
    What should you do for the rear shoe for the 2003 Toyota Sequoia? Posted by Customer
    A:
    Repeat the process for the rear shoe, ensuring to disconnect the parking brake cable from the parking brake shoe lever.
    Posted by ToyotaPartsNow Specialist
    See expert answers on similar Parking Brake Shoe
    Q:
    How do you remove the rear disc brake assembly for the 2004 Toyota Sequoia? Posted by Customer
    A:
    Remove the 2 mounting bolts with a torque of 105 Nm (1,070 kgf-cm, 77 ft. lbs.) and securely suspend the assembly to avoid stretching the hose.
    Posted by ToyotaPartsNow Specialist
    See expert answers on similar Parking Brake Shoe
    If you have any questions about this product, please don't hesitate to ask us. We will be happy to help you!

OEM Toyota 46540-60060, Excellent Performance and Perfect Fitment

To ensure reliability, purchase Toyota part # 46540-60060 Brake Shoes, Driver Side. It is sometimes referred to as Toyota Brake Shoe Set, Toyota Parking Brake Shoe. OEM parts are unrivaled in terms of quality. They go through extensive quality control inspections and are produced in accordance with Toyota's official factory specifications. All of these remove defects and imperfections. So you can relax knowing they promise exceptional lifespan and flawless fitment.

ToyotaPartsNow.com is a leading supplier of genuine Toyota parts such as Toyota 4654060060 Brake Shoes, Driver Side. At ToyotaPartsNow.com, we have a wide variety of OEM Toyota parts available at competitive prices. Our comprehensive range of genuine Toyota parts come with a manufacturer's warranty for peace of mind. We also prioritize customer satisfaction, providing a hassle-free return policy and expedited delivery for all our parts. For detailed Toyota parts information, click here.
Choose ToyotaPartsNow for discounted prices, exceptional service and fast delivery