My Garage
Cart
Make sure this part fits

Toyota 84119-35030
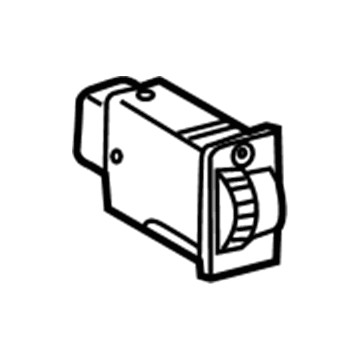
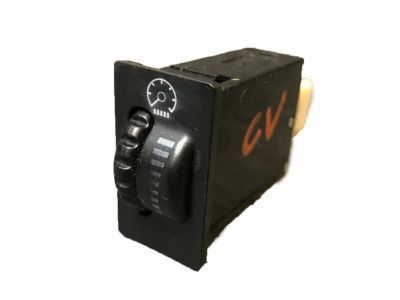
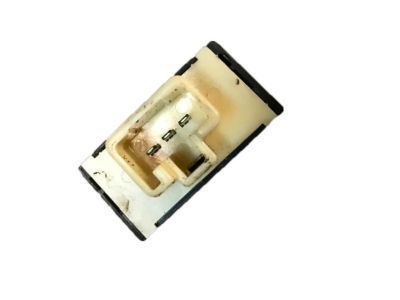
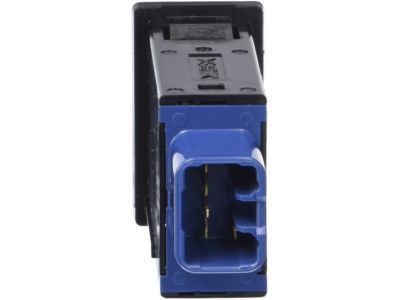
Dimmer Switch, Passenger Side

2003-2014 Toyota 8411935030

Customer Questions & Expert Answers (17)
Toyota 84119-35030 Dimmer Switch, Passenger Side
  • Part Description
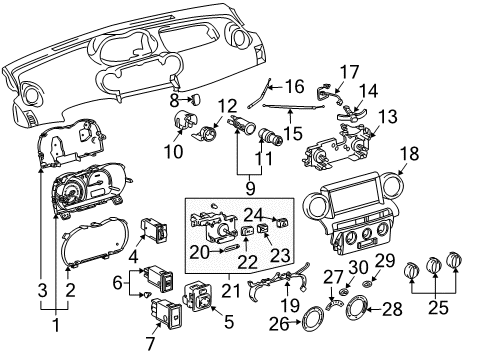
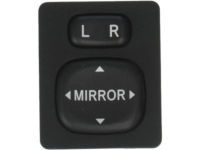
    Rheostat, Light Control; Instrument Panel Dimmer Switch
  • Part Name Code
    84119
  • Position
    Passenger Side
  • Manufacturer
    Toyota
Make sure this part fits
$144.18 MSRP: $204.11
You Save: $59.93 (30%)
Ships in 1-3 Business Days
1
ADD TO CART
  • Related Parts
  • Product Specifications
  • Vehicle Fitment
  • Customer Questions & Expert Answers
  • Product Specifications

    BrandGenuine Toyota
    Part Name Code84119
    Manufacturer Part Number84119-35030
    Part DescriptionRheostat, Light Control; Instrument Panel Dimmer Switch
    Other NamesInstrument Light Rheostat; Rheostat
    Item Dimensions3.7 x 2.3 x 1.3 inches
    Item Weight0.50 Pounds
    PositionPassenger Side
    ConditionNew
    Fitment TypeDirect Replacement
    ManufacturerToyota
    SKU84119-35030
    WarrantyThis genuine Toyota part is guaranteed by Toyota's factory warranty.
    Shipping & ReturnShipping Policy Return Policy
    Warning: California's Proposition 65
  • Vehicle Fitment

    Year Make Model Trim Engine
    2004-2006 Scion xABase4 Cyl 1.5 L GAS
    2004-2006 Scion xBBase4 Cyl 1.5 L GAS
    2003-2009 Toyota 4RunnerLimited, Sport, SR56 Cyl 4.0 L GAS, 8 Cyl 4.7 L GAS
    2007-2014 Toyota FJ CruiserBase, Trail Teams Special Edition, TRD Special Edition6 Cyl 4.0 L GAS
  • Customer Questions & Expert Answers

    Q:
    Can you provide the right 84119-35030 for my car? Posted by ToyotaPartsNow Specialist
    A:
    Find out if part number 84119-35030 is the right fit for your car by Selecting Your Vehicle model.
    Posted by ToyotaPartsNow Specialist
    Q:
    How to service the headlight dimmer switch on Scion xA? Posted by Customer
    A:
    The service process for the headlight dimmer switch requires a 90-second duration of disconnecting the negative cable from the terminal for preventing Air Bag and seat belt pretensioner activation. To begin service on the headlight dimmer switch assembly remove first the steering column cover and disconnect the connector from the dimmer switch assembly by taking out the claw while exercising caution to prevent damaging the teeth through excessive force. To install the dimmer switch begin by placing the claw onto the headlight dimmer which lets you reconnect the connector before replacing the steering column cover. Reconnect the cable to the negative battery terminal while performing initialization because specific systems need this procedure when disconnecting and reconnecting the cable.
    Posted by ToyotaPartsNow Specialist
    Q:
    How to replace the headlight dimmer switch assembly on Toyota 4Runner? Posted by Customer
    A:
    The headlight dimmer switch assembly replacement process begins with removal of the steering column lower cover then the steering column upper cover. Disconnect the connector then unfasten the 2 screws which support the headlight dimmer switch assembly. Place the steering column upper cover after assembly removal and replace it with the steering column lower cover.
    Posted by ToyotaPartsNow Specialist
    Q:
    How to replace the headlamp dimmer switch assembly on Scion xA? Posted by Customer
    A:
    The first step to replace the headlamp dimmer switch assembly requires removal of the steering column cover. To replace the headlamp dimmer switch assembly you should disconnect its connector before gently removing the switch assembly through the disengaged claw while being cautious to prevent damage to the teeth.
    Posted by ToyotaPartsNow Specialist
    Q:
    How to replace the headlamp dimmer switch assembly on Toyota 4Runner? Posted by Customer
    A:
    The first step to replace the headlamp dimmer switch assembly starts with taking out the steering wheel cover lower No.3 then moving to the steering wheel cover lower No.2. First disconnect the connector before removing the two screws which will enable you to extract the headlamp dimmer switch assembly. The procedure for installing the new assembly requires installation of steering wheel cover lower No.2 followed by installation of steering wheel cover lower No.3.
    Posted by ToyotaPartsNow Specialist
    Q:
    How to Service and Repair a Dimmer Switch for Headlights on Toyota FJ Cruiser? Posted by Customer
    A:
    The service of the headlight dimmer switch starts by disconnecting the cable from the negative battery terminal. Start by turning the steering wheel left to reach the screws which you can remove one by one in left-right sequence and complete the removal with the third indicated screw. You need to remove the two claws first then you can take off the lower steering column cover and finally remove the upper steering column cover by disengaging its claw. First disconnect the connector attached to the headlight dimmer switch then loosen the two screws used for its mounting. Attach the headlight dimmer switch after positioning the component properly and fasten the unit with two screws to reestablish the connector connection. Replacement of the steering column cover requires first securing the upper cover claw and afterward attaching the two claws on the lower part. Secure the indicated screws during right and left wheel rotations required for installation. You must readjust the cable to the negative battery terminal after performing a torque application of 3.9 N.m (40 kgf.cm, 35 in.lbf).
    Posted by ToyotaPartsNow Specialist
    Q:
    What should be done after removing the steering column cover for the 2004 Scion xB? Posted by Customer
    A:
    Next, disconnect the connector.
    Posted by ToyotaPartsNow Specialist
    See expert answers on similar Dimmer Switch
    Q:
    What is the final step in the installation process for the 2007 Toyota 4Runner? Posted by Customer
    A:
    Finally, install the steering column lower cover.
    Posted by ToyotaPartsNow Specialist
    See expert answers on similar Dimmer Switch
    Q:
    What is the next step after removing the lower cover for the 2008 Toyota 4Runner? Posted by Customer
    A:
    Remove the steering column upper cover.
    Posted by ToyotaPartsNow Specialist
    See expert answers on similar Dimmer Switch
    Q:
    What is the first step to replace the headlamp dimmer switch assembly for the 2003 Toyota 4Runner? Posted by Customer
    A:
    Remove the steering wheel cover lower No.3.
    Posted by ToyotaPartsNow Specialist
    See expert answers on similar Dimmer Switch
    Q:
    What is the first step to replace the headlamp dimmer switch assembly for the 2005 Scion xB? Posted by Customer
    A:
    Remove the steering column cover.
    Posted by ToyotaPartsNow Specialist
    See expert answers on similar Dimmer Switch
    Q:
    What is the second step in the removal process for the 2009 Toyota 4Runner? Posted by Customer
    A:
    Remove the steering column upper cover.
    Posted by ToyotaPartsNow Specialist
    See expert answers on similar Dimmer Switch
    Q:
    What is the final step in the process for the 2007 Toyota FJ Cruiser? Posted by Customer
    A:
    Reconnect the cable to the negative battery terminal, ensuring a torque of 3.9 N.m (40 kgf.cm, 35 in.lbf) is applied.
    Posted by ToyotaPartsNow Specialist
    See expert answers on similar Dimmer Switch
    Q:
    What caution should be taken during this process for the 2004 Scion xA? Posted by Customer
    A:
    Be cautious not to press the claw too hard, as this may break the teeth.
    Posted by ToyotaPartsNow Specialist
    See expert answers on similar Dimmer Switch
    Q:
    What is the first step to service the headlight dimmer switch for the 2006 Scion xB? Posted by Customer
    A:
    Disconnect the cable from the negative battery terminal and wait at least 90 seconds to prevent airbag and seat belt pretensioner activation.
    Posted by ToyotaPartsNow Specialist
    See expert answers on similar Dimmer Switch
    Q:
    What is the first step to remove the dimmer switch for the 2008 Toyota FJ Cruiser? Posted by Customer
    A:
    Disconnect the cable from the negative battery terminal.
    Posted by ToyotaPartsNow Specialist
    See expert answers on similar Dimmer Switch
    Q:
    What should you do after removing the first two screws for the 2009 Toyota FJ Cruiser? Posted by Customer
    A:
    Remove the third indicated screw.
    Posted by ToyotaPartsNow Specialist
    See expert answers on similar Dimmer Switch
    If you have any questions about this product, please don't hesitate to ask us. We will be happy to help you!

OEM Toyota 84119-35030, Excellent Performance and Perfect Fitment

To ensure reliability, purchase Toyota part # 84119-35030 Dimmer Switch, Passenger Side. It is sometimes referred to as Toyota Dimmer Switch. OEM parts are unrivaled in terms of quality. They go through extensive quality control inspections and are produced in accordance with Toyota's official factory specifications. All of these remove defects and imperfections. So you can relax knowing they promise exceptional lifespan and flawless fitment.

ToyotaPartsNow.com is a leading supplier of genuine Toyota parts such as Toyota 8411935030 Dimmer Switch, Passenger Side. At ToyotaPartsNow.com, we have a wide variety of OEM Toyota parts available at competitive prices. Our comprehensive range of genuine Toyota parts come with a manufacturer's warranty for peace of mind. We also prioritize customer satisfaction, providing a hassle-free return policy and expedited delivery for all our parts. For detailed Toyota parts information, click here.
Choose ToyotaPartsNow for discounted prices, exceptional service and fast delivery