My Garage
Cart
Make sure this part fits

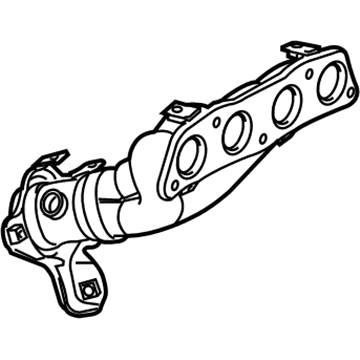
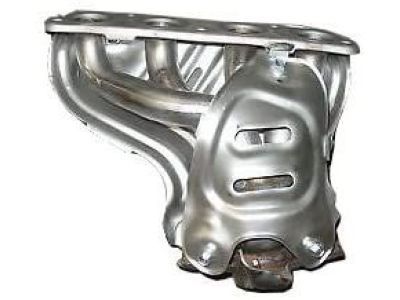
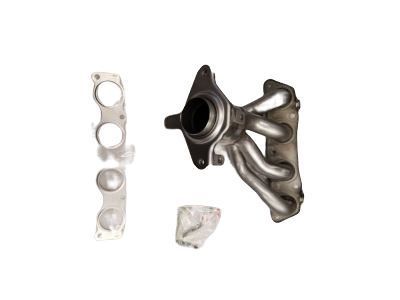
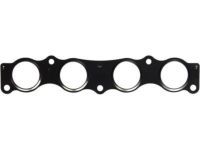
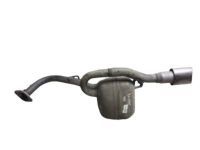
Toyota 17141-0T040
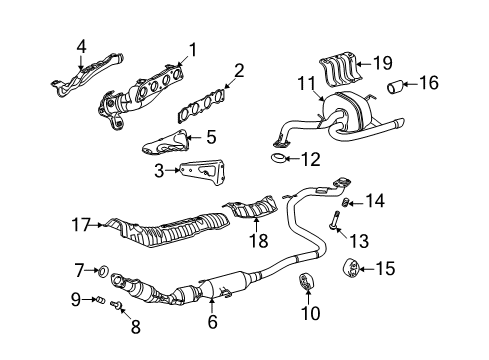
Exhaust Manifold

2008-2012 Toyota 171410T040

Customer Questions & Expert Answers (10)
Toyota 17141-0T040 Exhaust Manifold
  • Part Description
    Manifold, Exhaust
  • Part Name Code
    17141
  • Replaces
    17141-37050, 17141-37051
  • Manufacturer
    Toyota
Make sure this part fits
$230.77 MSRP: $329.49
You Save: $98.72 (30%)
Ships in 1-3 Business Days
1
ADD TO CART
  • Related Parts
  • Product Specifications
  • Vehicle Fitment
  • Customer Questions & Expert Answers
  • Product Specifications

    BrandGenuine Toyota
    Part Name Code17141
    Manufacturer Part Number17141-0T040
    Part DescriptionManifold, Exhaust
    Manufacturer Note(L)
    Item Dimensions15.0 x 12.1 x 6.9 inches
    Item Weight13.90 Pounds
    ConditionNew
    Fitment TypeDirect Replacement
    Replaces17141-37050, 17141-37051
    ManufacturerToyota
    SKU17141-0T040
    WarrantyThis genuine Toyota part is guaranteed by Toyota's factory warranty.
    Shipping & ReturnShipping Policy Return Policy
    Warning: California's Proposition 65
  • Vehicle Fitment

    Year Make Model Trim Engine
    2008-2012 Scion xDBase4 Cyl 1.8 L GAS
    2009-2011 Toyota CorollaBase, LE, S, XLE4 Cyl 1.8 L GAS
    2009-2010 Toyota MatrixBase4 Cyl 1.8 L GAS
  • Customer Questions & Expert Answers

    Q:
    Is 17141-0T040 a good match for my car? Posted by ToyotaPartsNow Specialist
    A:
    Find out if part number 17141-0T040 is the right fit for your car by Selecting Your Vehicle model.
    Posted by ToyotaPartsNow Specialist
    Q:
    How to remove the exhaust manifold on Scion xD? Posted by Customer
    A:
    The Air Fuel Ratio Sensor must be uninstalled as the first step when removing the 2ZR-FE engine's exhaust manifold. The first step involves removing the right-hand engine under cover before proceeding to detach the front exhaust pipe assembly. Vehicle owners should drain automatic transaxle fluid when their vehicle features an automatic transmission system while manual transmission vehicles require draining of manual transaxle oil. Start by removing the front wheel then proceed to detach the right-hand nuts located on the front axle shaft front speed sensor and tie rod end sub-assembly and front stabilizer link assembly. The technician will remove the No. 1 front lower suspension arm sub-assembly right-hand while separating the front axle assembly right-hand. Then disconnect both the drive shaft assembly right-hand. Start by removing the No. 1 exhaust manifold heat insulator through the process of discharging its 4 bolts and subsequently unfastening the manifold stay with its 3 bolts. Finish the job by unbolt the exhaust manifold while removing its 5 nuts and separate the No. 2 exhaust manifold heat insulator with three bolts.
    Posted by ToyotaPartsNow Specialist
    Q:
    How to install the exhaust manifold and associated components on Scion xD? Posted by Customer
    A:
    The installation of the exhaust manifold starts with attaching the No. 2 exhaust manifold heat insulator with 3 bolts that require a torque of 12 Nm (122 kgf-cm, 9 ft-lbf). Install the new exhaust manifold gasket along with the exhaust manifold under the correct sequence of 5 nuts which require 21 Nm (214 kgf-cm, 16 ft-lbf) torque. The manifold support bracket requires installation with 3 bolts in the exact sequence that needs to be tightened to 43 Nm (438 kgf-cm, 32 ft-lbf). Torque the 4 bolts of the No. 1 exhaust manifold heat insulator to 12 Nm (122 kgf-cm, 9 ft-lbf). Secure the drive shaft assembly RH followed by the front axle assembly RH as well as the No. 1 front suspension arm sub-assembly RH and the front stabilizer link assembly RH, tie rod end sub-assembly RH, front speed sensor RH, front axle shaft RH nut and the front wheel in place while making sure components stay properly mounted. Fit the front exhaust pipe assembly along with the air fuel ratio sensor into the correct position. After inserting automatic transaxle fluid personnel should check the automatic transaxle fluid followed by the process of adding manual transaxle oil and performing the corresponding inspection. Inspect all the automatic transaxle fluid, manual transaxle oil and exhaust gas for possible leaks. The engineer must check the front wheel alignment before putting on and torquing the engine under cover to 5.0 Nm (51 kgf-cm, 44 in-lbf).
    Posted by ToyotaPartsNow Specialist
    Q:
    How to remove the exhaust manifold on Toyota Matrix? Posted by Customer
    A:
    The first step to remove the exhaust manifold should start with unconnecting the negative battery cable while acknowledging that certain systems might need post-reconnection initialization. The first task involves engine under cover RH removal followed by V-ribbed belt extraction. First remove the generator assembly from the system. The center exhaust pipe assembly on 2WD requires removing 4 bolts and 2 compression springs to detach from 2 exhaust pipe supports for torsion beam or 3 supports for double wishbone suspension systems. Afterwards remove its 2 gaskets. A 4WD version requires disconnecting the heated oxygen sensor connector and using a wrench to remove 4 bolts with two compression springs before separating it from three exhaust pipe supports to finally discard the two gaskets. First detach the heated oxygen sensor connector for 2WD then remove the 2 bolts, 2 compression springs and front exhaust pipe assembly before obtaining the exhaust manifold gasket. Clear away the No. 1 exhaust manifold heat insulator after removing its 4 bolts followed by the air fuel ratio sensor removal. Start by removing the manifold stay after disconnecting its bolt and nut before moving to the No. 2 manifold stay. You need to take out the 5 nuts with the gasket to separate the exhaust manifold converter sub-assembly. Use two bolts to remove the No. 2 exhaust manifold heat insulator before you finish with the removal of the No. 1 manifold converter insulator through removing its 4 bolts.
    Posted by ToyotaPartsNow Specialist
    Q:
    How to remove the exhaust manifold on Toyota Corolla? Posted by Customer
    A:
    The process to remove the 2ZR-FE exhaust manifold begins with front wiper arm head cap removal then subsequent removal of front wiper arm and blade assembly from both left and right sides. The next step requires removal of the hood to cowl top seal and both the center No. 1 cowl top ventilator louver and left cowl top ventilator louver. The windshield wiper motor and link assembly get detach first before removing the outer cowl top panel (TMC Made) or the outer cowl top panel (except TMC Made). Next in the process, remove both the No. 2 cylinder head cover alongside the air fuel ratio sensor part. Following the removal of the 4 bolts securing the No. 1 exhaust manifold heat insulator you should disconnect the heated oxygen sensor connector and extract the front exhaust pipe assembly with its 4 bolts and 4 compression springs far from the 2 exhaust pipe supports. After removing the 3 bolts securing the manifold stay the technician should remove the exhaust manifold after taking out 5 nuts and inspect the exhaust manifoldasket. To finish the process remove the No. 2 exhaust manifold heat insulator using 3 bolt removal.
    Posted by ToyotaPartsNow Specialist
    Q:
    How to install the exhaust manifold on Toyota Corolla? Posted by Customer
    A:
    Begin installing the exhaust manifold for 2ZR-FE by placing the No. 2 exhaust manifold heat insulator on its position and fastening it using 3 bolts whose torque should be 12 Nm (122 kgf-cm, 9 ft-lbf). Fasten the exhaust manifold using 5 new nuts then torque them to 21 Nm (214 kgf-cm, 16 ft-lbf). The manifold stay gets installed using 3 bolts with a torques setting of 43 Nm (439 kgf-cm, 32 ft-lbf). Use a vernier caliper to measure the compression springs inside the front exhaust pipe assembly for their free length because their minimum specification might indicate replacement. Use new gaskets to build exhaust manifold-to-front exhaust pipe connections by applying a plastic hammer and wooden block to push them tightly in but only put them in the right direction and avoid all reuses and damages. Use the 4 exhaust pipe supports to fix the front exhaust pipe assembly before tightening the 4 bolts with 4 compression springs to 43 Nm (440 kgf-cm, 32 ft-lbf) and hook the heated oxygen sensor connector. The No. 1 exhaust manifold heat insulator requires installation with four bolts experiencing 12 Nm (122 kgf-cm, 9 ft-lbf) torque. The next installation procedure involves connecting the air fuel ratio sensor and No. 2 cylinder head cover and outer cowl top panel (both TMC Made and non-TMC Made models). As part of the installation connect the windshield wiper motor and link assembly, cowl top ventilator louvers, hood to cowl top seal and both front wiper arm and blade assemblies while inspecting for exhaust gas leaks during the procedure.
    Posted by ToyotaPartsNow Specialist
    Q:
    What should be removed after taking off the front wheel for the 2009 Scion xD? Posted by Customer
    A:
    Remove the front axle shaft right-hand nut.
    Posted by ToyotaPartsNow Specialist
    See expert answers on similar Exhaust Manifold
    Q:
    What components should be installed after the No. 1 exhaust manifold heat insulator for the 2010 Scion xD? Posted by Customer
    A:
    Install the drive shaft assembly RH, front axle assembly RH, No. 1 front suspension arm sub-assembly RH, front stabilizer link assembly RH, tie rod end sub-assembly RH, front speed sensor RH, front axle shaft RH nut, and front wheel, ensuring all components are properly secured.
    Posted by ToyotaPartsNow Specialist
    See expert answers on similar Exhaust Manifold
    Q:
    What is the next step after the manifold support bracket for the 2008 Scion xD? Posted by Customer
    A:
    Install the No. 1 exhaust manifold heat insulator with 4 bolts, also torqued to 12 Nm (122 kgf-cm, 9 ft-lbf).
    Posted by ToyotaPartsNow Specialist
    See expert answers on similar Exhaust Manifold
    Q:
    What should you do at the end of the installation process for the 2009 Toyota Matrix? Posted by Customer
    A:
    Inspect for exhaust gas leaks.
    Posted by ToyotaPartsNow Specialist
    See expert answers on similar Exhaust Manifold
    If you have any questions about this product, please don't hesitate to ask us. We will be happy to help you!

OEM Toyota 17141-0T040, Excellent Performance and Perfect Fitment

To ensure reliability, purchase Toyota part # 17141-0T040 Exhaust Manifold. It is sometimes referred to as Toyota Exhaust Manifold. OEM parts are unrivaled in terms of quality. They go through extensive quality control inspections and are produced in accordance with Toyota's official factory specifications. All of these remove defects and imperfections. So you can relax knowing they promise exceptional lifespan and flawless fitment.

ToyotaPartsNow.com is a leading supplier of genuine Toyota parts such as Toyota 171410T040 Exhaust Manifold. At ToyotaPartsNow.com, we have a wide variety of OEM Toyota parts available at competitive prices. Our comprehensive range of genuine Toyota parts come with a manufacturer's warranty for peace of mind. We also prioritize customer satisfaction, providing a hassle-free return policy and expedited delivery for all our parts. For detailed Toyota parts information, click here.
Choose ToyotaPartsNow for discounted prices, exceptional service and fast delivery