My Garage
Cart
Make sure this part fits

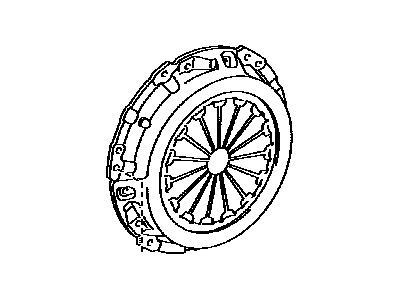
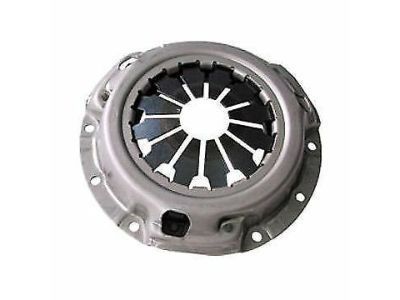
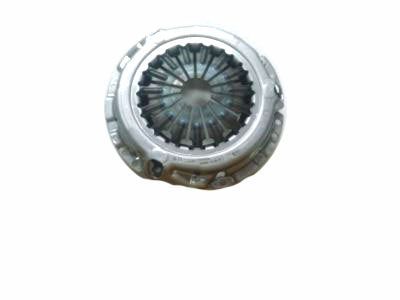
Toyota 31210-12291
Pressure Plate

2000-2014 Toyota 3121012291

Customer Questions & Expert Answers (4)
Toyota 31210-12291 Pressure Plate
  • Part Description
    Cover Assembly, Clutch; Clutch Kit
  • Part Name Code
    31210
  • Replaces
    31210-20380, 31210-12250, 31210-20360, 31210-12251, 31210-12290
  • Manufacturer
    Toyota
Make sure this part fits
$145.27 MSRP: $205.64
You Save: $60.37 (30%)
Ships in 1-3 Business Days
1
ADD TO CART
  • Product Specifications
  • Vehicle Fitment
  • Customer Questions & Expert Answers
  • Product Specifications

    BrandGenuine Toyota
    Part Name Code31210
    Manufacturer Part Number31210-12291
    Part DescriptionCover Assembly, Clutch; Clutch Kit
    Item Dimensions12.7 x 11.5 x 2.4 inches
    Item Weight1.40 Pounds
    ConditionNew
    Fitment TypeDirect Replacement
    Replaces31210-20380, 31210-12250, 31210-20360, 31210-12251, 31210-12290
    ManufacturerToyota
    SKU31210-12291
    WarrantyThis genuine Toyota part is guaranteed by Toyota's factory warranty.
    Shipping & ReturnShipping Policy Return Policy
    Warning: California's Proposition 65
  • Vehicle Fitment

    Year Make Model Trim Engine
    2008-2014 Scion xDBase4 Cyl 1.8 L GAS
    2000-2005 Toyota CelicaGT, GTS4 Cyl 1.8 L GAS
    2005-2006 Toyota CorollaXRS4 Cyl 1.8 L GAS
    2003-2006 Toyota MatrixXRS4 Cyl 1.8 L GAS
  • Customer Questions & Expert Answers

    Q:
    Can you provide the right 31210-12291 for my car? Posted by ToyotaPartsNow Specialist
    A:
    Find out if part number 31210-12291 is the right fit for your car by Selecting Your Vehicle model.
    Posted by ToyotaPartsNow Specialist
    Q:
    How to service and repair the pressure plate on Toyota Celica? Posted by Customer
    A:
    Service and repair of the pressure plate begins with transaxle removal from the engine followed by clutch cover and disc removal after aligning both matchmarks between clutch cover and flywheel while using the spring tension method to loosen the set bolts individually until spring release occurs and finally removing the set bolts to avoid clutch disc drop. The service procedure begins by taking away the release bearing and fork assembly before separating them next and completing the process with release fork support and boot removal. Professional use of vernier calipers is essential to measure clutch disc rivet depth which requires a minimum depth of 0.3 mm (0.012 inch) while replacement is needed if this value is not maintained. Use a dial indicator to measure the clutch disc runout only when it stays under 0.8 mm (0.031 inch). Verify the flywheel runout with the same tool checking its maximum value at 0.1 mm (0.004 inch) before replacing it if necessary. The initial flywheel bolt tightening starts by using even torque pressure to reach 49 Nm (500 kgf-cm, 36 ft. lbs.), after which the bolts receive an additional 90° rotation before verification of the painted mark at a 90° angle. Measure the diaphragm spring depth and width to determine replacement of the clutch cover when depth reaches 0.5 mm (0.020 inch) or width exceeds 6.0 mm (0.236 inch). A functional release bearing can be assessed through manual rotation under axial pressure conditions. Otherwise, replace the bearing if necessary. Special Service Tool: 09301-00210 should be inserted into the clutch disc to attach it onto the flywheel while making sure the disc enters correctly and lining up the matchmarks found on the clutch cover and flywheel. Tighten the six bolts to 19 Nm (195 kgf-cm, 14 ft. lbs.) using a specific installation sequence while verifying that the disc maintains its center position throughout the process. A dial indicator helps you check the diaphragm spring tip alignment for maximum non-alignment less than 0.5 mm (0.020 inch). When the alignment exceeds this amount use Special Service Tool: 09333-00013 for manual adjustment. Use a maximum 37 Nm torque (375 kgf-cm, 27 ft. lbs.) to fasten the boot and release fork support to the transaxle while applying release hub grease (Part No. 08887-01806) to both release fork and hub contact areas and applying clutch spline grease (Part No. 08887-01706) to the input shaft spline. Reinstall the transaxle to the engine after you install both the release bearing and fork to the transaxle.
    Posted by ToyotaPartsNow Specialist
    Q:
    How to overhaul the pressure plate on Toyota Matrix? Posted by Customer
    A:
    The pressure plate overhaul process begins with removal of manual transaxle components and then proceeds with the sequential removal of clutch release fork sub-assembly before extracting the fork and bearing from the transaxle assembly. Begin the process by removing the clutch release bearing assembly from the clutch release fork before moving to the release fork support from transaxle assembly and afterward taking off the release bearing hub clip and clutch release fork boot. Use a socket wrench to line up the matchmarks while untightening each bolt gradually until the spring tension frees, then remove the 6 bolt to disconnect the clutch cover assembly without letting the clutch disc assembly fall. After removing the clutch disc assembly maintain a clean status for the lining part and pressure plate and flywheel sub-assembly surface surface free from oil and foreign objects. Measure the distance of the rivet heads on the clutch disc assembly with vernier calipers to verify it stays below 0.3 mm (0.012 inch) before continuing; replace the clutch disc assembly if needed. Install the clutch disc assembly into the transaxle assembly while facing it in the right direction and run it through a dial indicator which should read less than 0.8 mm (0.031 inch) at most; replace if this limit is exceeded. Verify the clutch cover assembly diaphragm spring wear with vernier calipers to confirm both depth exceeds 0.5 mm (0.020 inch) and width exceeds 6.0 mm (0.236 inch); perform a replacement if necessary. A dial indicator must check the flywheel sub-assembly runout which should not exceed 0.1 mm (0.004 inch). Replace the component if required. To check the clutch release bearing assembly function properly turn it by hand under axial force conditions; perform a replacement of the release bearing assembly if required. Install the clutch disc assembly through Special Service Tool: 09301-00210 which should go first into the clutch disc assembly then into the flywheel sub-assembly while maintaining proper orientation. Install the clutch cover assembly by aligning the matchmarks before tightening the bolts in a specified order up to 19.1 Nm (195 kgf-cm, 14 ft. lbs.) torque while checking for disc centering. To inspect and adjust clutch cover assembly so diaphragm spring tip alignment can be checked with a dial indicator for maximum non-alignment of less than 0.5 mm (0.020 inch), Special Service Tool: 09333-00013 should be used to conduct any necessary adjustments. The transaxle assembly should receive the release fork support which requires 36.8 Nm (375 kgf-cm, 27 ft. lbs.) torques while the clutch release fork sub-assembly installation must be accompanied by application of release hub grease (Part No. 08887-01806) at contact points. Before installation of the clutch release bearing assembly you must apply clutch spline grease (Part No. 08887-01706) to the input shaft spline. Also verify that the release bearing slides easily once installed. End the installation process by installing both the clutch release fork boot together with the manual transaxle.
    Posted by ToyotaPartsNow Specialist
    Q:
    What is the procedure for installing the clutch cover assembly for the 2005 Toyota Matrix? Posted by Customer
    A:
    Align the matchmarks and tighten the 6 bolts in the specified order to a torque of 19.1 Nm (195 kgf-cm, 14 ft. lbs.).
    Posted by ToyotaPartsNow Specialist
    See expert answers on similar Pressure Plate
    If you have any questions about this product, please don't hesitate to ask us. We will be happy to help you!

OEM Toyota 31210-12291, Excellent Performance and Perfect Fitment

To ensure reliability, purchase Toyota part # 31210-12291 Pressure Plate. It is sometimes referred to as Toyota Pressure Plate. OEM parts are unrivaled in terms of quality. They go through extensive quality control inspections and are produced in accordance with Toyota's official factory specifications. All of these remove defects and imperfections. So you can relax knowing they promise exceptional lifespan and flawless fitment.

ToyotaPartsNow.com is a leading supplier of genuine Toyota parts such as Toyota 3121012291 Pressure Plate. At ToyotaPartsNow.com, we have a wide variety of OEM Toyota parts available at competitive prices. Our comprehensive range of genuine Toyota parts come with a manufacturer's warranty for peace of mind. We also prioritize customer satisfaction, providing a hassle-free return policy and expedited delivery for all our parts. For detailed Toyota parts information, click here.
Choose ToyotaPartsNow for discounted prices, exceptional service and fast delivery