My Garage
Cart
Make sure this part fits

Toyota 13568-09041
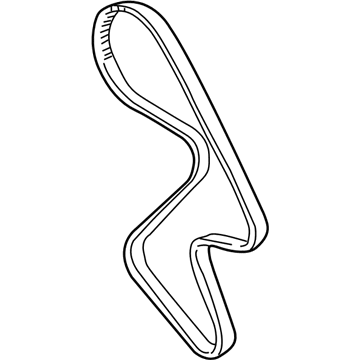
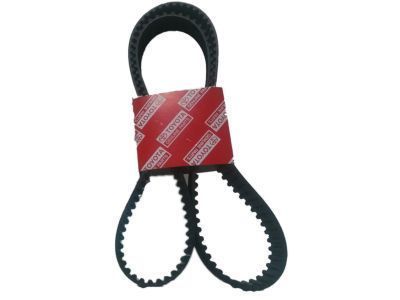
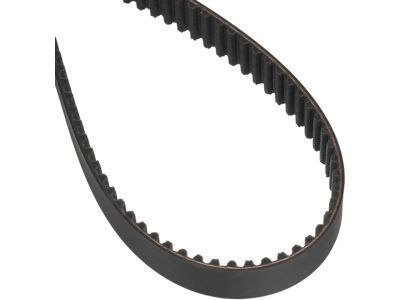
Timing Belt

1984-2001 Toyota 1356809041

Customer Questions & Expert Answers (6)
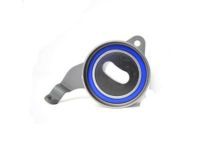
Toyota 13568-09041 Timing Belt
  • Part Description
    Belt, Timing; Engine Timing Belt; Timing Belt Kit
  • Part Name Code
    13568
  • Replaces
    13568-74010, 13568-03010, 13568-79025, 13568-79225, 13568-74020, 13568-79095, 13568-74011, 13568-74012
  • Manufacturer
    Toyota
Make sure this part fits
$43.02 MSRP: $59.88
You Save: $16.86 (29%)
Ships in 1-3 Business Days
1
ADD TO CART
  • Related Parts
  • Product Specifications
  • Vehicle Fitment
  • Customer Questions & Expert Answers
  • Product Specifications

    BrandGenuine Toyota
    Part Name Code13568
    Manufacturer Part Number13568-09041
    Part DescriptionBelt, Timing; Engine Timing Belt; Timing Belt Kit
    Manufacturer Note(L)
    Item Dimensions14.0 x 11.8 x 2.2 inches
    Item Weight1.10 Pounds
    ConditionNew
    Fitment TypeDirect Replacement
    Replaces13568-74010, 13568-03010, 13568-79025, 13568-79225, 13568-74020, 13568-79095, 13568-74011, 13568-74012
    ManufacturerToyota
    SKU13568-09041
    WarrantyThis genuine Toyota part is guaranteed by Toyota's factory warranty.
    Shipping & ReturnShipping Policy Return Policy
    Warning: California's Proposition 65
  • Vehicle Fitment

    Year Make Model Trim Engine
    1984-2001 Toyota CamryBase, CE, DLX, DLX All Trac, DX, LE, LE All Trac, SE, XLE4 Cyl 1.8 L DIESEL, 4 Cyl 2.0 L DIESEL, 4 Cyl 2.0 L GAS, 4 Cyl 2.2 L CNG, 4 Cyl 2.2 L GAS
    1987-1999 Toyota CelicaGT, GTS, ST4 Cyl 2.0 L GAS, 4 Cyl 2.2 L GAS
    1991-1995 Toyota MR2Base4 Cyl 2.2 L GAS
    1996-2000 Toyota RAV4Base4 Cyl 2.0 L GAS, BATTERY EV (EV/BEV)
    1999-2001 Toyota SolaraSE, SLE4 Cyl 2.2 L GAS, 6 Cyl 3.0 L GAS
  • Customer Questions & Expert Answers

    Q:
    Is 13568-09041 a good match for my car? Posted by ToyotaPartsNow Specialist
    A:
    Find out if part number 13568-09041 is the right fit for your car by Selecting Your Vehicle model.
    Posted by ToyotaPartsNow Specialist
    Q:
    How to Service and Repair a Timing Belt on Toyota Camry? Posted by Customer
    A:
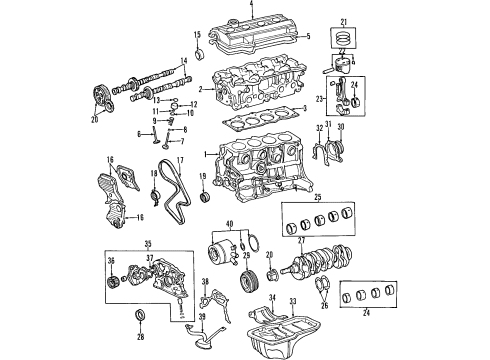
    The service procedure starts with unfastening the generator and right-hand front wheel together with the right-hand front fender apron seal and PS pump drive belt through two bolts. Start the procedure by disconnecting the ground strap connector followed by removing the engine moving control rod after disassembly of 3 bolts and the No.2 right-hand engine mounting bracket with its associated 3 bolts. Start by disconnecting the 4 thick cords from the spark plugs and clamps on the cylinder head cover and then remove both the spark plugs and the No.2 timing belt cover after removing its 4 bolts and two engine wire clamps. Turn the crankshaft pulley to position the No.1 cylinder at TDC/compression where the timing mark "0" lines up with the No.1 timing belt cover while the camshaft timing pulley hole addresses the bearing cap timing mark. The camshaft timing pulley requires Special Service Tool: 09249-63010, 09960-10010 (09962-01000, 09963-01000) for removal of its bolt that enables loosening. Subsequently remove the crankshaft pulley using Special Service Tool: 09213-54015 (91651-00855), 09330-00021 (and bolt) together with proper alignment of matchmarks if reusing the timing belt. Proceed to eliminate the No.1 timing belt cover, timing belt guide, and timing belt while noting down the engine revolution direction for belt reuse. First remove the No.1 idler pulley alongside its tension spring and then extract the No.2 idler pulley from the system. For optimal results use Special Service Tool: 09950-50012 (09951-05010, 09952-05010, 09953-05010, 09953-05020, 09954-05020, 09954-05010) for the removal process of the crankshaft timing pulley. Use Special Service Tool: 09960-10010 (09962-01000, 09963-00500) to free the pulley nut of the oil pump. Look for any damage on the timing belt that is not bent and not twisted and not in contact with oil water or steam also check for idler pulley oil leakage and normal operation. Free-length measurement of tension spring (42.0 mm) combined with 32 - 37 N tension reading at 50.5 mm will indicate whether replacement is required. Position the oil pump pulley first and install the crankshaft timing pulley while ensuring no damage to the angle sensor. Put on the second idler pulley after setting the first idler pulley with the tension spring and verifying normal operation. Begin by installing the timing belt with proper point alignment along with maintaining cleanliness until you place the timing belt guide followed by the No.1 timing belt cover while inspecting the gasket for damages. After securing the crankshaft pulley to the proper torque standard the technician can install the camshaft timing pulley then sets the No.1 cylinder at TDC compression and connects the timing belt to the pulley during the tension check. The valve timing check involves rotating the crankshaft pulley clockwise when the No.1 idler pulley bolt is loosened to align its timing marks before tightening the bolt. Check the No.2 timing belt cover while inspecting gaskets for damage then install the spark plugs and high-tension cords. The installation sequence continues with the No.2 right-hand engine mounting bracket and then follows with engine moving control rod, ground strap connector, PS pump drive belt and right-hand front fender apron seal and right-hand front wheel and generator.
    Posted by ToyotaPartsNow Specialist
    Q:
    How to remove and install the timing belt on Toyota RAV4? Posted by Customer
    A:
    The procedure for timing belt removal requires disconnecting the PS reservoir and removing the reservoir bracket followed by disconnecting the wire harness bracket then removing the generator together with its bracket. The removal process starts with disconnecting and removing the No. 3 ABS actuator bracket and continuing with disassembly of the RH front wheel and RH engine under cover before proceeding further. First use bolt A loosening and Special Service Tool: 09249-63010 with a deep socket wrench to detach bolt B on the drive belt before removing the PS pump's drive belt. Slightly raising the engine by fastening a jack to its oil pan enables the removal of weight from the right engine mounting. Then remove the insulator and spark plugs from the RH engine mounting. Properly remove the crankshaft pulley by using Special Service Tool: 09213-54015 (91651-60855 for Type A) combined with 09330-00021 and 91121-40665 (and bolt) before using a plate washer with bolt Type B beside Special Service Tool: 09950-50010. Remove the No.2 timing belt cover only after engine wire disconnect and remove the RH engine mounting bracket using Special Service Tool: 09249-63010. The first step requires to place the crankshaft pulley temporarily before setting the No. 1 cylinder engine position at TDC compression by lining up the crankshaft pulley slot with timing mark "0" and the camshaft timing pulley hole with bearing cap timing marks. Tension the No. 1 idler pulley mounting bolt leftwards and detach the camshaft timing pulley using Special Service Tool: 0924-63010, 09960-10010 (09962-10000, 09963-10000). Use Special Service Tool: 09950-50012 to dismantle the crankshaft timing pulley with subsequent removal of the oil pump pulley through the use of Special Service Tool: 09960-10010 (09962-01000, 09963-06000). Examine the timing belt for deficiencies while verifying it remains free from bends, twists and stays clear from contaminants like oil, water or steam. Check all idler pulleys and their tension spring for regular operations and measurement accuracy. Installation of the oil pump pulley requires the use of Special Service Tool: 09960-10010 to install the nut at 24 Nm torque while aligning cutouts. Faced inward should be the sensor side of the crankshaft timing pulley before installing it along with the 42 Nm torqued No. 2 idler pulley. Install the No. 1 idler pulley and tension spring but ensure the system moves without friction and place the timing belt on during engine downtime in a clean environment. After installing the timing belt guide you must put on the No. 1 timing belt cover while checking the gasket for damage and verifying correct installation. Install the crankshaft pulley temporarily before using Special Service Tools 09249-63010 & 09960-10010 to install the camshaft timing pulley according to provided torque specifications. Use TDC/compression of the No. 1 cylinder to properly install the timing belt and check valve timing through crankshaft alignment with timing marks. Complete your work by first installing the RH engine mounting bracket and second installing the No. 2 timing belt cover before finishing the installation with the RH engine mounting bracket followed by crankshaft pulley and spark plugs together with RH engine mounting insulator then PS pump drive belt before placing the RH engine under cover and RH front wheel in addition to other components that might be needed.
    Posted by ToyotaPartsNow Specialist
    Q:
    How to remove and install the timing belt on Toyota Solara? Posted by Customer
    A:
    The first step for timing belt removal requires unwinding both bolts to detach the RH front wheel with its suspension upper brace and RH fender apron seal plus the generator drive belt and PS pump drive belt. Disconnect the engine coolant reservoir hose which is attached to the water outlet as well as the ground strap connectors. First detach the No.2 RH engine mounting bracket through generator pivot bolt loosening and removing its nut and bracket. Then take out the No.2 RH engine mounting stay, engine moving control rod, and RH engine mounting stay following the engine mounting stay removal. Use Special Service Tool: 09213-54015 (91651-60855) together with 09330-00021 to detach the crankshaft pulley bolt before utilizing Special Service Tool: 09950-50012 (09951-05010, 09952-05010, 09953-05010, 09953-05020, 09954-05020) to remove the pulley. Start by removing the 4 bolts from the No.1 timing belt cover before taking out the timing belt guide and finishing with removal of the 5 bolts from the No.2 timing belt cover after engine wire protector clamps have been disconnected. The removal of RH engine mounting bracket requires disassembly of its two bolts together with the accompanying nut. Use a crankshaft pulley bolt and checking procedure to establish No.1 cylinder at TDC/compression. Then check camshaft timing pulley and No.3 timing belt cover alignment. Verify the presence of three installation marks and a front mark on the timing belt before removal because no marks indicate a need for new placement. Use Special Service Tool: 09249-63010, 09960-10010 (09962-01000, 09963-01000) for the RH timing pulley and Special Service Tool: 09960-10010 (09962-01000, 09963-01000) for the LH timing pulley while removing the camshaft timing pulleys after draining the timing belt tensioner and its two bolts in alternating techniques. Use a 10 mm hexagon wrench to uninstall the No.2 idler pulley followed by the No.1 idler pulley from the vehicle. Move the crankshaft timing pulley off its bolt and timing belt plate yet proceed to extract it through Special Service Tool: 09950-50012 (09951-05010, 09952-05010, 09953-05010, 09953-05020, 09954-05010) while being careful to prevent damage to the sensor region. Check the timing belt for proper condition among defects and verify its resistance to bending and twisting as well as its compatibility with oil, water, and steam exposure and confirm correct installation and wear levels. The staff should check idler pulleys for oil leakage while inspecting the pulleys' smooth operation and examining the timing belt tensioner for oil leakage and proper push rod movement. Position the crankshaft timing pulley by matching the pulley set key with the key groove followed by pulley insertion. Then install the timing belt plate together with its bolt. Add adhesive Part No. 08833-00080 such as THREE BOND 1344 or LOCTITE 242 or equivalent to the No.1 idler pulley installation before proceeding with the No.2 idler pulley. Use the correct Special Service Tool to position the RH camshaft timing pulley with the flange facing outward while you place the LH pulley inside with its flange on the inner side. Verify that all timing marks coincide when you position the No.1 cylinder at TDC/compression. Mount the belt to the engine when it is cool and with clean pulleys by following specific installation order. Set the timing belt tensioner by activating the push rod for pressing and securing it with a hexagon wrench. Afterward, install the timing belt tensioner and verify valve timing alignment by cranking the crankshaft and checking all timing marks. The necessary installation steps involve placing the RH engine mounting bracket and the No.2 timing belt cover, timing belt guide, No.1 timing belt cover, and crankshaft pulley with attention to using suitable gaskets that are both functional and correctly positioned. The final stage involves installing the No.2 generator bracket, No.2 RH engine mounting bracket, engine moving control rod followed by No.2 RH engine mounting stay (M/T) and RH engine mounting stay and reattaching the ground strap connectors and engine coolant reservoir hose and PS pump drive belt, generator drive belt, RH fender apron seal, and RH front wheel with the suspension upper brace finally installed before conducting a road test evaluation of abnormal noise, shock, slippage, correct shift points, and smooth operation.
    Posted by ToyotaPartsNow Specialist
    Q:
    What is the installation procedure for the oil pump pulley for the 2001 Toyota Camry? Posted by Customer
    A:
    Align the oil pump pulley with the shaft cutouts and use Special Service Tool: 09960-10010 to install the pulley nut with a torque of 24 Nm.
    Posted by ToyotaPartsNow Specialist
    See expert answers on similar Timing Belt
    Q:
    How should the idler pulleys be installed for the 2000 Toyota Camry? Posted by Customer
    A:
    Install the No.1 idler pulley with adhesive Part No. 08833-00080, using a 10 mm hexagon wrench, and ensure smooth movement, then install the No.2 idler pulley.
    Posted by ToyotaPartsNow Specialist
    See expert answers on similar Timing Belt
    If you have any questions about this product, please don't hesitate to ask us. We will be happy to help you!

OEM Toyota 13568-09041, Excellent Performance and Perfect Fitment

To ensure reliability, purchase Toyota part # 13568-09041 Timing Belt. It is sometimes referred to as Toyota Timing Belt. OEM parts are unrivaled in terms of quality. They go through extensive quality control inspections and are produced in accordance with Toyota's official factory specifications. All of these remove defects and imperfections. So you can relax knowing they promise exceptional lifespan and flawless fitment.

ToyotaPartsNow.com is a leading supplier of genuine Toyota parts such as Toyota 1356809041 Timing Belt. At ToyotaPartsNow.com, we have a wide variety of OEM Toyota parts available at competitive prices. Our comprehensive range of genuine Toyota parts come with a manufacturer's warranty for peace of mind. We also prioritize customer satisfaction, providing a hassle-free return policy and expedited delivery for all our parts. For detailed Toyota parts information, click here.
Choose ToyotaPartsNow for discounted prices, exceptional service and fast delivery