×
ToyotaParts- Hello
- Login or Register
- Quick Links
- Live Chat
- Track Order
- Parts Availability
- RMA
- Help Center
- Contact Us
- Shop for
- Toyota Parts
- Scion Parts
My Garage
My Account
Cart
OEM Toyota Tacoma Windshield
Glass Windshield- Select Vehicle by Model
- Select Vehicle by VIN
Select Vehicle by Model
orMake
Model
Year
Select Vehicle by VIN
For the most accurate results, select vehicle by your VIN (Vehicle Identification Number).
9 Windshields found

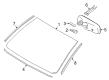
Toyota Tacoma Windshield, Front Part Number: 56101-04082
$390.43 MSRP: $572.18You Save: $181.75 (32%)
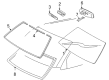
Toyota Tacoma Windshield, Front Part Number: 56101-04010
$434.58 MSRP: $636.88You Save: $202.30 (32%)Ships in 1-3 Business DaysToyota Tacoma Windshield, Front Part Number: 56101-04081
$388.84 MSRP: $569.85You Save: $181.01 (32%)Ships in 1-3 Business DaysToyota Tacoma Windshield, Front Part Number: 56101-04060
$400.53 MSRP: $586.98You Save: $186.45 (32%)Ships in 1-3 Business DaysToyota Tacoma Windshield, Blue, Front Part Number: 56101-04040
$410.18 MSRP: $601.12You Save: $190.94 (32%)Ships in 1-3 Business Days
Toyota Tacoma Glass, Windshield Part Number: 56101-AK010
$470.22 MSRP: $689.11You Save: $218.89 (32%)Toyota Tacoma Windshield, Front Part Number: 56101-04021
$549.90 MSRP: $805.88You Save: $255.98 (32%)Ships in 1-3 Business DaysToyota Tacoma Glass, Windshield Part Number: 56101-AK100
$653.64 MSRP: $957.91You Save: $304.27 (32%)
Toyota Tacoma Windshield, Front Part Number: 56111-04090
$388.84 MSRP: $569.85You Save: $181.01 (32%)
Toyota Tacoma Windshield
Choose genuine Windshield that pass strict quality control tests. You can trust the top quality and lasting durability. Shopping for OEM Windshield for your Toyota Tacoma? Our website is your one-stop destination. We stock an extensive selection of genuine Toyota Tacoma parts. The price is affordable so you can save more. It only takes minutes to browse and find the exact fit. Easily add to cart and check out fast. Our hassle-free return policy will keep you stress-free. We process orders quickly for swift delivery. Your parts will arrive faster, so you can get back on the road sooner.
Toyota Tacoma Windshield Parts and Q&A
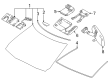
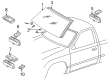
- Q: How to remove and install a windshield on Toyota Tacoma?A:The removal of a windshield begins with the detachment of components like inner rear view mirror, sun visors and holders, assist grips, quarter trim, front pillar garnishes, cowl louver, wiper arms and windshield outside upper moulding requires precise knife-based cutting around the body to prevent any damage. The installation proceeds when you insert piano wire through the body-glass gap from inside before tying it to wood then secure it with protective tape to stop scratching. Remove the glass panel using piano wire to keep maximum adhesive on the body structure. During installation the contact surface of the body needs cleaning followed by shaping the area at the site of contact before eliminating any damaged adhesive on the body while avoiding contact with cleaned glass. Place double-stick tape on the new dam and position the glass according to desired alignment points before cleaning the contact area of glass surface. First apply Primer M to the exposed body part which needs to dry for a minimum of 3 minutes followed by treating the glass perimeter with Primer G while removing the excess before drying. The height of adhesive application should measure 8.0 - 10 mm when using cartridge Part No. 08850-00801 before placing the glass properly against reference marks using a light touch. A spatula should be used to apply adhesive on the glass rim while using a scraper to remove excess before securing the glass with protective tape that will stay until the adhesive hardens. Perform a leak test after the hardening period and fill all leak points with sealant Part No. 08833-00030. Place adhesive on the moulding installation zone before you tap the new windshield outside upper moulding into position. After properly torquing the wiper arms to 20 N.m staff should reinstall the cowl louver and front pillar garnishes and assist grips before installing the sun visors and holders and inner rear view mirror.

Related Toyota Tacoma Parts
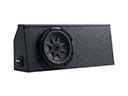 Toyota Tacoma Subwoofer
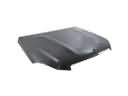 Toyota Tacoma Hood
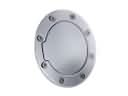 Toyota Tacoma Fuel Door
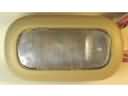 Toyota Tacoma Dome Light
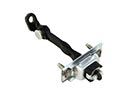 Toyota Tacoma Door Check
 Toyota Tacoma Windshield Washer Nozzle
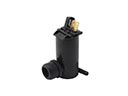 Toyota Tacoma Windshield Washer Pump
 Toyota Tacoma Wiper Linkage
 Toyota Tacoma Car Mirror
 Toyota Tacoma Sunroof Cable
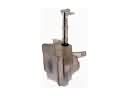 Toyota Tacoma Windshield Washer Fluid Reservoir
 Toyota Tacoma Wiper Motor