×
ToyotaParts- Hello
- Login or Register
- Quick Links
- Live Chat
- Track Order
- Parts Availability
- RMA
- Help Center
- Contact Us
- Shop for
- Toyota Parts
- Scion Parts
My Garage
My Account
Cart
OEM Toyota RAV4 Shift Cable
Transmission Shift Cable- Select Vehicle by Model
- Select Vehicle by VIN
Select Vehicle by Model
orMake
Model
Year
Select Vehicle by VIN
For the most accurate results, select vehicle by your VIN (Vehicle Identification Number).
9 Shift Cables found


Toyota RAV4 Shift Control Cable Part Number: 33820-0R020
$185.11 MSRP: $264.29You Save: $79.18 (30%)
Toyota RAV4 Shift Control Cable Part Number: 33820-0R010
$211.44 MSRP: $301.88You Save: $90.44 (30%)
Toyota RAV4 Shift Control Cable Part Number: 33820-42430
$227.40 MSRP: $324.67You Save: $97.27 (30%)Ships in 1-3 Business Days

Toyota RAV4 Control Cable Part Number: 33820-0R170
$240.79 MSRP: $343.80You Save: $103.01 (30%)Toyota RAV4 Control Cable Part Number: 33820-0R160
$241.61 MSRP: $344.96You Save: $103.35 (30%)Ships in 1-3 Business DaysToyota RAV4 Shift Control Cable Part Number: 33820-0R080
$169.54 MSRP: $240.01You Save: $70.47 (30%)Ships in 1-3 Business DaysToyota RAV4 Shift Control Cable Part Number: 33820-0R040
$206.78 MSRP: $295.23You Save: $88.45 (30%)Ships in 1-3 Business DaysToyota RAV4 Shift Control Cable Part Number: 33820-0R030
$237.18 MSRP: $338.64You Save: $101.46 (30%)Ships in 1-3 Business Days
Toyota RAV4 Cable Assembly, Transmission Control Part Number: 33820-42520
$252.91 MSRP: $361.10You Save: $108.19 (30%)Ships in 1-3 Business Days
Toyota RAV4 Shift Cable
Choose genuine Shift Cable that pass strict quality control tests. You can trust the top quality and lasting durability. Shopping for OEM Shift Cable for your Toyota RAV4? Our website is your one-stop destination. We stock an extensive selection of genuine Toyota RAV4 parts. The price is affordable so you can save more. It only takes minutes to browse and find the exact fit. Easily add to cart and check out fast. Our hassle-free return policy will keep you stress-free. We process orders quickly for swift delivery. Your parts will arrive faster, so you can get back on the road sooner.
Toyota RAV4 Shift Cable Parts and Q&A
- Q: How to replace the Shift Cable assembly on Toyota RAV4?A:Replacement of the transmission control cable assembly begins with removing the console box sub-assembly by removing its console box. Wait at least 90 seconds after disconnecting the negative battery terminal cable because this action prevents Air Bag and seat belt pretensioner operation. The first step requires untightening the nut to remove the bolt and battery clamp before extracting the battery and battery tray. After this, remove the 4 bolts and battery carrier and the 2 bolts and battery bracket reinforcement. Disassemble the air cleaner assembly by disconnecting the mass air flow meter connector followed by removing the engine wire clamps and the air cleaner case bolts and then extract the air cleaner case from its No. 1 air cleaner inlet. The installation process of the transaxle starts with a nut removal to disconnect the control cable from the control shaft lever followed by clip removal from the control cable bracket until you disconnect it from the control cable support then remove double-pins while disconnecting from the shift lever the nut unfastening from the shift lever retainer and completes with the removal of the control cable assembly. To install the new transaxle control cable assembly, secure it with the 2 bolts, torqued to 5.0 Nm (51 kgf-cm, 44 inch lbs.), turn the nut and push in the lock, install it onto the shift lever retainer with the protruding portion of the cable outer facing upward, ensuring the lock of the cable outer is protruding beyond portion A-A, connect it to the shift lever with the adjusting mechanism lock on the driver side, fix it onto the control cable bracket with the clip, connect it to the control shaft lever with the nut torqued to 12 Nm (122 kgf-cm, 9 ft. lbs.), connect the clamp with the bolt also torqued to 12 Nm (122 kgf-cm, 9 ft. lbs.), and finally connect it to the cable support. Reinsert the air cleaner assembly into position by attaching the air cleaner case through the No. 1 air cleaner inlet by using 4 bolts with proper torque set to 5.0 Nm (51 kgf-cm, 44 inch lbs.) and securing the engine wire clamps and reestablishing the mass air flow meter connector. Connect the battery with the battery clamp through the torqued bolt to 8.5 Nm (87 kgf-cm, 75 inch lbs.) and the torqued nut to 5.0 Nm (51 kgf-cm, 44 inch lbs.). After securing the battery tray first, install the battery carrier with 4 bolts torqued to 20 Nm (204 kgf-cm, 15 ft. lbs.). The final step is to bolt the battery bracket reinforcement to 20 Nm (204 kgf-cm, 15 ft. lbs.) using 2 bolts. Verify shift lever movement quality from P to R position when turning on the ignition and pressing the brake pedal down while inspecting the shift lever operation by attaching the negative battery cable. Also check that the vehicle advances from N to D and moves in reverse to R. The inspection should begin with the park/neutral position switch and continue with inspecting the shift lever installation condition. The last step includes necessary position adjustments to the shift lever before reinstallation of the rear console box sub-assembly.

Related Toyota RAV4 Parts
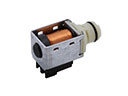 Toyota RAV4 Shift Solenoid
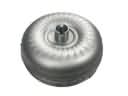 Toyota RAV4 Torque Converter
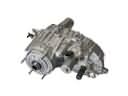 Toyota RAV4 Transfer Case
 Toyota RAV4 Automatic Transmission Filter
 Toyota RAV4 Automatic Transmission Shift Levers
 Toyota RAV4 Clutch Disc
 Toyota RAV4 Clutch Fork
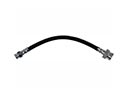 Toyota RAV4 Clutch Hose
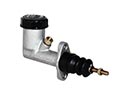 Toyota RAV4 Clutch Master Cylinder
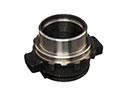 Toyota RAV4 Clutch Release Bearing
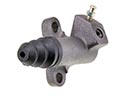 Toyota RAV4 Clutch Slave Cylinder
 Toyota RAV4 Valve Body