×
ToyotaParts- Hello
- Login or Register
- Quick Links
- Live Chat
- Track Order
- Parts Availability
- RMA
- Help Center
- Contact Us
- Shop for
- Toyota Parts
- Scion Parts
My Garage
My Account
Cart
OEM Toyota MR2 Spyder Starter
Starter Ignition- Select Vehicle by Model
- Select Vehicle by VIN
Select Vehicle by Model
orMake
Model
Year
Select Vehicle by VIN
For the most accurate results, select vehicle by your VIN (Vehicle Identification Number).
1 Starter found
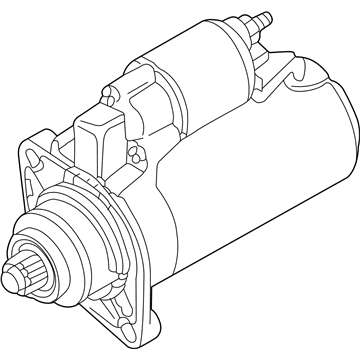
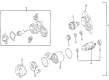
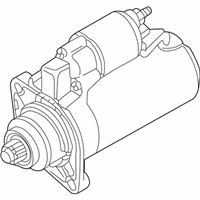
Toyota MR2 Spyder Starter Part Number: 28100-22060-84
Toyota MR2 Spyder Starter
Choose genuine Starter that pass strict quality control tests. You can trust the top quality and lasting durability. Shopping for OEM Starter for your Toyota MR2 Spyder? Our website is your one-stop destination. We stock an extensive selection of genuine Toyota MR2 Spyder parts. The price is affordable so you can save more. It only takes minutes to browse and find the exact fit. Easily add to cart and check out fast. Our hassle-free return policy will keep you stress-free. We process orders quickly for swift delivery. Your parts will arrive faster, so you can get back on the road sooner.
Toyota MR2 Spyder Starter transforms the battery electricity into a rotational force that cranks the engine and starts combustion. The Toyota MR2 Spyder Starter motor is attached to the flywheel and is powered by a solenoid connected to the battery by heavy-gauge wire. As the ignition switch is switched to START, the solenoid directs current to field coils or permanent magnets surrounding a rotating armature, generating electromagnetic movement. The armature rotates an MR2 Spyder Starter drive pinion that engages the flywheel ring gear, and an overrunning clutch releases the pinion when the engine is started. The front section of the armature has brushes and a commutator that ensure electrical contact in the Starter, with the rear providing the gear mechanism. The control circuit contains a Starter relay and a safety switch that do not allow the circuit to be engaged except when the transmission is in neutral or the clutch is depressed. This design provides reliable engine start of the Toyota MR2 Spyder, which functions within each model as a means of safeguarding gears and providing consistent cranking power as the vehicles outlined by Toyota.
Toyota MR2 Spyder Starter Parts and Q&A
- Q:How to service and repair the Starter on Toyota MR2 Spyder?A:Start the Starter repair process by completing component disassembly through the following steps: take out the nut and disconnect the lead wire from the magnetic switch terminal followed by removing all field frame through bolts to extract the field frame with its embedded armature from the magnetic switch assembly then remove the O-ring followed by the 2 screws and end cover from the field frame, and lastly remove the O-ring on the field frame. A screwdriver should be used to secure the spring tank while you disconnect the brush from the brush holder so you can remove the 4 brushes together with the brush holder. Begin by removing the 2 bolts to disconnect the starter housing and its included components of idler gear, bearing along with the clutch assembly and return spring. A magnetic finger will be used to extract the steel ball from the clutch shaft hole. After applying high-temperature grease on bearings and gears you should install the armature on the magnetic switch assembly while adding grease to the armature bearings. Place the steel ball into the clutch shaft hole after it receives grease before you mount the starter housing with its clutch assembly and gears while using grease for the return spring and placing it within the magnetic switch hole prior to securing the starter housing at a torque level of 5.9 N.m (60 kgf.cm, 52 in.lbf) to the magnetic switch with 2 bolts. You should install a new O-ring to the field frame groove where it will align with the magnetic switch before installing the O-ring. Place the brush holder onto the field frame before using a screwdriver to keep the brush spring back and connecting the brushes with proper orientation between positive (+) leads and ground. The process requires installation of a new O-ring inside the field frame groove followed by attachment of the end cover through two screws tightened to 1.5 N.m torque (15 kgf.cm, 13 in.lbf). The field frame and armature assembly requires two through bolts tightened to 5.9 N.m torque (60 kgf.cm, 52 in.lbf). Furthermore, lead wire connection to terminal C needs a nut tightened to 5.9 N.m torque (60 kgf.cm, 52 in.lbf). First remove the bearing through the use of Special Service Tool: 09286-46011 before pressing in new front and rear bearings using Special Service Tool: 09820-00030 with a press. The replacement process requires removing all 3 bolts, end cover, gasket, and plunger while measuring the contact plate wear to check if replacement is needed because the maximum allowable wear is 0.9 mm (0.035 in.). The technician utilizes Special Service Tool: 09810-38140 to untighten terminal nuts before replacing Terminal C and Terminal 30 terminal kit components by placing temporary new terminal parts while maintaining proper terminal insulator placement. Tighten terminal nuts by pressing a wooden block against the contact plate until it reaches 981 N (100 kgf, 221 lbf) force and applying 17 N.m (170 kgf.cm, 12 ft.lbf) torque with a goal of insulator preservation. The contact plate and plunger require cleaning of their contact surfaces and the magnetic switch end cover installation involves placement of the plunger and new gasket followed by securing the 3 bolts with a torque of 2.5 N.m (26 kgf.cm, 23 in.lbf).
Related Toyota MR2 Spyder Parts
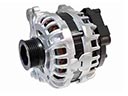 Toyota MR2 Spyder Alternator
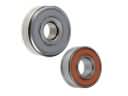 Toyota MR2 Spyder Alternator Bearing
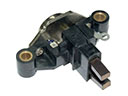 Toyota MR2 Spyder Alternator Brush
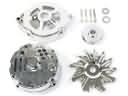 Toyota MR2 Spyder Alternator Case Kit
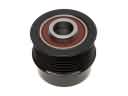 Toyota MR2 Spyder Alternator Pulley
 Toyota MR2 Spyder Armature
 Toyota MR2 Spyder Battery Terminal
 Toyota MR2 Spyder Battery Tray
 Toyota MR2 Spyder Starter Brush
 Toyota MR2 Spyder Starter Drive Gear
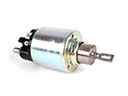 Toyota MR2 Spyder Starter Solenoid
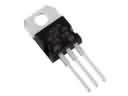 Toyota MR2 Spyder Voltage Regulator